Category: Windows

  • Delete mail queue in hmailserver

    Hmail store mails in folder

    C:\hMailServer\Data\
    

    Delete all .EML files from Data Directory. Do not delete folders inside Data, that is users data.

    Go to Data Directory (C:\hMailServer\Data\) in command prompt and run below command.

    cd "C:\hMailServer\Data\"
    del *.eml
    

    If you have lot of mails in queue, it may take some time to finish.

    See hmailserver

  • Sandboxie move sandbox from from drive c to d

    To move Sandbox folder from C drive to D drive.

    Start Sandboxie Control.

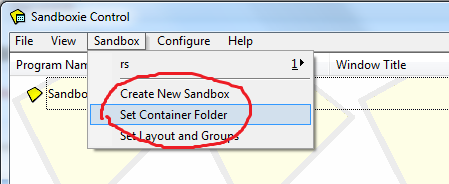
    Sandbox > Set Container Folder
    

    Sandboxie

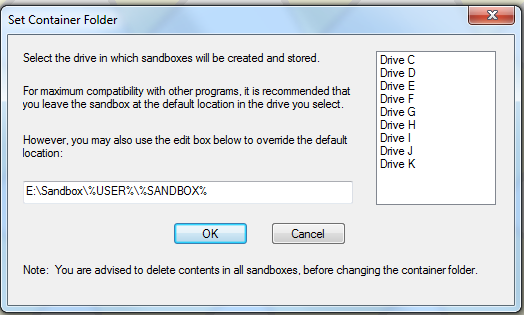
    On next screen, select the drive where you need sandbox folder stored.

  • Generate CSR on Microsoft Windows Server

    Generate CSR: IIS 6 Microsoft Windows Server 2003

    Open the Internet Information Services (IIS) Manager. From the Start button select Programs > Administrative Tools > Internet Information Services Manager.
    In IIS Manager, double-click the local computer, and then double-click the Web Sites folder.
    Right-click the Web site for which you want to request a certificate, and then click Properties. By default it will be Default Web Site, yours may be different.

    Select the Directory Security tab and click Server Certificate in the Secure communications section.

    Click Next in the Welcome to the Web Server Certificate Wizard window.

    Select Create a new certificate, Click Next.

    Select Prepare the request now, but send it later.

    At the Name and Security Settings screen, fill in the friendly name field for the new certificate

    Select bit length. We recommend using a 2048-bit length (2048 is required for EV SSL). Click Next.

    Leave the ‘Select cryptographic service provider (CSP) for this certificate’ unchecked. Click Next.

    You will be asked for several pieces of info which will be used by GeoTrust to create your new SSL certificate. These fields include the Common Name (aka domain, FQDN), organization, country, key bit length, etc. Use the CSR Legend in the right-hand column of this page to guide you when asked for this information. The following characters should not be used when typing in your CSR input: < > ~ ! @ # $ % ^ / \ ( ) ? , &

    Enter your Organization (e.g., Gotham Books Inc) and Organizational Unit (e.g., Internet Sales). Click Next.

    THIS IS THE MOST IMPORTANT STEP! Enter your site’s Common Name. The Common Name is the fully-qualified-domain name for your web site or mail server. What ever your end-user will see in their browser’s address bar is what you should put in here. Do not include http:// nor https://. Refer to the CSR legend in the right-hand column of this page for examples. If this is wrong, your certificate will not work properly. Click Next.

    Enter your Geographical Information for Country, State, and City. Do not abbreviate States and Cities. Click Next.

    In the Certificate Request File Name box enter the path and file name where you want to save your CSR. You can use the default of c:\certreq.txt. Remember where you save it, you’ll need to be able to find this CSR file later. Click Next.

    Review the data on the Request File Summary screen and click Next.

    Click Finish to complete the Wizard.

    Now, from a simple text editor such as Notepad (do not use Word), open the CSR file you just created at c:\certreq.txt (your path/filename may be different). You will need to copy-and-paste the contents of this file

    See SSL
  • Change Unidentified Network from public in windows 7

    After upgrading Main computer (one that connect to DSL modem) on LAN, other PC’s are able to get internet. But failed to ping on 192.168.0.1.

    Method 1

    Go to

    Start > Search > secpol.msc
    

    Navigate to

    Network List Manager Policies > Unidentified Networks
    

    Double Click and Change Location Type to

    Private
    

    Warning This means from now on all Unidentified Networks will be set as private!!

    Method 2

    NOTE: This is temporary solution, on rebooting, changes will be lost

    This is caused by Network card that connect to lan with IP 192.168.0.1 is assigned as a “Public Network”. Public Network have many features disabled for security.

    To fix this, run “ChangeCategory.psl” on Power Shell running as Administrator.

    Copy and paste following content to a text file, save it as ChangeCategory.psl

    $NLMType = [Type]::GetTypeFromCLSID('DCB00C01-570F-4A9B-8D69-199FDBA5723B')
    $INetworkListManager = [Activator]::CreateInstance($NLMType)
    
    $NLM_ENUM_NETWORK_CONNECTED  = 1
    $NLM_NETWORK_CATEGORY_PUBLIC = 0x00
    $NLM_NETWORK_CATEGORY_PRIVATE = 0x01
    $UNIDENTIFIED = "Unidentified network"
    
    $INetworks = $INetworkListManager.GetNetworks($NLM_ENUM_NETWORK_CONNECTED)
    
    foreach ($INetwork in $INetworks)
    {
        $Name = $INetwork.GetName()
        $Category = $INetwork.GetCategory()
    
        if ($INetwork.IsConnected -and ($Category -eq $NLM_NETWORK_CATEGORY_PUBLIC) -and ($Name -eq $UNIDENTIFIED))
        {
            $INetwork.SetCategory($NLM_NETWORK_CATEGORY_PRIVATE)
        }
    }
    

    Now run power shell as administrator.

    Type

    set-executionpolicy remotesigned
    ChangeCategory.ps1 
    

    This should be done in folder where ChangeCategory.ps1 is saved.

    PowerShell change network

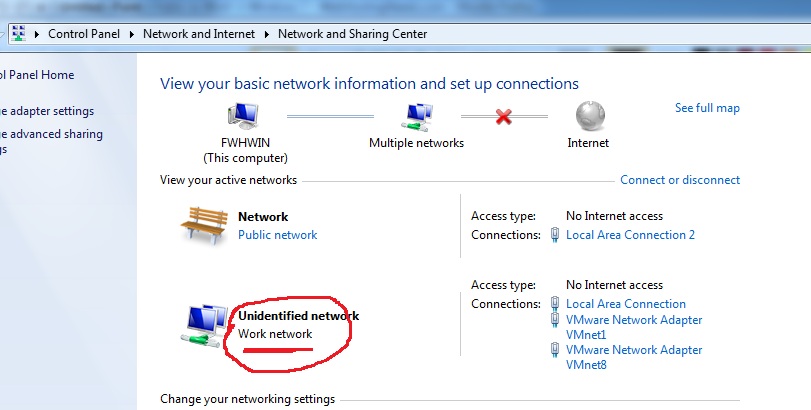
    After doing this, Network and Sharing Center will show

    Undefined Network

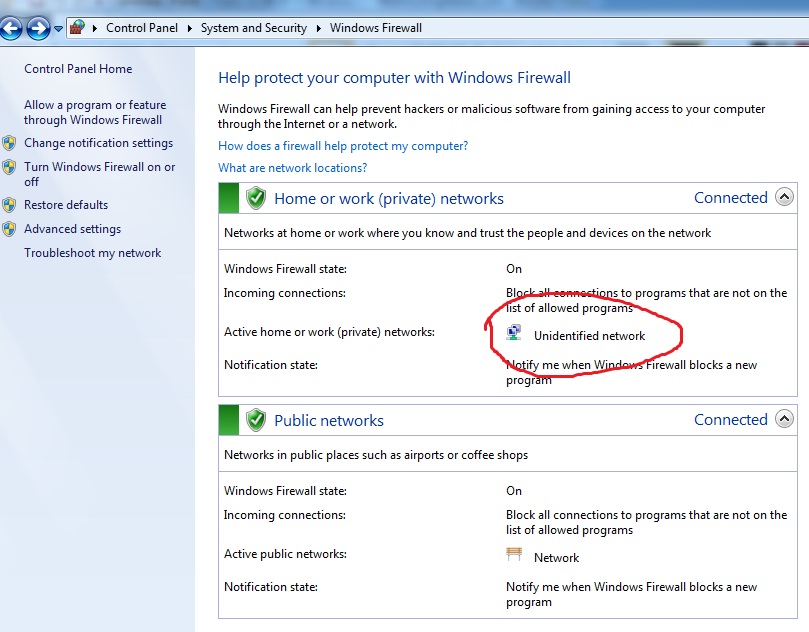
    Windows Firewall will show “undefined network” in “Home or work (private) networks”. Being in private network, you get privileges to share, ping etc…

    See Windows