Tag: lxd

  • Migrate physical server to LXD container

    Migrate physical server to LXD container

    lxd-p2c is developed by LXD team to migrate physical servers into LXD containers.

    https://github.com/lxc/lxd/tree/master/lxd-p2c

    Static binary files are available in Github. To Download, go to

    https://github.com/lxc/lxd/actions

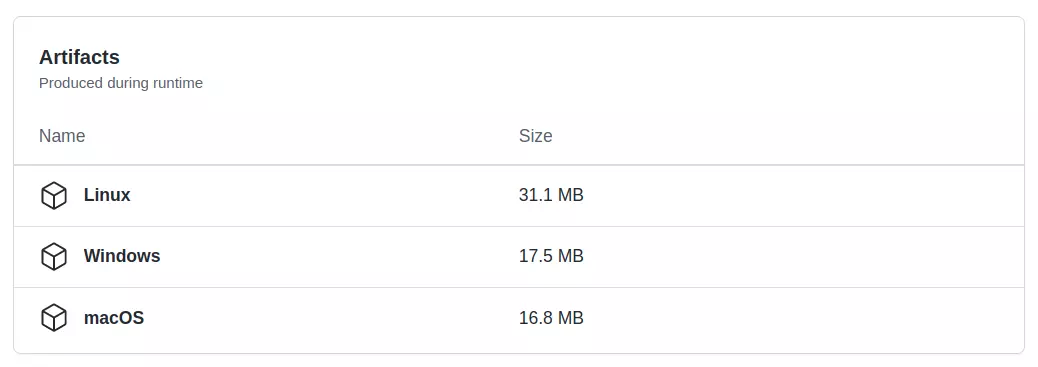
    Click on any of the actions with a green tick mark. Under Artifacts, you will see the download link for various operating systems.

    lxd-p2c download

    Download the Linux.zip file, extract, copy the “lxd-p2c” file to the physical server that you need to convert to LXD container.

    Before migrating

    You need to stop all services like web server, MySQL server, etc before you run lxd-p2c migration.

    Running lxd-p2c

    Before you can run the migration, you need to create an LXD container with the same OS as the physical server.

    Then run the following command on the physical server to migrate files to the LXD container you created.

    ./lxd-p2c https://lxdserver:8443 NEW_CONTAINTER_NAME /
    

    It is will ask for LXD password, if you don’t have it, use the following command to reset the password on the LXD server.

    lxc config set core.trust_password PASSOWORD_HERE
    
    
  • lxc storage list

    To list Storage in LXD, use the command

    lxc storage list

    Example

    root@b24:~# lxc storage list
    +---------+--------+--------------------------------------------+-------------+---------+
    |  NAME   | DRIVER |                   SOURCE                   | DESCRIPTION | USED BY |
    +---------+--------+--------------------------------------------+-------------+---------+
    | default | btrfs  | /var/snap/lxd/common/lxd/disks/default.img |             | 7       |
    +---------+--------+--------------------------------------------+-------------+---------+
    root@b24:~# 

    In this installation, we use btrfs file system for storing containers. The file location is /var/snap/lxd/common/lxd/disks/default.img. It is used by 7 containers.

    See LXD

  • How to connect to lxd container

    How to connect to lxd container

    lxd is an easy-to-use command-line interface for lxc (Linux container). In this blog post, I will show how to create an lxd container and connect to it.

    To create an lxd container, run

    lxc launch ubuntu:20.04 vm-1
    

    Here vm-1 is the name of the container. ubuntu:20.04 tells lxc to create a new container with Ubuntu version 20.04.

    To see the list of containers, you can use the command

    lxc ls
    

    list lxd containers

    This list IP address of the containers. If you have openssh-server installed and have a user name and password or SSH key set, you can login using the IP address.

    If you just created the container, you don’t have any login, then you can use the command

    lxc shell CONTAINER_NAME
    

    connect to lxd container with lxc shell command

    Another way is to use lxc exec

    lxc exec CONTAINER_NAME bash
    

    Example

    root@instance-20210627-0830:~# lxc exec vm-1 bash
    root@vm-1:~#
    

    If you have a login, then you can use the command

    lxc console CONTAINER_NAME
    

    This command will give you access to the console of the container.

    See lxd

  • Copy a file from host into LXD container

    To copy file from host machine to LXD container run

    lxc file push FILE_NAME CONTAINER_NAME/FOLDER/

    Example

    lxc file push ant-media-server-enterprise-2.2.1-20201029_2042.zip centos8/root/
    lxc file copy

    To copy a file from the host machine to an lxd container, run

    lxc file push FILE_NAME CONTAINER_NAME/path/to/folder/
    copy file to lxd container

    To copy a file from LXD container to the local machine, run

    lxc file pull first-vm/root/2.txt .

    If you need to copy a folder and files inside, you can use option –recursive

    See LXD

  • LXD container snapshot and restore

    lxc allow you to take snapshot, restore snapshot of a container.

    Here we create a snapshot, then delete the /etc folder from the container. Now the container is useless. Restore the container from snapshot to get it work again.

    root@UNUSED:~# lxc snapshot my-vm-2 my-vm-2-snap1
    root@UNUSED:~# lxc exec my-vm-2 -- rm -rf /etc
    root@UNUSED:~# lxc exec my-vm-2 -- bash
    I have no name!@my-vm-2:~# ls -l / | grep etc
    I have no name!@my-vm-2:~# exit
    root@UNUSED:~# lxc restore my-vm-2 my-vm-2-snap1
    root@UNUSED:~# lxc exec my-vm-2 -- bash
    root@my-vm-2:~# ls -l / | grep etc
    drwxr-xr-x  89 root   root    4096 Aug 27 07:06 etc
    root@my-vm-2:~# exit
    root@UNUSED:~#