Once you resize the disk in the Amazon AWS console, it gets auto resized on reboot. Sometimes this won’t happen, you have to manually resize the disk.
Resize EC2 file system with LVM
To resize the disk, do the following.
1) Take a snapshot of the disk
2) Create a new server in the same availability zone as the current server. Let’s call it tmpServer.
3) Shutdown tmpServer.
4) Shutdown the server that need disk resized. Lets call it mainServer. Make sure you have Elastic IP, if not shutting down changes IP of the server.
5) Detach the disk.
6) Attack the disk in tmpServer as /dev/xvdf
7) Start tmpServer.
Login to tempServer and do the following.
Resize Partition
Firt find the devices
parted -l
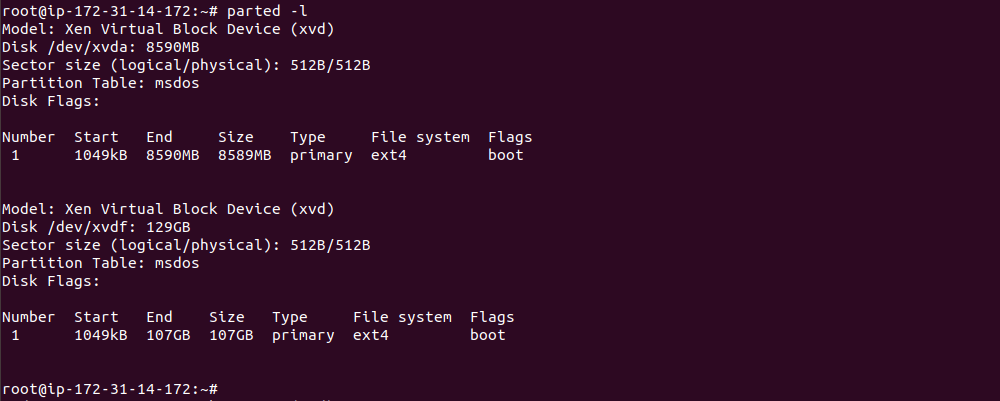
In this cause /dev/xvdf is the disk that need to be resized. Current Size is approx 107 GB.
To see free disk space on this disk, run
parted /dev/xvdf print free
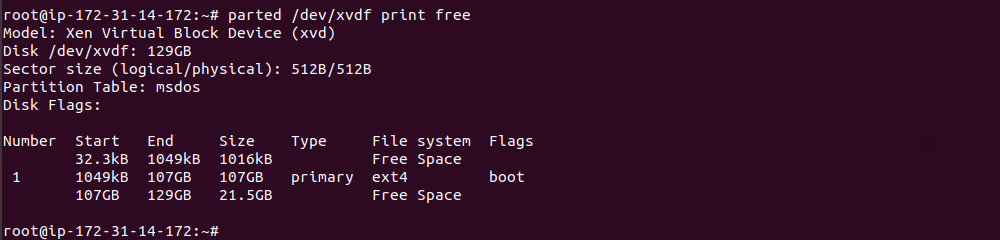
There is 21.5GB free space on the disk.
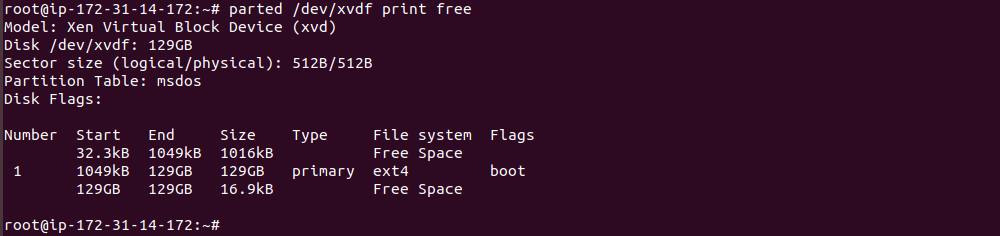
To grow partition 1 to use up remaining disk space, run command
growpart /dev/xvdf 1

Verify free disk space after. Now you see there is not much free disk space left after partition 1.
Resize FileSystem
Resize file system depends on the type of file system you are using. For ext4, do the folllowing.
Check disk using e2fsck
e2fsck -f /dev/xvdf1
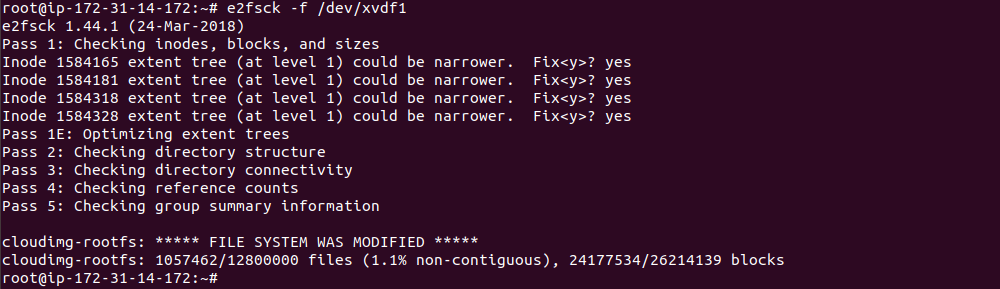
If any errors found, you will be asked to press “y” to fix the errors. After e2fsck run, you can reszie filesystem with command
resize2fs /dev/xvdf1

You have completed resizeing the disk. All you need to do now is
8) Shutdown tmpServer
9) Detact the disk from tmpServer (/dev/xvdf)
10) Attach the disk on original server mainServer as /dev/sda1.
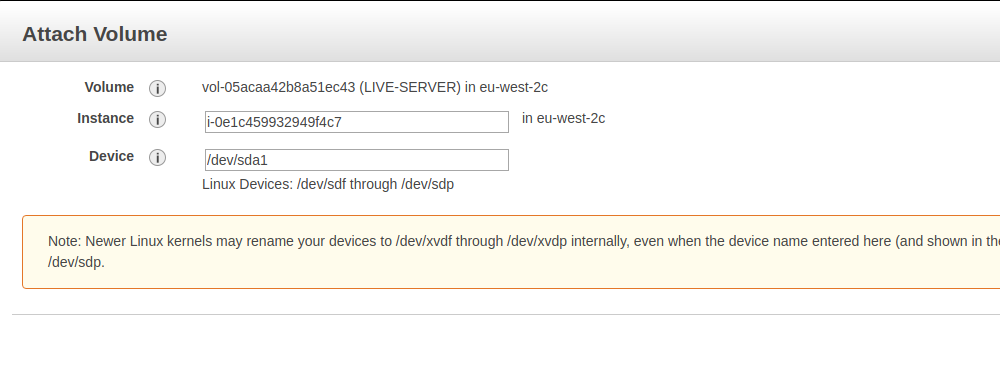
11) start the mainServer.
Leave a Reply