To install npm on Ubuntu, run
apt install npm
To install a node package, run
npm install mongodb@2.2 --save
To install npm on Ubuntu, run
apt install npm
To install a node package, run
npm install mongodb@2.2 --save
To find latest MongoDB version, see
https://docs.mongodb.com/manual/release-notes/
To install MongoDB 3.6 on CentOS 7, create file
vi /etc/yum.repos.d/mongodb-org-3.6.repo
Add
[mongodb-org-3.6] name=MongoDB Repository baseurl=https://repo.mongodb.org/yum/redhat/$releasever/mongodb-org/3.6/x86_64/ gpgcheck=1 enabled=1 gpgkey=https://www.mongodb.org/static/pgp/server-3.6.asc
Refer https://docs.mongodb.com/master/tutorial/install-mongodb-on-red-hat/
Now install MongoDB with
yum install mongodb-org
Enable MongoDB start on boot with
systemctl enable MongoDB
To start MongoDB, run
systemctl start mongod
You can check status of MongoDB with
systemctl status mongod
To restore backup, login to R1Soft Server Backup Manager. Go to Protected Machines. This page will list all available servers.
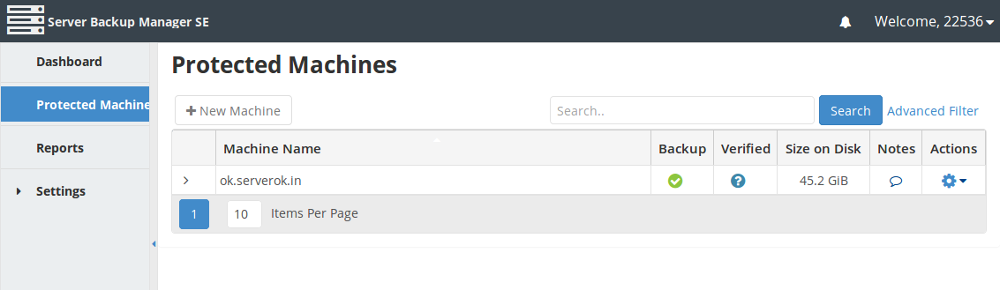
Click on wheel icon on right side.
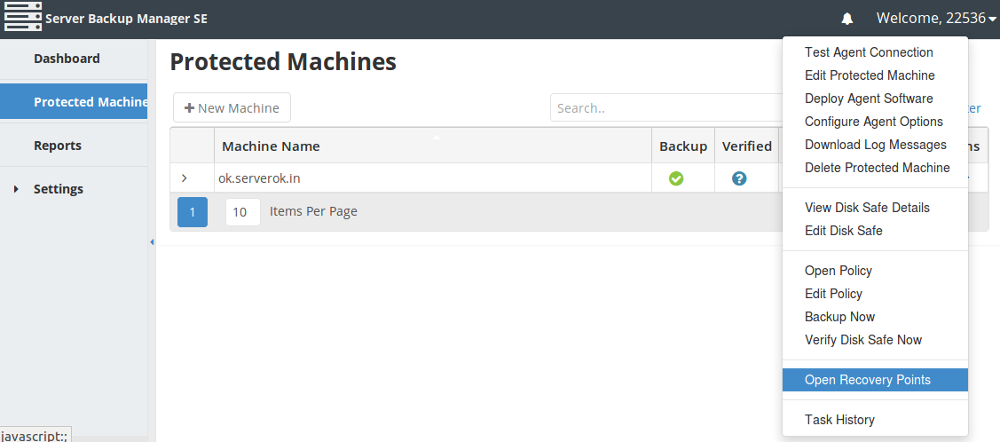
Click “Open Recovery Points” in the pop up menu. You get a new window with all available recovery points.
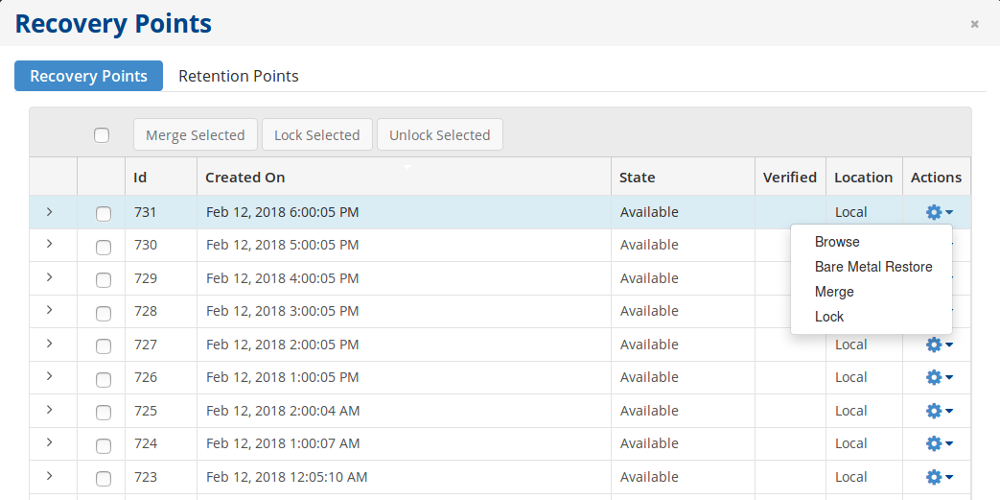
Click on the wheel icon.
In the popup menu, you will see “Browse” and “Bare Metal Restore”.
Bare Metal Restore
This is useful when you need to restore a server as is. Everything get restored exactly like in your old server. But only possible if you have physical access to server.
Download backup files
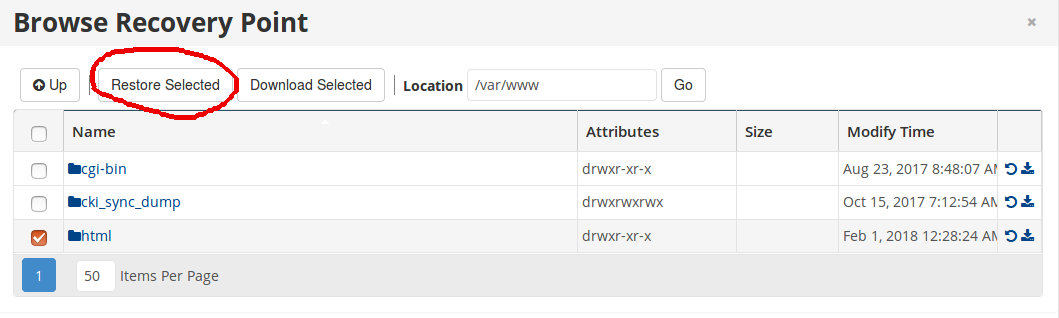
Browse option allow you to browse files and restore files and folders.
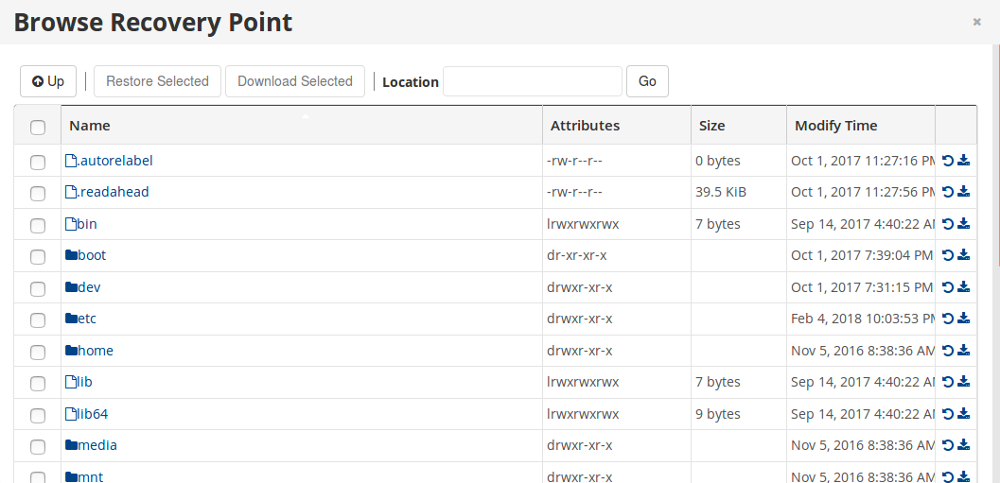
You can go inside a folder by double clicking the folder name. To download a folder or file as compressed file, click the download icon on right side.
Restore on same server
You can restore a file on same server. This will replace existing files on the server with files from backup. Always take a copy of the files before you do this.
To install GeoIP Apache module on CentOS 7, run
yum -y install GeoIP GeoIP-devel GeoIP-data yum -y install mod_geoip
Now you need to configure Apache VirtualHost.
To block traffic, add following to your VirtualHost entry
RewriteEngine On RewriteCond %{ENV:GEOIP_COUNTRY_CODE} ^(CN|RU|A1)$ RewriteRule ^(.*)$ https://serverok.in [L]
In this example, traffic from CN, RU and A1 (stands for proxy IP) get redirected to specified URL.
To get list of all available timezones, run
timedatectl list-timezones
Example
# timedatectl list-timezones | grep -i kolka
Asia/Kolkata
#
You can use the following command to set the timezone
timedatectl set-timezone EST
Example
timedatectl set-timezone EST
timedatectl set-timezone UTC
timedatectl set-timezone America/New_York
timedatectl set-timezone Asia/Kolkata
To set the timezone in Ubuntu, run
dpkg-reconfigure tzdata
/etc/localtime
For GMT
ln -sf /usr/share/zoneinfo/GMT /etc/localtime
For EST
ln -sf /usr/share/zoneinfo/EST /etc/localtime
Back to time
Sendy cronjob
*/5 * * * * /usr/bin/curl --silent https://URL/scheduled.php &> /var/log/sendy.log
Or
*/5 * * * * /usr/bin/php /var/www/html/scheduled.php > /dev/null 2>&1 */2 * * * * /usr/bin/php /var/www/html/import-csv.php > /dev/null 2>&1
if you are installing as user root, run cronjob as web server user.
On Ubuntu
crontab -e -u www-data
To install fail2ban on Deban/Ubuntu, run
apt install fail2ban -y
To enable fail2ban start on boot and start it
systemctl enable fail2ban --now
To view the status
fail2ban-client status
To resart fail2ban
systemctl restart fail2ban
To install fail2ban on CentOS, first, enable the epel repo by running
yum install epel-release -y
Now install fail2ban with
yum install fail2ban -y
Enable fail2ban with
systemctl enable fail2ban
Basck to fail2ban
PCI Compliance report from COMMODO complain about OpenSSH version available in Ubuntu 16.04.
SSH-2.0-OpenSSH_7.2p2 Ubuntu-4ubuntu2.4
This version have all security updates back ported. Installing OpenSSH from source is bad idea as you have to manually upgrade to latest version when new version is released.
Since PCI Compliance require new version of OpenSSH, i installed from source. It is better to LIMIT SSH access to your own IP using firewall or hosts.allow/deny rules.
Install requirements
apt update && apt install -y build-essential libssl-dev zlib1g-dev
Go to
https://www.openssh.com/portable.html
Download latest version of OpenSSH source code from one of the mirrors.
Download and install with
cd /usr/local/src wget https://cloudflare.cdn.openbsd.org/pub/OpenBSD/OpenSSH/portable/openssh-7.6p1.tar.gz tar -zxvf openssh-7.6p1.tar.gz cd /usr/local/src/openssh-7.6p1 make clean && make distclean ./configure --prefix=/usr make make install
Create a password file
htpasswd -c /path/to/passwd/file admin
To change the password for an existing user
htpasswd /path/to/passwd/file USER_HERE
You can use -b option to specify the password as a command line option, this is useful for adding or updating users non-interactively.
htpasswd -b -c /path/to/passwd/file USER_HERE PASSWORD_HERE
To limit access, add the following to the Apache virtual host entry.
<Directory "/var/www/html">
AuthType Basic
AuthName "Restricted Content"
AuthUserFile /path/to/passwd/file
Require valid-user
</Direcory>