AWS Elastic Beanstalk is a PaaS (Platform As Service) allow you to quickly deploy applications. To install AWS Elastic Beanstalk command line tool, run
sudo pip install awsebcli
Starting your first Project
Create a folder with a php file.
mkdir ~/www/eb-project-1
cd  ~/www/eb-project-1
echo "" > index.php
Add our project to git.
git init
git add .
git commit -a -m "initial commit"
Initialise Elastic Beanstalk project
run
eb init
It will ask you to select a region
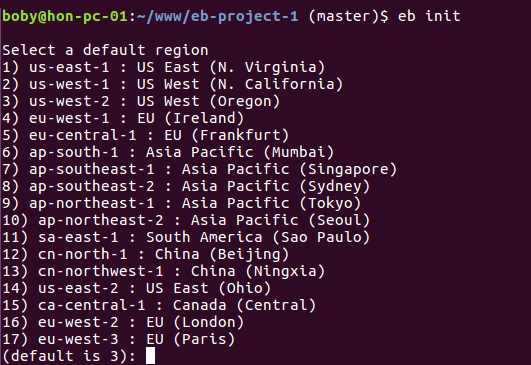
Select a region near to you. It will ask for Application name, you can use default name or enter your own. Since you have PHP file, it will auto detect you are using PHP and ask if you want to create PHP project.
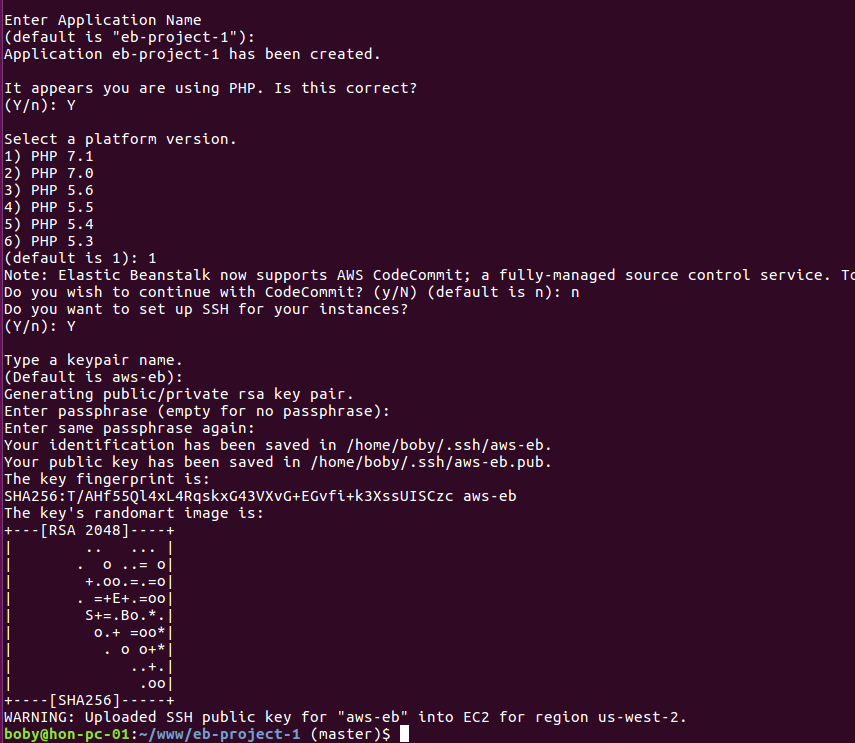
It ask for if you need SSH access, answer yes, it will create an SSH key.
Creating your Environment
Now your project is ready, lets make it live in Amazon Elastic Beanstalk.
eb create
This ask you few questions like environment name, DNS name (this need to be unique).
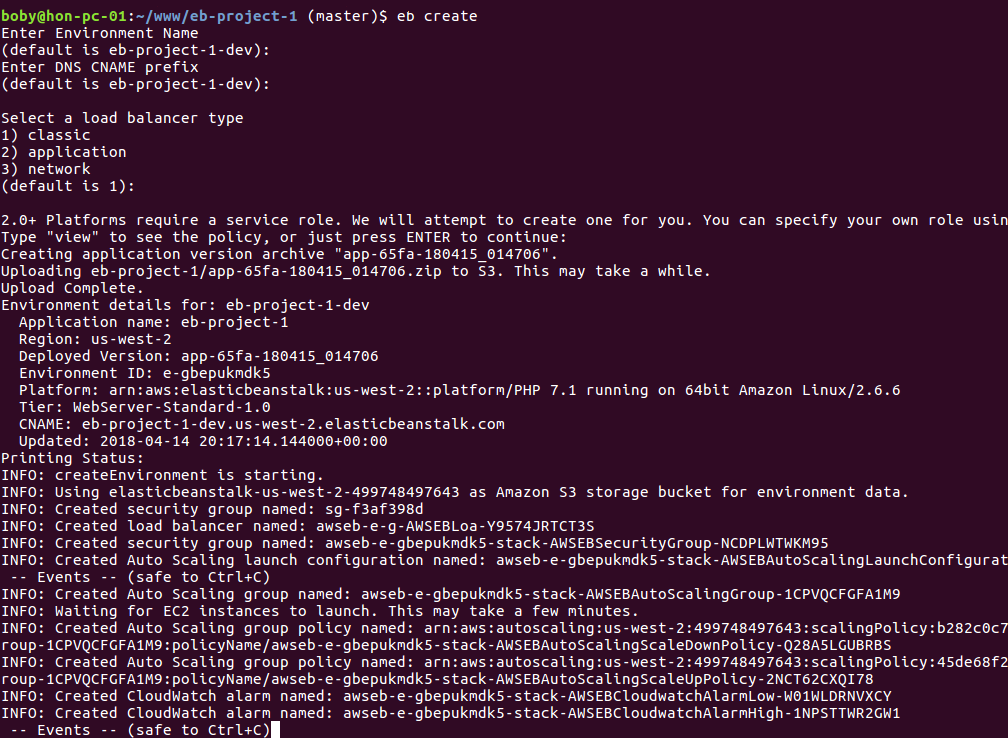
You will be able to see the link for the application in the terminal, in this case, the URL is http://eb-project-1-dev.us-west-2.elasticbeanstalk.com, you can open the URL in browser to see the application. You can also use
eb open
This will open the application in your default web browser.
Updating Your Application
Make some changes to index.php and commit the changes. To deploy new version of your application to Amazon Elastic Beanstalk, run
eb deploy
SSH Access
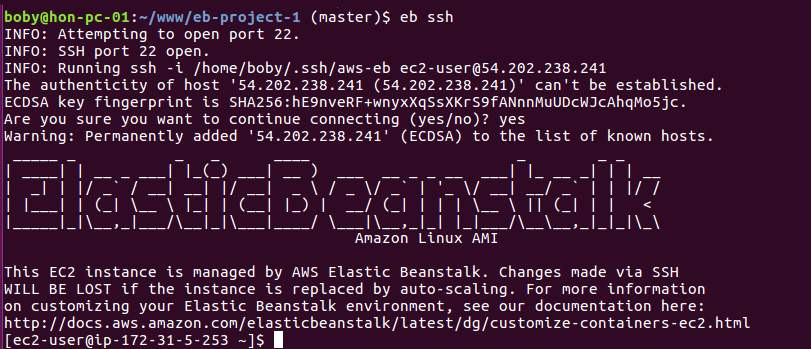
To get SSH access to EC2 instance running your application, run
eb ssh
Terminate your application
Once you are done with you application, you can terminate it with command
eb terminate
Leave a Reply