ShadowSocks client is part of shadowsocks package. This include both client and server. If you are looking to install server, see Install ShadowSocks server on Debian 10
To install ShadowSocks, run
apt install -y shadowsocks
ShadowSocks client is called sslocal, get installed in /usr/bin/sslocal.
On Ubuntu, no start up script provided with this package, so you need to create one or manually run sslocal when required.
Create a service file
vi /lib/systemd/system/shadowsocks-local@.service
Add following content
[Unit]
Description=Shadowsocks client mode service
Documentation=man:sslocal(1)
After=network-online.target

[Service]
Type=simple
User=nobody
Group=nogroup
ExecStart=/usr/bin/sslocal -q -c /etc/shadowsocks/%i.json
Restart=on-failure
RestartSec=30

[Install]
WantedBy=multi-user.target
Now we need to create a configuration file with your ShadowSocks server IP and password.
mkdir /etc/shadowsocks/
vi /etc/shadowsocks/local.json
Add following content
{
    "server":"YOUR_SERVER_IP",
    "server_port":8044,
    "local_address": "127.0.0.1",
    "local_port":8044,
    "password":"PASSWORD",
    "timeout":300,
    "method":"aes-256-cfb",
    "fast_open": false,
    "workers": 1,
    "prefer_ipv6": false
}
“server” = IP of the server where you installled ShadowSocks server.
“server_port” = Port used by ShadowSocks server
“password” = ShadowSocks server password.
local_port can be anything you like.
Enable shadowsocks service
systemctl enable shadowsocks-local@local
To start
systemctl start shadowsocks-local@local
To see status
systemctl status shadowsocks-local@local
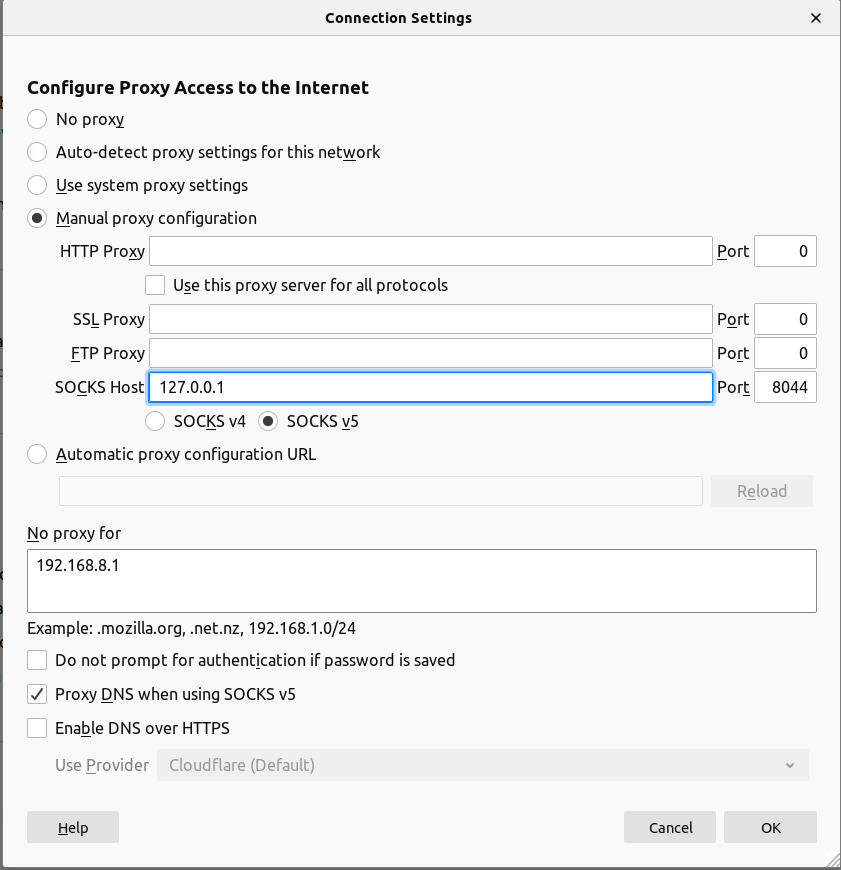
Now you can configure your browser or other sock proxy supported application using 127.0.0.1:8044. Here is how to configure firefox
Leave a Reply