Tag: ISPConfig

  • ISPConfig how to rename web directory

    ISPConfig how to rename web directory

    ISPConfig is a free hosting control panel. The DocumentRoot in ISPConfig is /var/www/clients/client0/web1/web. In the path client0 and web1 changes depending on number of customers and web site you have on the server. If you try to rename web foder, you get permission denied error, this is because ISPConfig set chattr +i (immune) to parent folder of document root so users can change it. This is to avoid a user delete DocumentRoot folder.

    root@server:/var/www/clients/client0/web1# mv web web-old
    mv: cannot move 'web' to 'web-old': Operation not permitted
    root@server:/var/www/clients/client0/web1# 
    

    If you need to rename or delete the folder, you can run

    chattr -i /var/www/clients/client0/web1
    

    To protect the folder again, run

    chattr +i /var/www/clients/client0/web1
    

    See ISPConfig

  • ISPConfig reset admin password

    ISPConfig reset admin password

    To reset password for ISPConfig, login to MySQL as root.

    mysql -u root -p
    

    if you don’t have MySQL root password, see ISPConfig Find MySQL root password.

    Switch to ISPConfig database

    use dbispconfig;
    

    To change password, run

    UPDATE sys_user SET passwort = md5('NEW_PASSWORD_HERE') WHERE username = 'admin';
    

    Replace NEW_PASSWORD_HERE with your new password.

  • ISPConfig Find MySQL root password

    To find MySQL root password on ISPConfig server, run

    /usr/local/ispconfig/server/lib/mysql_clientdb.conf
    
  • ISPConfig fail to create MySQL database

    ISPConfig fail to create MySQL database

    Whem creating MySQL database in ISPConfig, no database get created. To debug, i disabled the cronjob. Created a database in ISPConfig control panel, run cronjob manually, it shows following error

    [root@vs-sok ~]# /usr/local/ispconfig/server/server.sh
    PHP Warning:  mysqli::mysqli(): (28000/1045): Access denied for user 'root'@'localhost' (using password: YES) in /usr/local/ispconfig/server/plugins-available/mysql_clientdb_plugin.inc.php on line 528
    11.11.2019-13:45 - ERROR - Unable to connect to mysqlAccess denied for user 'root'@'localhost' (using password: YES)
    PHP Warning:  mysqli::mysqli(): (28000/1045): Access denied for user 'root'@'localhost' (using password: YES) in /usr/local/ispconfig/server/plugins-available/mysql_clientdb_plugin.inc.php on line 184
    11.11.2019-13:45 - ERROR - Unable to connect to mysqlAccess denied for user 'root'@'localhost' (using password: YES)
    finished.
    [root@vs-sok ~]# /usr/local/ispconfig/server/server.sh
    PHP Warning:  mysqli::mysqli(): (28000/1045): Access denied for user 'root'@'localhost' (using password: YES) in /usr/local/ispconfig/server/plugins-available/mysql_clientdb_plugin.inc.php on line 472
    11.11.2019-13:46 - ERROR - Unable to connect to mysql: Access denied for user 'root'@'localhost' (using password: YES)
    finished.
    [root@vs-sok ~]# 
    

    This is because ISPConfig can’t connect to MySQL server for creating new MySQL database. To fix, edit file /usr/local/ispconfig/server/lib/mysql_clientdb.conf

    vi /usr/local/ispconfig/server/lib/mysql_clientdb.conf
    

    Update MySQL password for user root on this file. The content of the file look like


    Related Posts

    ISPConfig

  • Install SSL for ISPConfig Control Panel

    Install SSL for ISPConfig Control Panel

    To add SSL for ISPConfig control panel, add the server hostname as a website in ISPConfig and enable the LetsEnrypt checkbox. You can find the server hostname with the command

    hostname -f
    

    That will get SSL installed for your hostname. You need to point the server hostname to the server’s IP address to get SSL certificate. Visit server hostname subdomain in a browser and verify SSL works.

    Once you have a valid LetsEncrypt SSL certificate installed on your site, create a file

    mkdir /usr/serverok/
    vi /usr/serverok/ssl-hostname-renew
    

    Add the following content to the file

    #!/bin/bash
    
    cat /etc/letsencrypt/live/$(hostname -f)/fullchain.pem > /usr/local/ispconfig/interface/ssl/ispserver.crt
    cat /etc/letsencrypt/live/$(hostname -f)/privkey.pem > /usr/local/ispconfig/interface/ssl/ispserver.key
    cat /usr/local/ispconfig/interface/ssl/ispserver.{key,crt} > /usr/local/ispconfig/interface/ssl/ispserver.pem
    chmod 600 /usr/local/ispconfig/interface/ssl/ispserver.pem
    systemctl restart apache2
    
    cat /usr/local/ispconfig/interface/ssl/ispserver.crt > /etc/postfix/smtpd.cert
    cat /usr/local/ispconfig/interface/ssl/ispserver.key > /etc/postfix/smtpd.key
    service postfix restart
    service dovecot restart
    
    cat /usr/local/ispconfig/interface/ssl/ispserver.pem > /etc/ssl/private/pure-ftpd.pem
    chmod 600 /etc/ssl/private/pure-ftpd.pem
    service pure-ftpd-mysql restart
    

    If you use nginx webserver, replace apache2 with nginx.

    Make the script executable

    chmod 755 /usr/serverok/ssl-hostname-renew
    

    Run the script to activate SSL for the ISPConfig control panel, FTP, and mail server.

    /usr/serverok/ssl-hostname-renew
    

    Now set a cronjob

    crontab -e
    

    Add

    @weekly /usr/serverok/ssl-hostname-renew > /dev/null
    

    Now you should be able to access ISPConfig with a valid SSL certificate on URL

    https://HOSTNAME:8080
    

    Back to ISPconfig

  • Disable Apache Error log in ISPConfig

    ISPConfig is a free hosting control panel. It come with Nginx and Apache web servrs. You can select one during installation.

    if you are using Apache web server with ISPConfig and want to disable Apache Error logs, then do the following

    cd /etc/apache2/sites-available
    sed -i 's/ErrorLog .*/ErrorLog \/dev\/null/g'  *
    

    Now restart Apache

    systemctl restart apache2
    

    This is not a permanant solution as ISPCOnfig will rewrite apache configuration when you make changes to web site. I had to do this for a server which have too many sites writing errors to error_log, causing high IO load. Proper solution is to fix errors, until errors can be fixed, this is a quick fix, that will reduce IO usage due to error_log.

    Make sure you make a copy of files before you run the sed command that modify all apache config, so in cuase anything happens, you can revert back.

  • ISPConfig 3 configuration files

    ISPConfig 3 configuration files are are located in folder

    /usr/local/ispconfig/interface/lib/config.inc.php
    /usr/local/ispconfig/server/lib/config.inc.php
    /usr/local/ispconfig/server/lib/mysql_clientdb.conf
    

    DocumentRoot

    /usr/local/ispconfig/interface/web/
    

    Config file for webmail/phpmyadmin

    /etc/nginx/sites-available/000-apps.vhost
    

    Config for ispconfig web interface

    /etc/nginx/sites-available/ispconfig.vhost
    
  • mod_fcgid: HTTP request exceeds MaxRequestLen

    On a ISPConfig server with PHP running in FCGI Mode, i get following error in error_log when upload images from WordPress admin area.

    [Tue Apr 03 13:45:11 2018] [warn] [client 112.133.237.47] mod_fcgid: HTTP request length 139264 (so far) exceeds MaxRequestLen (131072), referer: https://www.url.com/wp-admin/media-new.php

    ISPConfig store error log for site in “log” directory in parent folder of document root. In this case, it was

    /var/www/clients/client0/web1/log/error.log
    

    To fix the error add

    FcgidMaxRequestLen 1073741824
    

    to fcgi.conf

    On Ubuntu/Debian, you file location is

    vi /etc/apache2/mods-available/fcgid.conf
    

    On CentOS/RHEL

    vi /etc/httpd/conf.d/fcgid.conf
    
  • Install PHP 7.2 in CentOS ISPConfig Server

    First you need to install EPEL repo and REMI repo.

    To install EPEL, run

    yum install epel-release
    

    To Install REMI repo, download RPM file for your OS from https://rpms.remirepo.net

    For CentOS 6, run

    rpm -ivh https://rpms.remirepo.net/enterprise/remi-release-6.rpm
    

    For CentOS 7

    rpm -ivh https://rpms.remirepo.net/enterprise/remi-release-7.rpm
    

    Install PHP 7.2 with

    yum install php72-php-bcmath php72-php-cli php72-php-common php72-php-fpm php72-php-gd php72-php-intl php72-php-json php72-php-mbstring php72-php-mcrypt php72-php-mysqlnd php72-php-opcache php72-php-pdo php72-php-pear php72-php-pecl-uploadprogress php72-php-pecl-zip php72-php-soap php72-php-xml php72-php-xmlrpc
    

    Configure PHP-FPM

    vi /etc/opt/remi/php72/php-fpm.d/www.conf
    

    Find

    listen = 127.0.0.1:9000
    

    Replace 9000 with unused port, i used

    listen = 127.0.0.1:9072
    

    Restart/Enable PHP-FPM

    For CentOS 7

    systemctl start php72-php-fpm
    systemctl enable php72-php-fpm
    

    For CentOS 6

    service php72-php-fpm start
    chkconfig php72-php-fpm on
    

    Add PHP Version in ISPConfig

    Login to ISPConfig, go to

    System > Additional PHP Versions > Add new PHP version
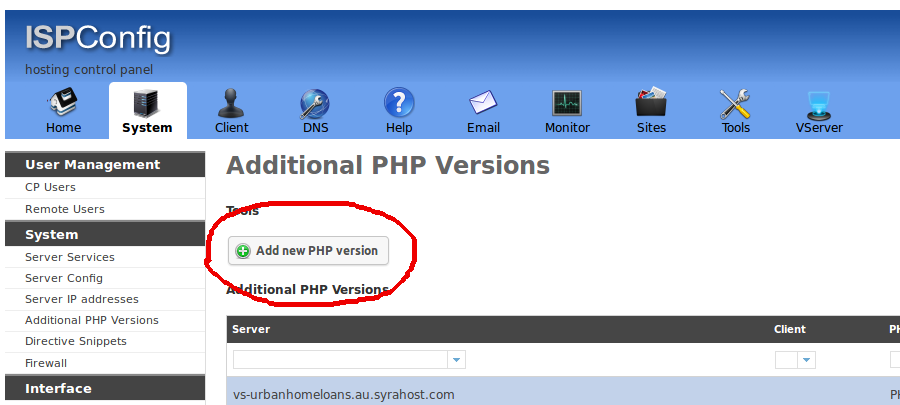
    ISPConfig Add New PHP Version

    On Next Page, enter name.

    Name: PHP7.2
    

    In “FastCGI Settings” tab, fill following details

    Path to the PHP FastCGI binary = /opt/remi/php72/root/usr/bin/php-cgi
    Path to the php.ini directory = /etc/opt/remi/php72
    

    In “PHP-FPM Settings” tab, add

    Path to the PHP-FPM init script =  /etc/init.d/php72-php-fpm
    Path to the php.ini directory = /etc/opt/remi/php72
    Path to the PHP-FPM pool directory = /etc/opt/remi/php72/php-fpm.d
    

    Changing a Sites PHP Version in ISPConfig

    Go to sites, click on site you need to change PHP version.
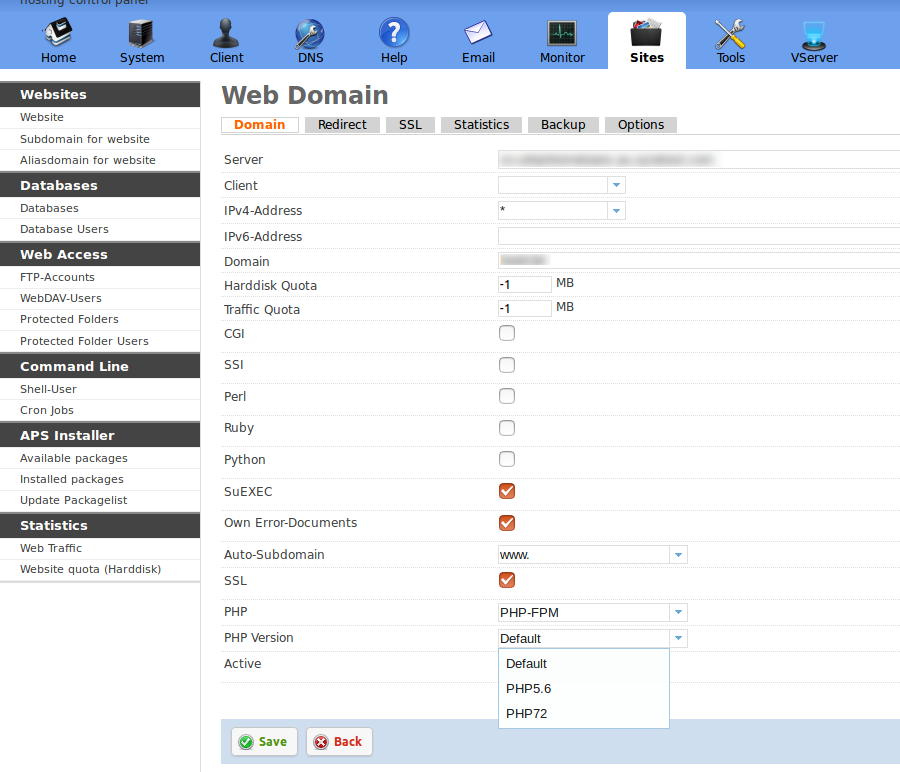
    On this page, you need to select value for “PHP” and “PHP Version”. Once changed, you need to wait a minute for the version change to happen. This is done by cronjob, that run every one minute.

    * * * * * /usr/local/ispconfig/server/server.sh &> /dev/null
    

    You can manually execute the script if you want.

    ispconfig

  • Enable LetsEncrypt SSL in ISPConfig

    Login to ISPConfig at

    https://your-server-ip:8080

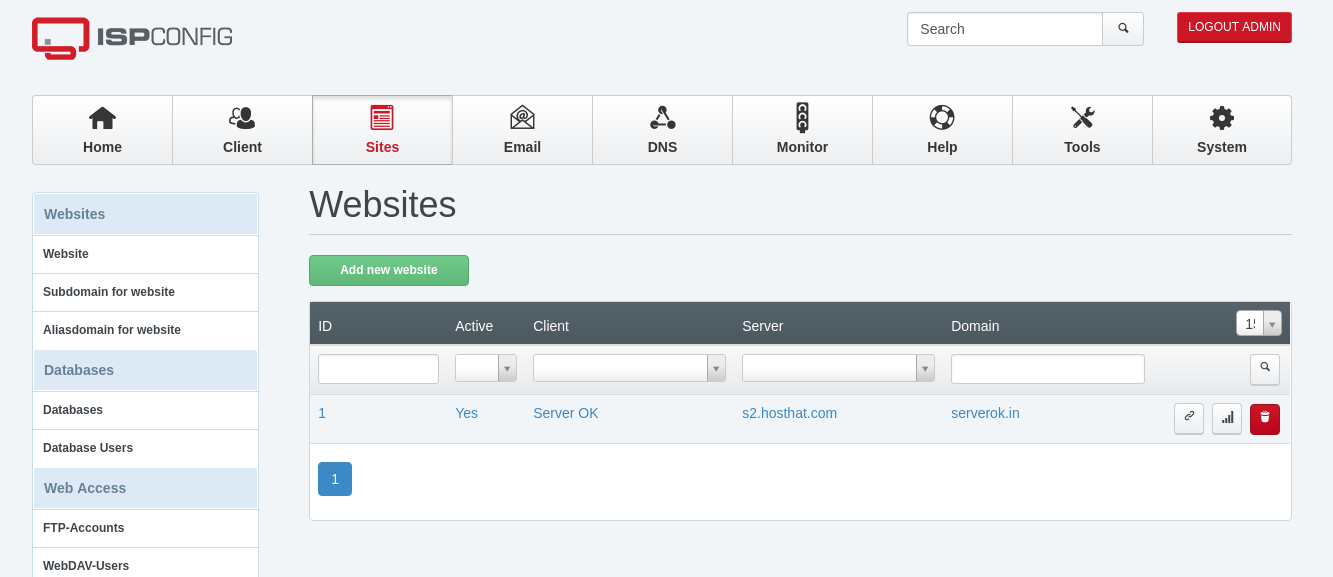
    On main menu, click on “Sites”. It will show all available web sites on your server.

    ISPConfig

    Click on the domain on which you need LetsEncrypt SSL installed.

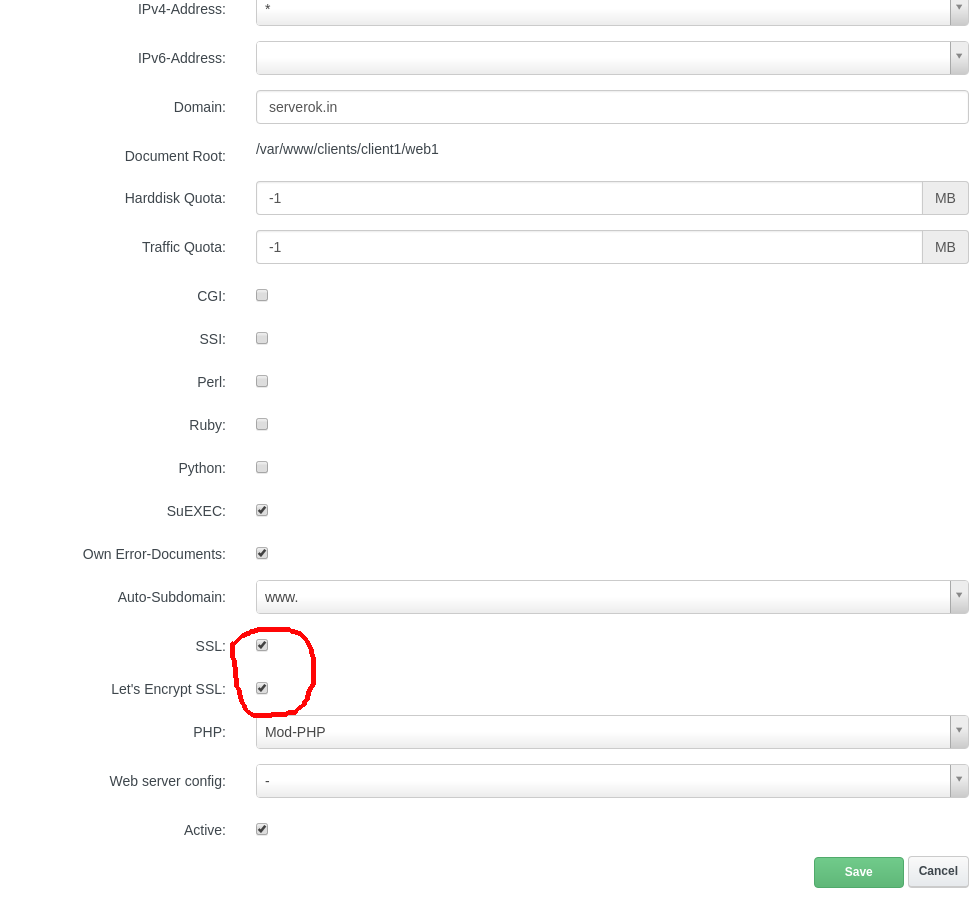
    On Next page, click the check boxes “SSL” and “LetsEncrypt”.

    ISPConfig LetsEncrypt Free SSL

    Click “Save” button. In few minutes you will get SSL installed on your web site.

    See LetsEncrypt