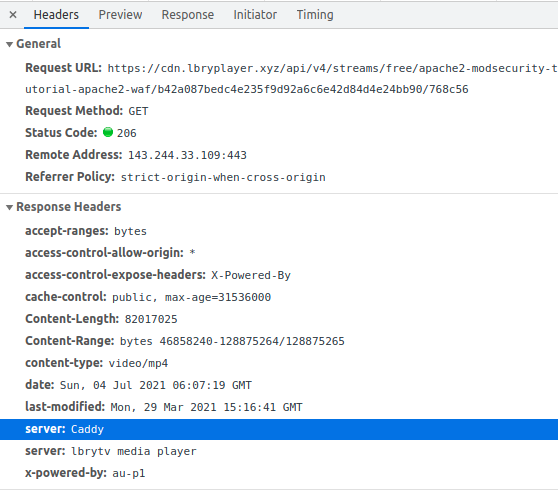
Caddy is used to serving videos on https://odysee.com, it is a block-chain based video service with no censoring.
Install Caddy Web Server
Install Caddy Webserver on CentOS 7
How to Use Caddy as a Reverse Proxy
Caddy is used to serving videos on https://odysee.com, it is a block-chain based video service with no censoring.
Install Caddy Web Server
Install Caddy Webserver on CentOS 7
How to Use Caddy as a Reverse Proxy
Caddy is a light weight web server written in golang. Caddy auto generate SSL for your web site using LetsEncrypt and support HTTP/2.
To instal Caddy, download latest Caddy release from github
https://github.com/caddyserver/caddy/releases/
At the time of this post, 1.3 is latest stable release, to install it, run
cd /usr/local/src wget https://github.com/caddyserver/caddy/releases/download/v2.4.6/caddy_2.4.6_linux_amd64.tar.gz tar xvf caddy_2.4.6_linux_amd64.tar.gz cp /usr/local/src/caddy /usr/local/bin chown root:root /usr/local/bin/caddy chmod 755 /usr/local/bin/caddy
Make caddy listen to privilage ports 80 and 443
setcap 'cap_net_bind_service=+ep' /usr/local/bin/caddy
If you don’t have a system user for caddy to run as, create one
groupadd -g 33 www-data useradd -g www-data --no-user-group --home-dir /var/www --no-create-home --shell /usr/sbin/nologin --system --uid 33 www-data
Create config folder for caddy
mkdir /etc/caddy chown -R root:root /etc/caddy mkdir /etc/ssl/caddy chown -R root:www-data /etc/ssl/caddy chmod 0770 /etc/ssl/caddy
Create Caddy config file
vi /etc/caddy/Caddyfile
Add
lab.serverok.in { root /var/www/html }
Replace lab.serverok.in with whatever domain you need to host.
Create service file for caddy
vi /etc/systemd/system/caddy.service
Add following
[Unit] Description=Caddy Documentation=https://caddyserver.com/docs/ After=network.target network-online.target Requires=network-online.target [Service] Type=notify User=caddy Group=caddy ExecStart=/usr/bin/caddy run --environ --config /etc/caddy/Caddyfile ExecReload=/usr/bin/caddy reload --config /etc/caddy/Caddyfile TimeoutStopSec=5s LimitNOFILE=1048576 LimitNPROC=512 PrivateTmp=true ProtectSystem=full AmbientCapabilities=CAP_NET_BIND_SERVICE [Install] WantedBy=multi-user.target
Set permission
chown root:root /etc/systemd/system/caddy.service chmod 644 /etc/systemd/system/caddy.service systemctl daemon-reload
Start caddy with
systemctl start caddy
Enable caddy start on boot
systemctl enable caddy
When using curl linux command line tool, to set user agent, run
curl --user-agent "USER_AGENT_HERE" URL_HERE
You can also use
curl -A "USER_AGENT_HERE" URL_HERE
By changing user agent, you can view a site as google bot, check Fetch as Google with curl
Back to curl
phpMyAdmin configuration file is config.inc.php located in phpMyAdmin install folder.
To enable connecting to arbitary Server, add
$cfg['AllowArbitraryServer'] = true;
This will allow you to enter server IP or hostname to connect to.
To add connecting to differnt predefined servers, you can add following to end of config.inc.php
$i++; $cfg['Servers'][$i]['host'] = 'database-1.abxfzy3gt.us-east-2.rds.amazonaws.com'; $cfg['Servers'][$i]['port'] = '3306'; $cfg['Servers'][$i]['user'] = 'root'; $cfg['Servers'][$i]['password'] = 'yoursecretpassword'; $cfg['Servers'][$i]['extension'] = 'mysqli'; $cfg['Servers'][$i]['auth_type'] = 'config';
Repeat this for any number of MySQL servers you need to connect.
Related Posts
iostat – Report Central Processing Unit (CPU) statistics and input/output statistics for devices and partitions.
The iostat command is used for monitoring system input/output device loading by observing the time the devices are active in relation to their average transfer rates. The iostat command generates reports that can be used to change system configuration to better balance the input/output load between physical disks.
The first report generated by the iostat command provides statistics concerning the time since the system was booted. Each subsequent report covers the time since the previous report. All statistics are reported each time the iostat command is run. The report consists of a CPU header row followed by a row of CPU statistics. On multiprocessor systems, CPU statistics are calculated system-wide as averages among all processors. A device header row is displayed followed by a line of statistics for each device that is configured.
The interval parameter specifies the amount of time in seconds between each report. The first report contains statistics for the time since system startup (boot). Each subsequent report contains statistics collected during the interval since the previous report. The count parameter can be specified in conjunction with the interval parameter. If the count parameter is specified, the value of count determines the number of reports generated at interval seconds apart. If the interval parameter is specified without the count parameter, the iostat command generates reports continuously.
iostat is part of sysstat package. To install on Debian/Ubuntu, run
apt install sysstat
To enable sysstat to collect data, edit file
vi /etc/default/sysstat
Find
ENABLED="false"
Replace with
ENABLED="true"
To see current IO Usage, run
iostat
To show information in one line, run
iostat -xkd 2 5
The number 2 is to print stats every 2 seconds. 5 is to print the stats 5 times.
Other iostat options
iostat -x iostat -x 2 5
Related Posts
To install PHP 7.4 on CentOS 7, first install remi repository.
yum install epel-release -y rpm -ivh https://rpms.remirepo.net/enterprise/remi-release-7.rpm
Set PHP 7.4 as default PHP
yum install yum-utils yum-config-manager --enable remi-php74
Install PHP with
yum install -y php php-bcmath php-cli php-common php-devel php-gd \ php-imap php-intl php-json php-ldap php-lz4 php-mbstring php-mysqlnd \ php-soap php-intl php-opcache php-xml php-pdo
After installing check PHP version with php -v, you will see
At the time of installation, it is PHP version 7.4.0RC3, it will change as new 7.4 release become available.
Related Posts
When you are using Reverse Proxy like Nginx, Haproxy or Amazon ELB in front of web server and web server use HTTP to serve all traffic, you can use normal redirect code based HTTPS variable to do the redirect to HTTPS. You need to use X-Forwarded-Proto to do the redirect.
For Apache, add following code to .htaccess to Apache Virtual Host entry.
RewriteEngine On RewriteCond %{HTTP:X-Forwarded-Proto} =http RewriteRule .* https://%{HTTP:Host}%{REQUEST_URI} [L,R=permanent]
For Nginx, add following to server entry for the domain name
if ($http_x_forwarded_proto = 'http'){ return 301 https://$host$request_uri; }
For IIS edit web.config, add following to
xampp server only allow access to phpMyAdmin from localhost. This is because root password is set to blank by default. If you need to access phpMyAdmin over internet, it will be good to add a password protection for phpmyadmin.
Create a password file
/opt/lampp/bin/htpasswd -c /opt/lampp/htpasswd-phpmyadmin admin
Here “admin” is the user. You will be asked to enter a new password.
vi /opt/lampp/etc/extra/httpd-xampp.conf
Find
# since XAMPP 1.4.3AllowOverride AuthConfig Limit Require local ErrorDocument 403 /error/XAMPP_FORBIDDEN.html.var
Replace with
AuthType Basic AuthName "Restricted Content" AuthUserFile /opt/lampp/htpasswd-phpmyadmin Require valid-user
Restart Apache
/opt/lampp/lampp reloadapache
Related Posts
CentOS 8 comes with PHP 7.2. To install PHP 7.3, you need to enable remi repo. You can download remi-release rpm file from
Download and install remi-release rpm
cd ; wget http://rpms.remirepo.net/enterprise/remi-release-8.rpm dnf install remi-release-8.rpm
if you have older php version and don’t want to keep it, uninstall it with
dnf remove php-gd php-xml php-mbstring php-common php php-odbc php-mysqlnd php-json php-process php-cli php-fpm php-intl php-bcmath php-soap php-pdo
Install PHP 7.3
dnf install php73
Set it as default PHP version
update-alternatives --install /usr/bin/php php /usr/bin/php73 1
Install PHP modules
dnf install -y php73-php php73-php-gd php73-php-fpm php73-php-pdo php73-php-xml php73-php-json php73-php-imap php73-php-intl php73-php-json php73-php-soap php73-php-bcmath php73-php-xmlrpc php73-php-mysqlnd php73-php-mbstring php73-php-zip
Install php-fpm package
dnf install php73-php-fpm
set php-fpm to start on boot
systemctl enable php73-php-fpm
Start php-fpm
systemctl start php73-php-fpm
Restart Apache
systemctl restart httpd
PHP 7.3 php.ini located at
/etc/opt/remi/php73/php.ini
Module directory for PHP 7.3 at
/opt/remi/php73/root/usr/lib64/php/modules/
Related Posts
Allow phpMyAdmin remote access on xampp
Restart Services in Xampp Linux
To auto start XAMPP on boot on Ubuntu, create file
vi /etc/systemd/system/xampp.service
Add following content
[Unit] Description=XAMPP auto start by ServerOk.in [Service] ExecStart=/opt/lampp/lampp start ExecStop=/opt/lampp/lampp stop Type=forking [Install] WantedBy=multi-user.target
Enable xampp with
systemctl enable xampp
start xampp
systemctl start xampp
First disable SELinux by editing file
vi /etc/selinux/config
Find
SELINUX=enforcing
Replace with
SELINUX=disabled
Now restart the server.
reboot
Verify SELinux is disabled by running “sestatus” command. It should show disabled.
Lets start by installing some basic tools like whois, curl, git etc..
dnf -y install wget curl telnet bind-utils net-tools git
On CentOS 8 by default only port 22 (SSH) is open to public. To run a web server, you need to open ports 80 and 443.
Run following command to open ports in firewall
firewall-cmd --zone=public --permanent --add-service=http firewall-cmd --zone=public --permanent --add-service=https firewall-cmd --zone=public --permanent --add-service=ssh firewall-cmd --zone=public --permanent --add-port=25/tcp firewall-cmd --reload
To install Apache, run
dnf -y install httpd
Enable Apache to start on boot by running
systemctl start httpd
Verify Apache is running with command
netstat -lntp | grep 80
If Apache is running, you will see something like
If all works good, you should be able to access your web server by opening your server IP in a web browser.
CentOS 8 comes with PHP 7.2
To install PHP, run
dnf -y install php php-cli php-xml php-json php-intl php-odbc php-pdo php-soap php-mysqlnd php-process php-bcmath php-gd php-mbstring
Install php-fpm
dnf -y install php-fpm
Enable php-fpm start on boot
systemctl enable php-fpm
Start php-fpm with
systemctl start php-fpm
php-fpm pool config files are located in folder /etc/php-fpm.d. php-fpm listens on socket at /run/php-fpm/www.sock
php-fpm package comes with Apache config file, it get placed on /etc/httpd/conf.d/php.conf. Restart apache to get php-fpm activated.
systemctl restart httpd
Now create a file
vi /var/www/html/1.php
with content
You should be able to access phpinfo page on URL
http://YOUR-SERVER-IP/1.phpphp.ini file located in /etc/php.ini, you need to restart php-fpm service if you edit this file.
Install MySQL
We will install MariaDB, it is an open source drop in replacement for MySQL, created by creator of MySQL. To install MariaDB, run
dnf install mariadb-serverEnable MariaDB to start on boot
systemctl enable mariadbStart MariaDB
systemctl start mariadbCentOS 8 come with MariaDB 10.3. By default there is no root PW set, So you can connect to MySQL with command "mysql".
To create a database, use
create database DB_NAME_HERE;To create a user, run
grant all on DB_NAME_HERE.* to 'USER_NAME'@'localhost' identified by 'PASSWORD_HERE';Now you have Apache, PHP, MySQL ready to use. Upload your web application to /var/www/html folder using SFTP.
See CentOS 8