To start Apache from command line with out using a systemd service file or init script, run
/usr/sbin/httpd -DFOREGROUND
To stop Apache, press CTRL+C.
You can keep it running by running it inside screen or tmux.
See Apache
ulimit command allow you to view or set user limits.
boby@sok-01:~$ ulimit -a
core file size          (blocks, -c) 0
data seg size           (kbytes, -d) unlimited
scheduling priority             (-e) 0
file size               (blocks, -f) unlimited
pending signals                 (-i) 31482
max locked memory       (kbytes, -l) 16384
max memory size         (kbytes, -m) unlimited
open files                      (-n) 1024
pipe size            (512 bytes, -p) 8
POSIX message queues     (bytes, -q) 819200
real-time priority              (-r) 0
stack size              (kbytes, -s) 8192
cpu time               (seconds, -t) unlimited
max user processes              (-u) 31482
virtual memory          (kbytes, -v) unlimited
file locks                      (-x) unlimited
boby@sok-01:~$
To increase limits for a user, edit file
vi /etc/security/limits.conf
Add
USER_NAME_HERE        hard nofile 20480
USER_NAME_HERE        soft nofile 10240
To install ImageMagick on CentOS, run
yum install ImageMagick
To install on Ubuntu/Debian, run
apt install -y imagemagick
On Ubuntu 18.04 server, first i get Ubuntu to use /etc/network/interface, by default Ubuntu 18.04 and newer use netplan.
First install ifdown
apt install ifupdown -y
Install bridge utils and resolvconf.
apt install bridge-utils resolvconf
Now you can configure your network interface by editing file
vi /etc/network/interface
Here is my network configuration on an OVH server.
root@ns3048991:~# cat /etc/network/interfaces
# interfaces(5) file used by ifup(8) and ifdown(8)
# Include files from /etc/network/interfaces.d:
source-directory /etc/network/interfaces.d

auto eno3
iface eno3 inet static
    address 149.202.199.137
    netmask 255.255.255.255
    broadcast 149.202.199.137
    gateway 149.202.199.254
    dns-nameservers 8.8.8.8 8.8.4.4
root@ns3048991:~#
To convert this interface to bridge network, do the following
1) Replace all occurance of “eno3” with “br0”
2) Add following lines
    bridge_ports eno3
    bridge_stp off
    bridge_maxwait 5
In above, replace “eno3” with name of your physical interface.
Here is my final network configuration.
root@ns3048991:~# cat /etc/network/interfaces
# interfaces(5) file used by ifup(8) and ifdown(8)
# Include files from /etc/network/interfaces.d:
source-directory /etc/network/interfaces.d

auto br0
iface br0 inet static
    address 149.202.199.137
    netmask 255.255.255.255
    broadcast 149.202.199.137
    gateway 149.202.199.254
    bridge_ports eno3
    bridge_stp off
    bridge_maxwait 5
    dns-nameservers 8.8.8.8 8.8.4.4
root@ns3048991:~#
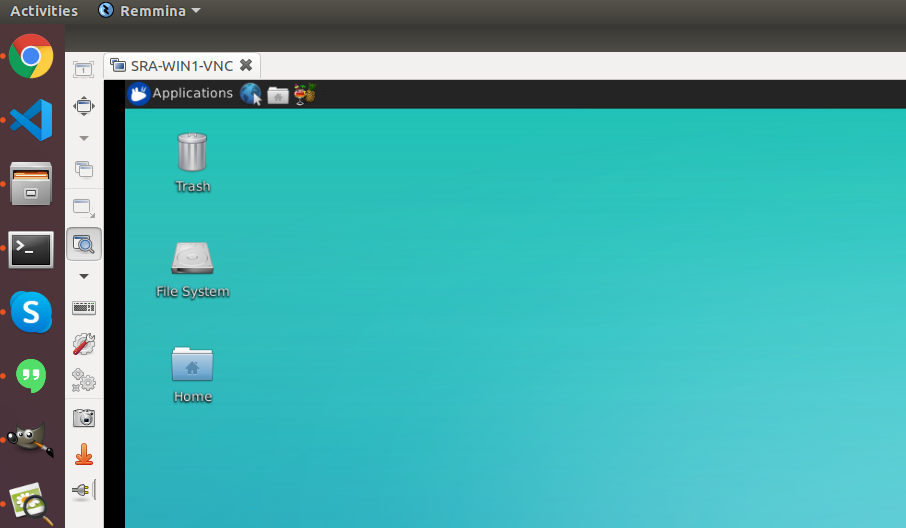
XFCE is a lightweight Desktop Environment for Linux. XFCE + vnc allows you to set up a remote desktop on a VPS or dedicated server located in a remote data center or cloud. You can connect to remote desktop using a VNC client and work like it is a local computer, similar to Windows Remote Desktop (RDP).
Note: This post shows how to install Ubuntu, XFCE, and TightVNC. TightVNC has not been updated recently. Here is an instruction to use TigerVNC, which is actively maintained.
Ubuntu Remote VNC Server Setup with XFCE and TigerVNC
To install XFCE run
apt update
apt install -y xfce4 xfce4-goodies dbus-x11
You will be asked to select Default Display Manager. You can select any of the options.
Next install vncserver
apt install tightvncserver autocutselIt is a bad idea to use root user for logging into the desktop. Create a normal user with sudo privileges to be used as desktop user.
useradd -m -s /bin/bash USERNAMEIt will be good to make this user an admin, so the user can install software or update the system.
usermod -aG sudo USERNAMESet a password for the user
passwd USERNAMENow login as the user
su - USERNAME_HERECreate a vnc password for this user.
vncpasswdCreate vnc startup file
vi ~/.vnc/xstartupAdd
#!/bin/bash

xrdb $HOME/.Xresources
autocutsel -fork
startxfce4 &
Make it executable
chmod 755 ~/.vnc/xstartupTo autostart vncserver on boot, you need to create a service file. You need to do the following as user root.
vi /etc/systemd/system/vncserver@.serviceAdd
[Unit]
Description=Start VNC server at startup
After=syslog.target network.target

[Service]
Type=forking
User=USERNAME
Group=USERNAME
WorkingDirectory=/home/USERNAME

PIDFile=/home/USERNAME/.vnc/%H:%i.pid
ExecStartPre=-/usr/bin/vncserver -kill :%i
ExecStart=/usr/bin/vncserver :%i -geometry 1920x1080 -depth 24
ExecStop=/usr/bin/vncserver -kill :%i

[Install]
WantedBy=multi-user.target
In the above, replace USERNAME with the actual user name you created above.
Enable the service with
systemctl enable vncserver@1Start the VNC server
systemctl start vncserver@1Now reboot the server. You should be able to connect to VNC server using SERVER_IP:1
When starting vncserver, i get error
xfce4-session-CRITICAL **: 20:18:42.985: dbus-launch not found, the desktop will not work properly!To fix it, install
apt install dbus-x11If you want to use RDP (Windows Remote Desktop) to connect instead of VNC, install xrdp
apt install -y xrdpEdit
vi /etc/xrdp/xrdp.iniSet value of new_cursors to false.
new_cursors=falseChange to desktop user
su - USERNAMECreate file
vi ~/.xsessionAdd following content
xfce4-session
export XDG_SESSION_DESKTOP=xubuntu
export XDG_DATA_DIRS=/usr/share/xfce4:/usr/local/share:/usr/share:/var/lib/snapd/USERNAME:/usr/share
export XDG_CONFIG_DIRS=/etc/xdg/xfce4:/etc/xdg:/etc/xdg
Enable and restart XRDP
systemctl enable xrdp
systemctl restart xrdp
See VNC Server
HandBreak is an OpenSource Video transcoder available from https://handbrake.fr. It can convert video to various format.
Latest version of Handbreak available in Ubuntu PPA. To install, enable Handbreak PPA
add-apt-repository ppa:stebbins/handbrake-releases
Install handbreak with
apt install handbrake-gtk handbrake-cli
Linux KVM is virtualisation software that allow you to create virtual machine under linux. To install on Ubuntu, run
apt install -y qemu-kvm qemu-utils
Install libvirtd, this allow you to easily create KVM virtual machines and allow remote connection from virt-manager GUI application.
For Ubuntu 20.04
apt install -y libvirt-daemon libvirt-daemon-system
For Ubuntu 18.04
apt install -y libvirt-bin
Enable and start libvirt
systemctl enable libvirtd
systemctl start libvirtd
systemctl is-active libvirtd
systemctl status libvirtd
At this stage, you should be able to connect to KVM server form your computer using virt-manager.
You need to create a bridge network interface (“br0”), for this, follow instructions at Linux KVM Bridge network on Ubuntu.
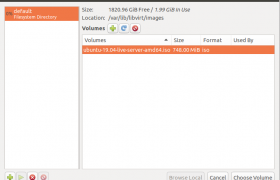
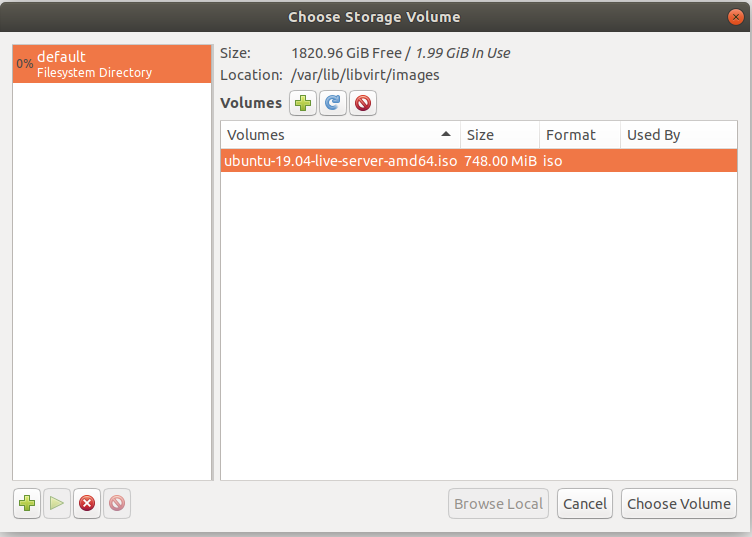
Before you can setup any VM, you need to download ISO image for the OS. Here i downloaded ISO image for Ubuntu 19.04
cd /var/lib/libvirt/images
wget http://mirrors.piconets.webwerks.in/ubuntu-mirror/ubuntu-releases/19.04/ubuntu-19.04-live-server-amd64.iso
Once downloaded, you should be able to select this ISO image in virt-manager when creating a VM.
See Linux KVM
To disable IP block alert in CSF firewall, run
sed -i "s/LF_PERMBLOCK_ALERT\s*=.*$/LF_PERMBLOCK_ALERT = \"0\"/g" /etc/csf/csf.conf
Restart lfd and csf
systemctl restart lfd
csf -r
See csf firewall
maldet is malware scanner for linux. On a shared hosting server, maldet detected one cusomer files as malware, on checking i found it is false positive. It is just a log file written by the application. To avoid getting further email from this application, i added this folder to maldet ignore_paths.
To add a folder to ignore list, edit file
vi /usr/local/maldetect/ignore_paths
Add the folder you need to ignore to end of this file as a new line.
Example
root@server74 [~]# cat /usr/local/maldetect/ignore_paths
/home/welgreenkerala/public_html/login/
/usr/local/maldetect
/usr/local/sbin/maldet
/home/shopatke/public_html/application/logs/
root@server74 [~]#
See maldet
To download RPM file from yum repo, you need to install yum-utils package.
yum install -y yum-utils
Now you can use command
yumdownloader --resolve --destdir=/path/ PACKAGE_NAME
Example
yumdownloader --resolve --destdir=/root/yum/ nginx
This will download and store all rpm files in /var/yum folder. –resolve will resolve dependency and download them. This will be helpful if you need to install a package on a system with no direct internet connection.
See yum
To enable Passive FTP in Debian/Ubuntu installation of ISPConfig, run
echo "40110 40210" > /etc/pure-ftpd/conf/PassivePortRange
Restart pure-ftpd
service pure-ftpd-mysql restart
Now open ports 40110-40210 in firewall.
On CSF Firewall, edit
vi /etc/csf/csf.conf
Add
40110:40210
At ened of TCP_IN line.
Example
TCP_IN = "20,21,22,25,53,80,110,143,443,465,587,993,995,3333,8080,8090,19999,40110:40210"
if you are using AWS, you need to run
echo "YOUR_EXTERNAL_IP_ADDR" > /etc/pure-ftpd/conf/ForcePassiveIP
service pure-ftpd-mysql restart
See ispconfig
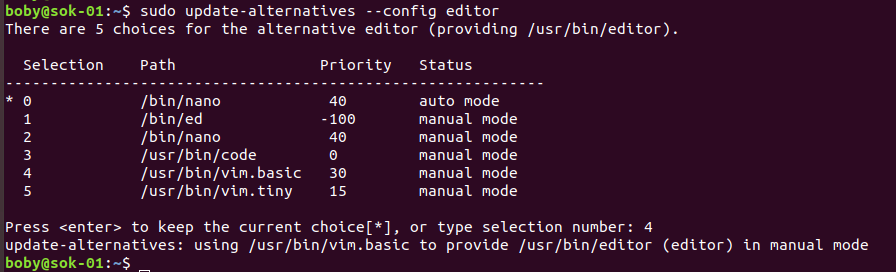
To set default editor in Ubuntu/Debian, run
update-alternatives --config editor