Category: Linux

  • CentovaCast Enable SSL on icecast

    Before you can get SSL work, you need to compile icecast with SSL. If icecast is not installed with SSL support, it will ignore settings and just serve the stream using non HTTPS.

    To install Icecast with SSL support, download Icecast from

    https://icecast.org/download/

    cd /usr/local/src
    wget http://downloads.xiph.org/releases/icecast/icecast-2.4.4.tar.gz
    tar xvf icecast-2.4.4.tar.gz
    cd icecast-2.4.4
    ./configure --prefix=/usr/serverok/icecast --with-curl --with-openssl
    

    You need to verify SSL supported enabled. If you don’t have SSL support, you will see following error.

    configure: SSL disabled!
    

    If SSL enabled, you can verify it with

    grep lssl config.status
    

    You will see something like

    [root@vmi173436 icecast-2.4.4]# grep lssl config.status
    S["XIPH_LIBS"]=" -lssl -lcrypto  -lcurl   -lspeex  -ltheora  -lvorbis -logg  -L/usr/lib64 -lxslt -lxml2 -lz -ldl -lm "
    [root@vmi173436 icecast-2.4.4]# 
    

    If you get SSL disabled message, you need to install openssl-dev package

    yum install -y openssl-devel
    

    If SSL enabled, install icecast with

    make
    make install
    

    Replace icecast provided with CentovaCast with

    mv /usr/local/icecast/bin/icecast /usr/local/icecast/bin/icecast-old
    ln -s /usr/serverok/icecast/bin/icecast /usr/local/icecast/bin/icecast
    

    Enable SSL for stream

    You need to edit icecast config for each user to do this. Config file stored at

    vi /usr/local/centovacast/var/vhosts/USERNAME_HERE/etc/server.conf
    

    Find

            8005
    

    Replace with

    	
    		8005


    		9005   
    		1


    Here port 8005 is whatever port used by the stram. 9005 can be any unused port. It is better just use a port same format, so you know what port SSL will be running on.

    Find

    var/run/server.pid
    

    Add Below

        /usr/local/centovacast/etc/ssl/icecast.pem
        ECDH+AESGCM:DH+AESGCM:ECDH+AES256:DH+AES256:ECDH+AES128:DH+AES:ECDH+3DES:DH+3DES:RSA+AESGCM:RSA+AES:RSA+3DES:!aNULL:!MD5:!DSS
    

    Now create a file

    vi /usr/local/centovacast/etc/ssl/icecast.pem
    

    Paste your SSL in following order

    1) Your private key
    2) Your SSL cert
    3) CA Bundle
    

    Change owner of the SSL cert file

    chown ccuser:ccuser /usr/local/centovacast/etc/ssl/icecast.pem
    

    Stop and start icecast in CentovaCast.

    Here is a server.conf file for a user with SSL enabled.

    https://gist.github.com/serverok/57ae398bb94aa61d9945f2405c73e221

    See Centova Cast

  • Install Paid SSL on Centova Cast

    To install SSL on Centova Cast, edit file

    vi /usr/local/centovacast/etc/ssl/certificate.pem
    

    Add your SSL cert and ca-bundle file content to this file.

    Edit

    vi /usr/local/centovacast/etc/ssl/private.key
    

    paste your private key.

    Creae dhparam.

    cd /usr/local/centovacast/etc/ssl/
    openssl dhparam -out dhparam.pem 4096
    

    Edi nginx config

    vi /usr/local/centovacast/etc/cc-panel.conf
    

    find

    listen 2199 default ssl;
    

    Add below

    listen 443 ssl;
    listen 80;
    

    Verify Nginx config is valid with

    /usr/local/centovacast/sbin/cc-web -t
    

    If all good, restart nginx with

    /usr/local/centovacast/sbin/cc-web -s reload
    

    Now Centova Cast can be accessed using HTTPS/SSL.

  • ASTPP install SSL

    To install SSL on ASTPP server, edit file

    vi /etc/nginx/ssl/nginx.crt;
    

    Add your SSL cert on this file. It is good idea to paste your ca-bundle file content after SSL cert, so you have full chain.

    vi /etc/nginx/ssl/nginx.key
    

    Add SSL private key.

    Now restart Nginx

    nginx -s reload
    

    By default if you use non HTTPS link, you get default nginx page. To avoid this, set a redirect by editing file

    vi /etc/nginx/sites-enabled/defaul
    

    Add inside default server entry

    return 301 https://YOUR_URL-HERE/;
    

    Now restart nginx.

    nginx -s reload
    

    See ASTPP

  • ASTPP change URL

    To change URL of ASTPP installation, edit file

    vi /var/lib/astpp/astpp-config.conf
    

    Find

    base_url=https://URL-HERE/
    

    You can update your new URL here.

    See ASTPP

  • Set server time PST/PDT

    To set server time to PST/PDT, run

    rm -f /etc/localtime
    ln -sf /usr/share/zoneinfo/America/Los_Angeles /etc/localtime
    

    or

    timedatectl set-timezone America/Los_Angeles
    
  • ERPnext Scheduler Inactive error

    ERPnext Scheduler Inactive error

    After installing ERPnext, when login for first time, i get error message

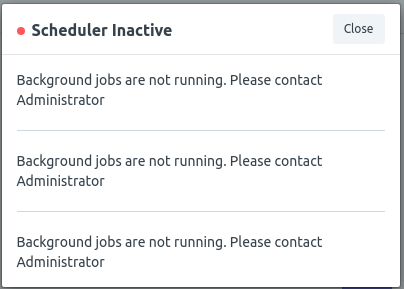
    Scheduler Inactive
    Background jobs are not running. Please contact Administrator.

    ERPnext

    To fix this, login to the user that is used to install erpnext, then change to the erpnext folder

    su - erpnext
    cd ~/erpnext
    

    Now run

    bench --site SITE_NAME_HERE enable-scheduler
    

    This will set following cronjobs

    erpnext@ip-172-31-38-185:~/erpnext$ crontab -l
    0 10 * * * cd /home/erpnext/erpnext &&  /home/erpnext/erpnext/env/bin/bench update --auto >> /home/erpnext/erpnext/logs/auto_update_log.log 2>&1
    0 */6 * * *  cd /home/erpnext/erpnext && /usr/local/bin/bench --site all backup >> /home/erpnext/erpnext/logs/backup.log 2>&1
    erpnext@ip-172-31-38-185:~/erpnext$ 
    

    Related Posts

    ERPnext
    Install LetsEncrypt SSL on ERPnext

  • Change Server Hostname in VestaCP

    To change server hostname in VestaCP control panel, login to SSH as user root, run

    /usr/local/vesta/bin/v-change-sys-hostname HOSTNAME_HERE
    

    Example

    /usr/local/vesta/bin/v-change-sys-hostname server1.serverok.in
    

    Related Posts

    vestacp

  • Install LetsEncrypt SSL on ERPnext

    To install LetsEncrypt free SSL on ERPnext site, run

    sudo -H bench setup lets-encrypt [site-name] --custom-domain [custom-domain]
    

    Example

    sudo -H bench setup lets-encrypt lab.serverok.in
    

    To renew SSL, you can run

    sudo bench renew-lets-encrypt
    

    This will ask for your confirmation to restart nginx. Running this on cronjob won’t work. But you can use “echo y” to get it work. But it is better just to certbot-auto to renew SSL.

    Auto Renew ERPnext SSL

    To auto renew create a cronjob

    crontab -e
    

    Add

    30 2 * * 1 /usr/serverok/ssl-renew >> /var/log/le-renew.log
    

    Create file

    mkdir /usr/serverok/
    vi /usr/serverok/ssl-renew
    

    Add

    #!/bin/bash
    
    systemctl stop nginx
    /opt/certbot-auto renew
    systemctl start nginx
    

    Make it executable

    chmod 755 /usr/serverok/ssl-renew
    
  • How to delete ErpNext site with bench

    To delete an ErpNext site with bench, run

    bench drop-site DOMAIN
    

    Example

    ErpNext drop site

  • Disable Apache Error log in ISPConfig

    ISPConfig is a free hosting control panel. It come with Nginx and Apache web servrs. You can select one during installation.

    if you are using Apache web server with ISPConfig and want to disable Apache Error logs, then do the following

    cd /etc/apache2/sites-available
    sed -i 's/ErrorLog .*/ErrorLog \/dev\/null/g'  *
    

    Now restart Apache

    systemctl restart apache2
    

    This is not a permanant solution as ISPCOnfig will rewrite apache configuration when you make changes to web site. I had to do this for a server which have too many sites writing errors to error_log, causing high IO load. Proper solution is to fix errors, until errors can be fixed, this is a quick fix, that will reduce IO usage due to error_log.

    Make sure you make a copy of files before you run the sed command that modify all apache config, so in cuase anything happens, you can revert back.

  • Port forward using iptables

    To forward all requests from port 80 to port 8080, run

    iptables -t nat -A PREROUTING -p tcp --dport 80 -j REDIRECT --to-port 8080

    Here is another command that specify network interface and forward traffic on port 80 to port 5000

    iptables -t nat -A PREROUTING -i eth0 -p tcp --dport 80 -j REDIRECT --to-port 5000

    Back to iptables

  • ASTPP

    ASTPP is a Open Source VoIP Billing Solution for Freeswitch. It supports prepaid and postpaid billing with call rating and credit control.

    https://www.astppbilling.org

    To install ASTPP on CentOS 7, run

    wget --no-check-certificate https://raw.githubusercontent.com/iNextrix/ASTPP/v4.0.1/install.sh -O install.sh
    chmod +x install.sh
    ./install.sh
    

    Related Posts

    ASTPP change URL
    ASTPP install SSL

    voip