Install zsh in Debian/Ubuntu
apt install zsh
Install OhMyZsh
sh -c "$(curl -fsSL https://raw.github.com/robbyrussell/oh-my-zsh/master/tools/install.sh)"
See shell
Free DNS Hosting
Paid DNS Hosting
Free Dynamic DNS
After adding Server to R1Soft Server Backup Manager, you need to configure it.
Verify backup manager can connect to protected machine. If you can’t connect, you need to open TCP port 1167 on firewall.
Click on Wheel icon > Test Agent Connection.

If backup manager cna connect to server, you will see

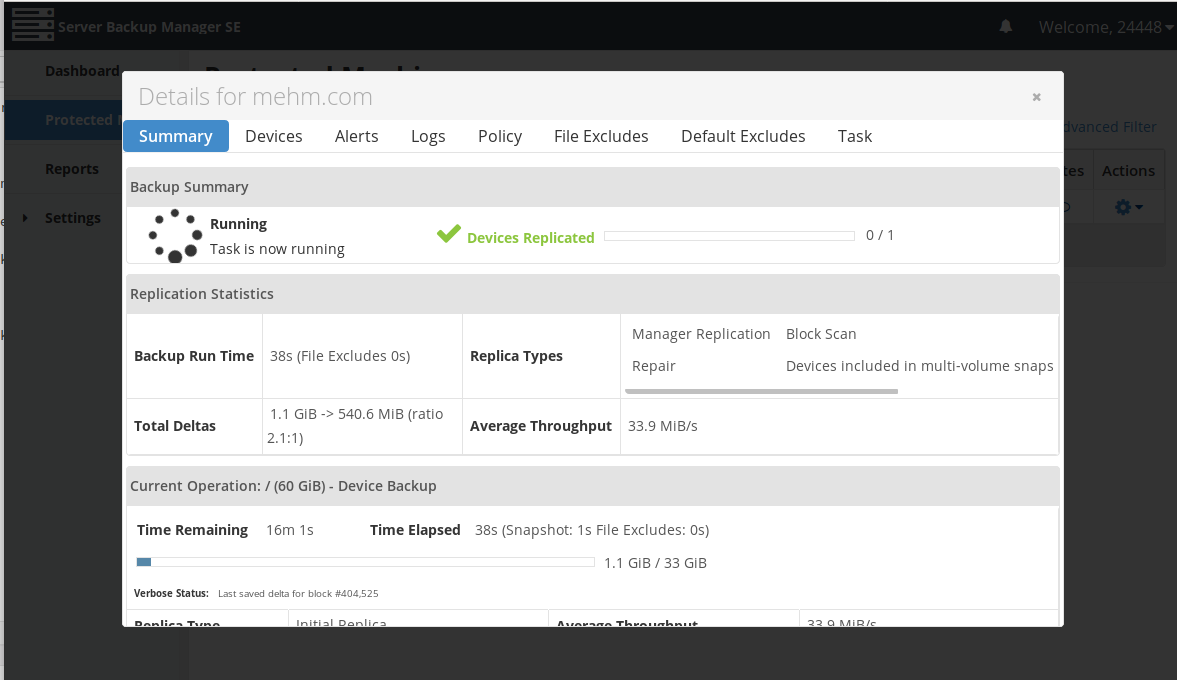
You can click
Wheel > Backup now
Go to
Protected Machines > Wheel icon > Edit Policy > MySQL > Add new MySQL instance
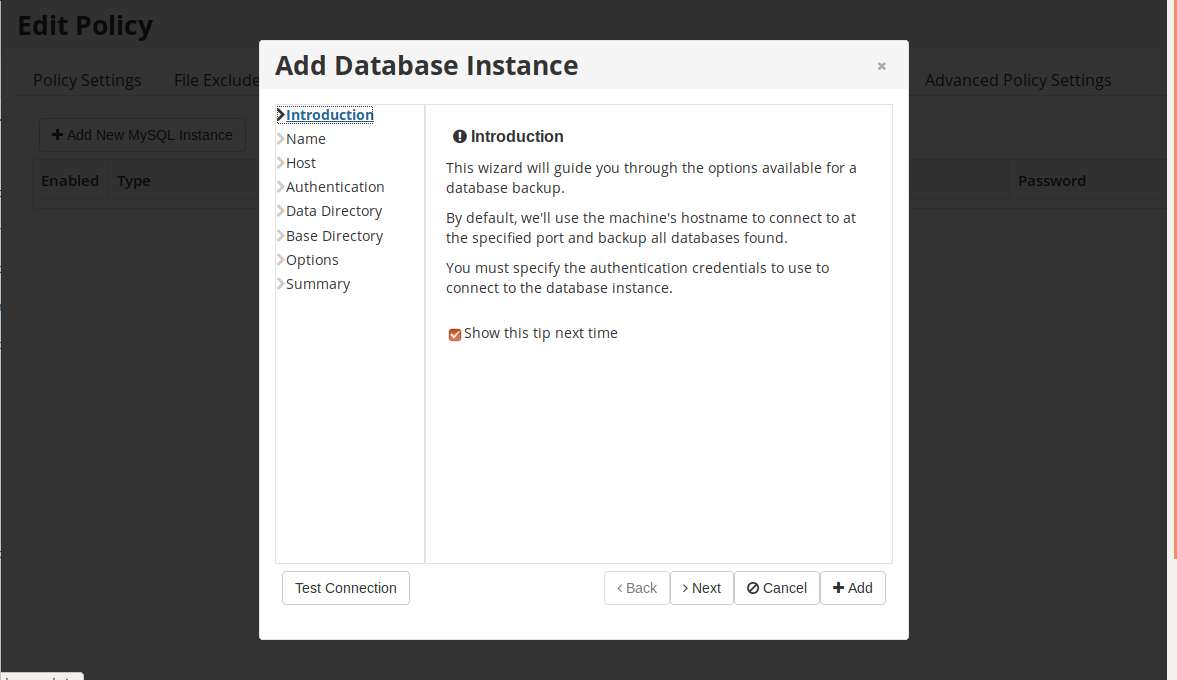
You will be asked to enter MySQL server login details. I created a user with remote access permission with following command.
GRANT ALL PRIVILEGES ON *.* TO 'r1soft'@'%' IDENTIFIED BY 'YOUR_PASSWORD_HERE' WITH GRANT OPTION;
GRANT PROXY ON ''@'' TO 'r1soft'@'%' WITH GRANT OPTION;
You may need to edit MySQL configuration and make it listen to public IP to allow R1Soft backup manager can connect to your MySQL server.
Back to r1soft
To install r1soft server backup agent on Ubuntu/Debian, add repository
echo deb http://repo.r1soft.com/apt stable main >> /etc/apt/sources.list
wget http://repo.r1soft.com/r1soft.asc
apt-key add r1soft.asc
Install agent
apt update
apt -y install serverbackup-enterprise-agent
Install kernal headers
apt install linux-headers-`uname -r`Install kernal modules
serverbackup-setup --get-moduleVerify backup agent works with
serverbackup-setup --test-connection
Start backup agent
/etc/init.d/cdp-agent restartNow you can add the server to R1Soft Backup Manager.
To select default PHP version in Ubuntu, run
update-alternatives --config php
This will show a menu, you can select the default php version
root@server:/usr/bin# update-alternatives --config php There are 2 choices for the alternative php (providing /usr/bin/php). Selection Path Priority Status ------------------------------------------------------------ * 0 /usr/bin/php7.0 70 auto mode 1 /usr/bin/php5.6 56 manual mode 2 /usr/bin/php7.0 70 manual mode Pressto keep the current choice[*], or type selection number: 1 update-alternatives: using /usr/bin/php5.6 to provide /usr/bin/php (php) in manual mode root@server:/usr/bin#
After setting PHP 5.6 as default PHP version, you will see
root@server:~# php -v
PHP 5.6.40-8+0~20190531120521.15+stretch~1.gbpa77d1d (cli)
Copyright (c) 1997-2016 The PHP Group
Zend Engine v2.6.0, Copyright (c) 1998-2016 Zend Technologies
    with Zend OPcache v7.0.6-dev, Copyright (c) 1999-2016, by Zend Technologies
root@server:~#
To install transmission torrent client on Ubuntu, run
apt install transmission-cli transmission-common transmission-daemon
Before you can configure transmission-deamon, you need to stop it.
service transmission-daemon stop
Edit configuration file
vi /var/lib/transmission-daemon/info/settings.json
Once edited, start transmission-deamon with
service transmission-daemon start
Default user and password is “transmission”.
You can modify it by editing config file
"rpc-password": "{62b16db87b89a91dd49a5110a7cafc06d20eb4f2wtK6kqPj",
"rpc-username": "transmission",
Password you can use plain text. Transmission will convert it to SHA1 encrypted format on startup,
You need to put your IP
"rpc-whitelist": "127.0.0.1,192.168.*.*",
Only white listed IP can access the web interface.
By default download will be stored in folder
"download-dir": "/var/lib/transmission-daemon/downloads",
You can modify this folder as required.
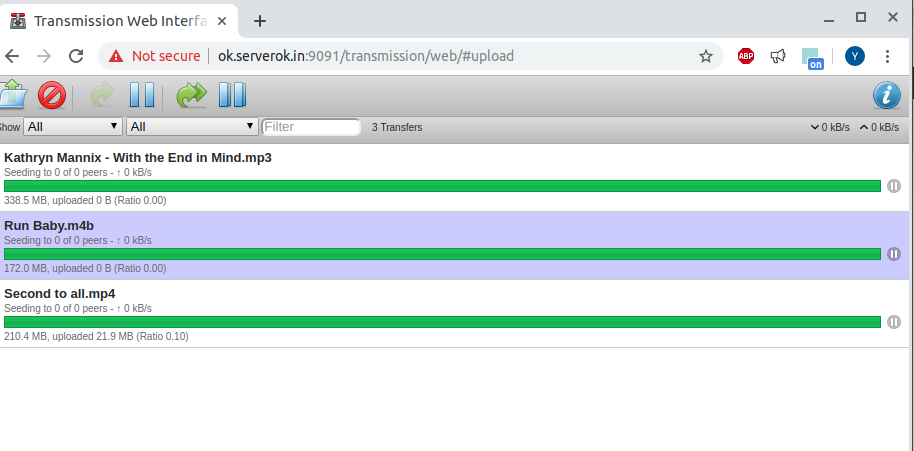
Web interface can be accessed using port 9091.
http://SERVER-IP:9091
You can try various linux distributions with out downloading ISO. To try, go to web site
Find the linux distribition from the list of available operating systems.
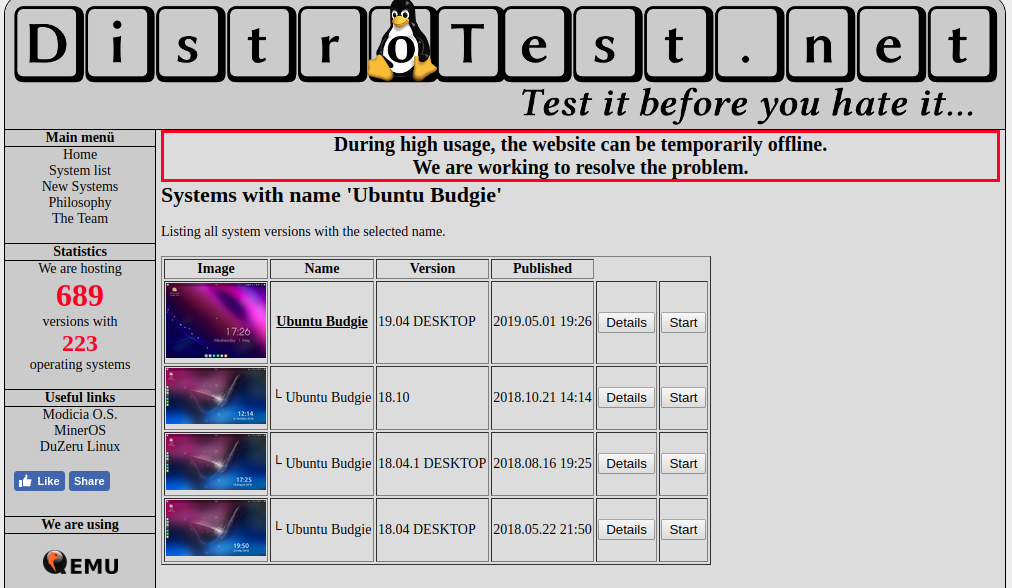
On next page, you will get IP address and port, that you can use to connect to the system using VNC viewer. There is option for using web based VNC client, this will open the desktop on a new browser window.
If you want to run same command on multiple servers, you can use tmux synchronize-panes feature. This will be useful when you need to setup multiple servers, say install nginx/php/mysql on multiple servers.
You can create multiple panes in tmux. SSH into each of the servers from these panes. Now run
CTRL + B :
Now type
setw synchronize-panes on
Whatever command you run on one of the pane will be executed on all panes. Be careful when you run server specific commands.
When you start a new window or split pane on tmux, it always start with the directory from where you run tmux command.
I prefer it start with current working directory of active tmux window. To do this, edit file
vi ~/.tmux.conf
Add
bind c new-window -c "#{pane_current_path}"
bind '"' split-window -c "#{pane_current_path}"
bind % split-window -h -c "#{pane_current_path}"
To start tmux and attach to existing connection on SSH in, edit file
vi ~/.bashrc
Add
if [[ "$TMUX" == "" ]] && [[ "$SSH_CONNECTION" != "" ]] && [ "$SSH_TTY" != "" ]; then
    WHOAMI=$(whoami)
    if tmux has-session -t $WHOAMI 2>/dev/null; then
        tmux -2 attach-session -t $WHOAMI
    else
        tmux -2 new-session -s $WHOAMI
    fi
fi
You can use following command when connecting to remote sevrer.
ssh USER@SERVER_IP -t tmux a
To install MongoDB 4.0 (for other versions, see release note) on CentOS 7, create file
vi /etc/yum.repos.d/mongodb-org-4.0.repo
Add content
[mongodb-org-4.0]
name=MongoDB Repository
baseurl=https://repo.mongodb.org/yum/redhat/$releasever/mongodb-org/4.0/x86_64/
gpgcheck=1
enabled=1
gpgkey=https://www.mongodb.org/static/pgp/server-4.0.asc
Install MongoDB with
yum install -y mongodb-org
Enable MongoDB start on boot
systemctl enable mongod
Start Mongo DB with
systemctl start mongod
To see mongoDB version, run
[root@ns3084948 ~]# mongo --version
MongoDB shell version v4.0.10
git version: c389e7f69f637f7a1ac3cc9fae843b635f20b766
OpenSSL version: OpenSSL 1.0.1e-fips 11 Feb 2013
allocator: tcmalloc
modules: none
build environment:
    distmod: rhel70
    distarch: x86_64
    target_arch: x86_64
[root@ns3084948 ~]#
To see if mongoDB running
[root@ns3084948 ~]# netstat -lntp | grep mongo
tcp        0      0 127.0.0.1:27017         0.0.0.0:*               LISTEN      10349/mongod
[root@ns3084948 ~]#
Or use
[root@ns3084948 ~]# systemctl status mongod
● mongod.service - MongoDB Database Server
   Loaded: loaded (/usr/lib/systemd/system/mongod.service; enabled; vendor preset: disabled)
   Active: active (running) since Tue 2019-06-04 06:08:01 BST; 18min ago
     Docs: https://docs.mongodb.org/manual
  Process: 10347 ExecStart=/usr/bin/mongod $OPTIONS (code=exited, status=0/SUCCESS)
  Process: 10344 ExecStartPre=/usr/bin/chmod 0755 /var/run/mongodb (code=exited, status=0/SUCCESS)
  Process: 10341 ExecStartPre=/usr/bin/chown mongod:mongod /var/run/mongodb (code=exited, status=0/SUCCESS)
  Process: 10338 ExecStartPre=/usr/bin/mkdir -p /var/run/mongodb (code=exited, status=0/SUCCESS)
 Main PID: 10349 (mongod)
   Memory: 46.7M
   CGroup: /system.slice/mongod.service
           └─10349 /usr/bin/mongod -f /etc/mongod.conf

Jun 04 06:07:57 ns3084948.ip-145-239-4.eu systemd[1]: Starting MongoDB Database Server...
Jun 04 06:07:58 ns3084948.ip-145-239-4.eu mongod[10347]: 2019-06-04T06:07:58.013+0100 I CONTROL  [main] WARNING: Cannot detect if NUMA interleaving is enabled. Failed to probe "/sys/devices...ssion denied
Jun 04 06:07:58 ns3084948.ip-145-239-4.eu mongod[10347]: about to fork child process, waiting until server is ready for connections.
Jun 04 06:07:58 ns3084948.ip-145-239-4.eu mongod[10347]: forked process: 10349
Jun 04 06:08:01 ns3084948.ip-145-239-4.eu mongod[10347]: child process started successfully, parent exiting
Jun 04 06:08:01 ns3084948.ip-145-239-4.eu systemd[1]: Started MongoDB Database Server.
Hint: Some lines were ellipsized, use -l to show in full.
[root@ns3084948 ~]#