Category: Ubuntu

  • csf error path to iptables is either not set or incorrect

    Whem install csf firewall on Ubuntu 20.04, i get following error

    root@ok:~# csf
    *Error* The path to iptables is either not set or incorrect for IPTABLES [/usr/sbin/ip6tables] in /etc/csf/csf.conf at /usr/local/csf/lib/ConfigServer/URLGet.pm line 26.
    Compilation failed in require at /usr/sbin/csf line 21.
    BEGIN failed--compilation aborted at /usr/sbin/csf line 21.
    root@ok:~#
    

    This is because path for iptables is changed in Ubuntu 20.04. To fix the error edit csf.conf

    vi /etc/csf/csf.conf
    

    Find

    IPTABLES = "/sbin/iptables"
    IPTABLES_SAVE = "/sbin/iptables-save"
    IPTABLES_RESTORE = "/sbin/iptables-restore"
    IP6TABLES = "/sbin/ip6tables"
    IP6TABLES_SAVE = "/sbin/ip6tables-save"
    IP6TABLES_RESTORE = "/sbin/ip6tables-restore"
    

    Replace with

    IPTABLES = "/usr/sbin/iptables"
    IPTABLES_SAVE = "/usr/sbin/iptables-save"
    IPTABLES_RESTORE = "/usr/sbin/iptables-restore"
    IP6TABLES = "/usr/sbin/ip6tables"
    IP6TABLES_SAVE = "/usr/sbin/ip6tables-save"
    IP6TABLES_RESTORE = "/usr/sbin/ip6tables-restore"
    

    Now restart csf with csf -r, it will work.

    csf -r
    systemctl restart lfd
    

    See csf

  • Install TeamSpeak Client on Ubuntu

    Install TeamSpeak Client on Ubuntu

    To install TeamSpeak client on Ubuntu, download latest version from

    https://www.teamspeak.com/en/downloads/

    Download page list both 32 and 64 bit versions. Most computers these days use 64 bit OS. So download 64 bit version unless you are using older computer with 32 bit OS.

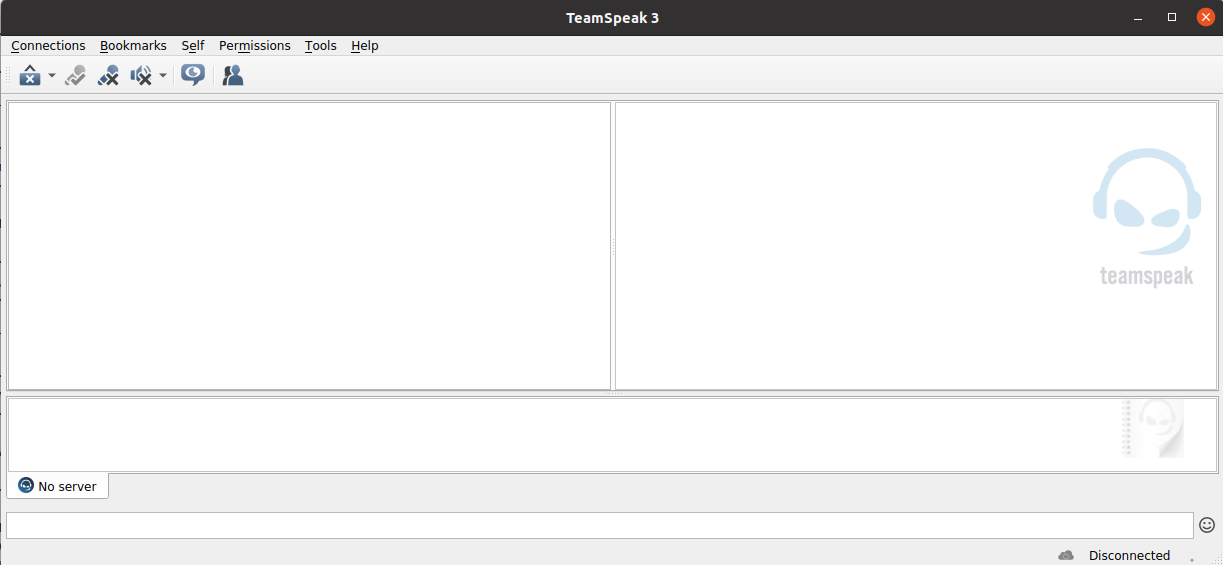
    TeamSpeak Client Ubuntu

    On Ubuntu, you can find if you are using 32 or 64 bit version with command arch

    boby@sok-01:~$ arch
    x86_64
    boby@sok-01:~$ 
    

    Download latest version of TeamSpeak, as for this writing, latest verison is

    wget https://files.teamspeak-services.com/releases/client/3.5.5/TeamSpeak3-Client-linux_amd64-3.5.5.run
    

    Make it executable

    chmod 755 TeamSpeak3-Client-linux_amd64-3.5.5.run
    

    To extract it, run

    ./TeamSpeak3-Client-linux_amd64-3.5.5.run
    

    This will cretae a folder with TeamSpeak files. Move it to /opt directory or any other folder you prefer.

    mv TeamSpeak3-Client-linux_amd64 /opt/
    

    Now you can start TeamSpeak from command line with command

    /opt/TeamSpeak3-Client-linux_amd64/ts3client_runscript.sh
    

    To create a shortcut file, create a desktop file

    vi ~/.local/share/applications/teamspeak.desktop
    

    Add following content

    [Desktop Entry]
    Name=TeamSpeak 3
    Comment=TeamSpeak 3 VoIP Communicator
    Exec=/opt/TeamSpeak3-Client-linux_amd64/ts3client_runscript.sh
    Terminal=false
    Type=Application
    Categories=Network;Application;
    Icon=/opt/TeamSpeak3-Client-linux_amd64/styles/default/logo-128x128.png
    

    Now you will be able to find TeamSpeak 3 in Ubuntu Start menu/Dash.

    See Ubuntu

  • bash: man: command not found

    When running man command on a debian server, i get error

    root@lab:~# man sftp
    -bash: man: command not found
    root@lab:~#
    

    This is because man-db package not installed on the server. To fix, install man-db package with

    apt install man-db
    

    See Errors

  • Enable FTP for EasyEngine Website

    To Enable FTP for EasyEngine web sites, we need to install pure-ftpd. On Ubuntu/Debian, run

    apt install -y pure-ftpd
    

    Enable virtial FTP users

    ln -s /etc/pure-ftpd/conf/PureDB /etc/pure-ftpd/auth/PureDB
    touch /etc/pure-ftpd/pureftpd.pdb
    

    In EasyEngine, we sites files are owned by www-data user, this user have a UID of 33. By default pure-ftpd won’t allow this. To enable users with UD 33 to login, run

    echo 1 > /etc/pure-ftpd/conf/MinUID
    

    Now lets create FTP user for a web site running in EasyEngine.

    pure-pw useradd  FTP_USER_HERE -u www-data -g www-data -d /opt/easyengine/sites/DOMAIN_NAME_HERE/app/
    

    In above command replace

    FTP_USER_HERE = FTP user for the web site, this can be any name, no space

    DOMAIN_NAME_HERE = the domain name of the web site that is hosted in EasyEngine, that you need FTP access.

    When you run above command, you will be asked to select password for the FTP user, this can be used to login to FTP server.

    Before you can login to FTP server with newly created virtual FTP user, you need to run

    pure-pw mkdb
    systemctl restart pure-ftpd
    

    Change FTP Password

    If you want to change FTP user for a user, you can run

    pure-pw passwd FTP_USER_HERE
    pure-pw mkdb
    systemctl restart pure-ftpd
    

    Passive FTP Configuration

    Many cloud hosting providers like AWS, Google Cloud, Oracle Cloud, AliCloud servers use NAT networking. That is your VM have private IP and your public IP is routed to your VM. In such case, you need to enable Passive FTP, for this run

    echo "30000 50000" > /etc/pure-ftpd/conf/PassivePortRange
    echo "YOUR_PUBLIC_IP" > /etc/pure-ftpd/conf/ForcePassiveIP
    

    YOUR_PUBLIC_IP = replace this with your public IP address.

    Restart pure-ftpd

    systemctl restart pure-ftpd
    

    Firewall configuration

    For Passive FTP, you need to open following ports in your firewall

    tcp 21
    tcp 30000:50000
    

    On Oracle Cloud server, i edited file

    vi /etc/iptables/rules.v4
    

    Find

    -A INPUT -p tcp -m state --state NEW -m tcp --dport 22 -j ACCEPT
    

    Replace with

    -A INPUT -p tcp -m state --state NEW -m tcp --dport 21 -j ACCEPT
    -A INPUT -p tcp -m state --state NEW -m tcp --dport 22 -j ACCEPT
    -A INPUT -p tcp -m state --state NEW -m tcp --dport 30000:50000 -j ACCEPT
    

    Now restore firewall rules with

    iptables-restore < /etc/iptables/rules.v4
    

    Now FTP will work.

    See EasyEngine

  • Install AnyDesk on Ubuntu

    To install AnyDesk on Ubuntu, run following commands as user root (sudo su).

    wget -qO - https://keys.anydesk.com/repos/DEB-GPG-KEY | apt-key add -
    

    Add repository

    echo "deb http://deb.anydesk.com/ all main" > /etc/apt/sources.list.d/anydesk-stable.list
    

    Update apt cache

    apt update
    

    Install anydesk with

    apt install anydesk
    

    If you don’t want auto start anydesk on boot, disable it with

    systemctl disable anydesk
    

    If you need to enable AnyDesk start on boot, run

    systemctl enable anydesk
    

    To see if anydesk is enabled or disabled, you can run

    systemctl list-unit-files | grep anydesk
    

    To check status of anydesk, run

    systemctl status anydesk
    

    You can manually start it with

    systemctl start anydesk
    

    See AnyDesk

  • Enable Remote Desktop in Ubuntu from the command line

    Method 1: Using x11vnc

    Connect to remote computer with SSH

    ssh user@REMOTE_PC_IP
    

    Install x11vnc

    sudo apt install x11vnc
    

    start x11vnc as the user that is logged in to GUI.

    x11vnc -display :0
    

    Now you should be able to connect to the desktop using any vnc client software using

    REMOTE_PC_IP:0
    

    Method 2: Using vino

    Connect to remote computer with SSH

    ssh -Y user@REMOTE_PC_IP
    

    Run

    sudo apt-get install vino -y
    vino-preferences
    

    You need X11 forward enabled to get this working, so you can run GUI application of remote PC on your PC.

    Configure settings as required.

    Now run

    export DISPLAY=:0.0
    xhost +
    /usr/lib/vino/vino-server
    

    This will start vino-server, if you want to run in background, run with & at end.

    /usr/lib/vino/vino-server &
    

    To verify vino running, run

    netstat -nl | grep 5900 
    

    Now you have VNC enabled on remote PC.

    Start your favorite VNC client and connect to remote PC.

    If you don’t have vino-preferences, you can use

    export DISPLAY=0.0
    gsettings set org.gnome.Vino notify-on-connect false
    gsettings set org.gnome.Vino prompt-enabled false
    gsettings get org.gnome.desktop.notifications.application:/org/gnome/desktop/notifications/application/vino-server/ enable
    gsettings set org.gnome.desktop.notifications.application:/org/gnome/desktop/notifications/application/vino-server/ enable false
    gsettings set org.gnome.desktop.notifications show-in-lock-screen false
    gsettings set org.gnome.desktop.notifications show-banners false
    gsettings set org.gnome.Vino require-encryption false
    gsettings set org.gnome.Vino view-only false
    

    To set password for VNC, run

    dbus-launch gsettings set org.gnome.Vino authentication-methods "['vnc']"
    dbus-launch gsettings set org.gnome.Vino vnc-password $(echo -n "YOUR_VNC_PW_HERE"|base64)
    

    Allow connection from a network interface

    eths=$(nmcli -t -f uuid,type c s --active | grep 802 | awk -F  ":" '{ print "'\''" $1 "'\''" }' | paste -s -d, -)
    gsettings set org.gnome.settings-daemon.plugins.sharing.service:/org/gnome/settings-daemon/plugins/sharing/vino-server/ enabled-connections "[ $eths ]"
    dbus-launch gsettings set org.gnome.settings-daemon.plugins.sharing.service:/org/gnome/settings-daemon/plugins/sharing/vino-server/ enabled-connections "[ $eths ]"
    gsettings get org.gnome.settings-daemon.plugins.sharing.service:/org/gnome/settings-daemon/plugins/sharing/vino-server/ enabled-connections
    

    start vino server

    /usr/lib/vino/vino-server --display=:0.0
    

    To view the settings

    gsettings list-recursively org.gnome.Vino
    gsettings list-recursively org.gnome.desktop.notifications
    dconf dump /org/gnome/
    
  • Install PowerDNS on Ubuntu 20.04

    PowerDNS is an OpenSource DNS server.

    Update apt repo

    apt-get update && apt-get upgrade -y
    

    On Ubuntu, systemd-resolved listen to port 53. This is a local DNS resolver, we need to stop this service before we can install PowerDNS.

    systemctl disable systemd-resolved
    systemctl stop systemd-resolved
    rm -f /etc/resolv.conf
    echo "nameserver 1.1.1.1" > /etc/resolv.conf
    echo "nameserver 8.8.8.8" >> /etc/resolv.conf
    

    To install PowerDNS with MySQL backend, run

    apt install pdns-server pdns-backend-mysql
    

    Since we are using MySQL backend to store DNS zones, we need to install MySQL database.

    apt install mariadb-server
    

    Login to MySQL, create a database and user.

    mysql
    CREATE DATABASE powerdns;
    GRANT ALL ON powerdns.* TO 'powerdns'@'localhost' IDENTIFIED BY 'YOUR_MYSQL_PW_HERE';
    

    Restore database scheme provided by powerdns

    mysql powerdns < /usr/share/pdns-backend-mysql/schema/schema.mysql.sql
    

    You can see this scheme in PowerDNS documentation.

    Configure PowerDNS to use MySQL backend

    vi /etc/powerdns/pdns.d/mysql.conf
    

    Add following content

    # MySQL Configuration
    # Launch gmysql backend
    launch+=gmysql
    # gmysql parameters
    gmysql-host=localhost
    gmysql-port=3306
    gmysql-dbname=powerdns
    gmysql-user=powerdns
    gmysql-password=YOUR_MYSQL_PW_HERE
    gmysql-dnssec=yes
    # gmysql-socket=
    

    Restart PowerDNS

    systemctl restart pdns
    

    If PowerDNS started properly, you will see it listening to port 53. You can verify with command netstat -lntp

    PowerDNS netstat

    In above picture, you will see PowerDNS listen to port 53 and 8081. Port 8081 is API port, you won't see it unless you enabled it.

    To verify PowerDNS is running, you can use command

    root@vultr:~# dig @127.0.0.1
    
    ; <<>> DiG 9.16.1-Ubuntu <<>> @127.0.0.1
    ; (1 server found)
    ;; global options: +cmd
    ;; Got answer:
    ;; ->>HEADER<<- opcode: QUERY, status: REFUSED, id: 63898
    ;; flags: qr rd; QUERY: 1, ANSWER: 0, AUTHORITY: 0, ADDITIONAL: 1
    ;; WARNING: recursion requested but not available
    
    ;; OPT PSEUDOSECTION:
    ; EDNS: version: 0, flags:; udp: 1232
    ;; QUESTION SECTION:
    ;.				IN	NS
    
    ;; Query time: 0 msec
    ;; SERVER: 127.0.0.1#53(127.0.0.1)
    ;; WHEN: Mon Oct 12 06:53:40 UTC 2020
    ;; MSG SIZE  rcvd: 28
    
    root@vultr:~# 
    

    Back to PowerDNS

  • Prevent Notification steal focus on Ubuntu 18.04

    On Ubuntu, some times notifications steal focus from current application. This annoying when you are working on terminal. This is due to start focus feature of gnome when your mouse is over the notification area.

    boby@sok-01:~$ gsettings get org.gnome.desktop.wm.preferences focus-new-windows 
    'smart'
    boby@sok-01:~$ 
    

    We need to change the value of focus-new-windows from smart to strict. This can be done with command

    gsettings set org.gnome.desktop.wm.preferences focus-new-windows 'strict'
    
  • Change Apache User in Ubuntu

    On Ubuntu/Debian server, apache run as user www-data. When you install Apache web server on your local computer for developement purpose, it may be easier to run Apache as your user. If you run Apache as www-data user, you will need to chmod folders 777 for yoru web application to write to a folder like file upload, creating log files etc..

    To change Apache user, edit file

    vi /etc/apache2/envvars
    

    Find and replace www-data with your user name. You can do this with following sed command

    sed -i "s/www-data/USERNAME/g" /etc/apache2/envvars
    chown -R USERNAME:USERNAME /var/lib/php
    
  • Install wireguard VPN on Ubuntu

    To install wireguard VPN on ubuntu, run

    apt update
    apt install software-properties-common
    apt install linux-headers-$(uname -r)
    add-apt-repository ppa:wireguard/wireguard
    apt-get update
    apt-get install wireguard
    

    Generate Keys

    cd /etc/wireguard
    umask 077
    wg genkey > privatekey
    cat privatekey | wg pubkey > publickey
    

    Configure wireguard

    You can generate wireguard configuration using

    https://www.wireguardconfig.com

  • Disable sshd start on boot in ubuntu

    On my local computer, i have installed openssh-server, but i don’t want it always enabled.

    To disable openssh-server from auto start on boot, run

    systemctl disable ssh
    

    Example

    root@lab:~# systemctl disable ssh
    Synchronizing state of ssh.service with SysV service script with /lib/systemd/systemd-sysv-install.
    Executing: /lib/systemd/systemd-sysv-install disable ssh
    Removed /etc/systemd/system/sshd.service.
    Removed /etc/systemd/system/multi-user.target.wants/ssh.service.
    root@lab:~# 
    

    If you want to start ssh server on boot, run systelctl enable ssh

    root@lab:~# systemctl enable ssh
    Synchronizing state of ssh.service with SysV service script with /lib/systemd/systemd-sysv-install.
    Executing: /lib/systemd/systemd-sysv-install enable ssh
    Created symlink /etc/systemd/system/sshd.service → /lib/systemd/system/ssh.service.
    Created symlink /etc/systemd/system/multi-user.target.wants/ssh.service → /lib/systemd/system/ssh.service.
    root@lab:~# 
    

    See Ubuntu

  • Install VirtualBox 6.1 on Ubuntu 18.04

    Install VirtualBox 6.1 on Ubuntu 18.04

    First you need to add VirtualBox repository

    sudo echo "deb [arch=amd64] https://download.virtualbox.org/virtualbox/debian bionic contrib" > /etc/apt/sources.list.d/virtualbox.list
    

    Add Keys

    wget -q https://www.virtualbox.org/download/oracle_vbox_2016.asc -O- | sudo apt-key add -
    wget -q https://www.virtualbox.org/download/oracle_vbox.asc -O- | sudo apt-key add -
    

    Do an apt upgrade

    sudo apt-get update
    

    If you have older version of VirtualBox installed, remove it

    sudo apt remove virtualbox virtualbox-dkms virtualbox-qt
    

    Install VirtualBox 6.1 with

    sudo apt-get install virtualbox-6.1
    

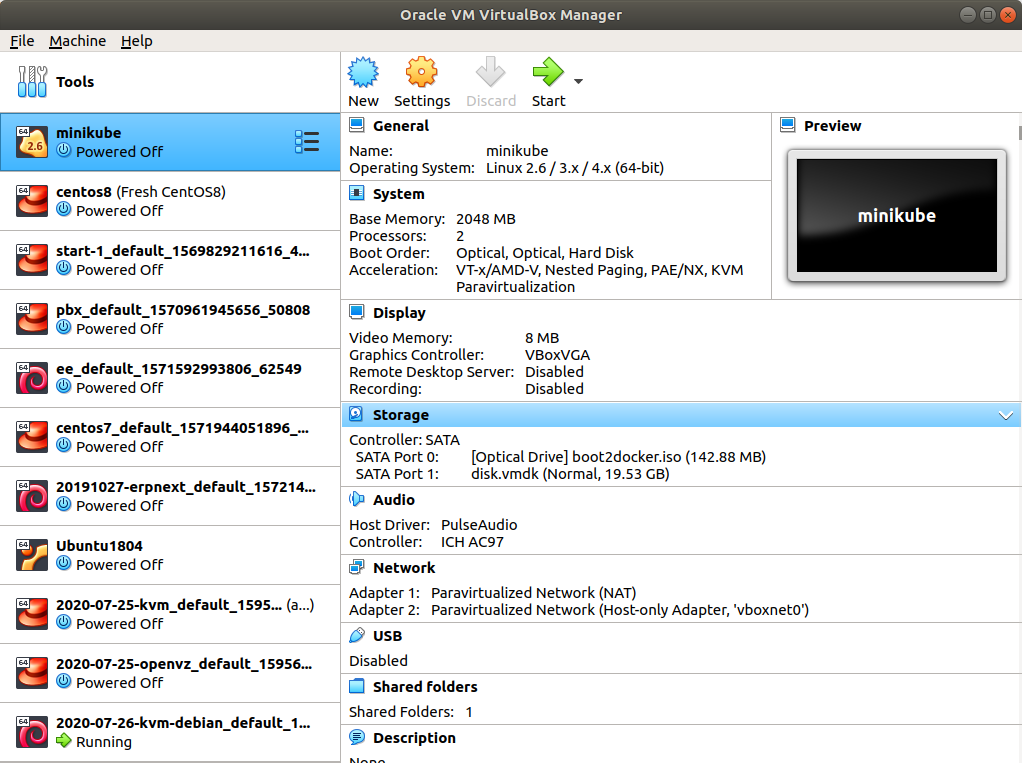
    VirtualBox 6.1 on Ubuntu

    If you use Vagrant, you may need to install latest version as the vagrant provided by ubuntu won’t work with VirtualBox 6.1