To enable LetsEncrypt SSL for a web site hosted in EasyEngine server, run
ee site update SITE_NAME_HERE --ssl=le
Example

See EasyEngine
To enable LetsEncrypt SSL for a web site hosted in EasyEngine server, run
ee site update SITE_NAME_HERE --ssl=le
Example

See EasyEngine
When creating a wordpress web site on EasyEngine, i get following error
root@ee:~# ee site create smartandsolar.serverok.in --wp
Starting site creation.
Warning: Could not create user smartandsolar.serverok.in-8LHl6l. Please check logs.
Warning: Initiating clean-up.
Success: Site smartandsolar.serverok.in deleted.
Report bugs here: https://github.com/EasyEngine/site-type-wp
root@ee:~#
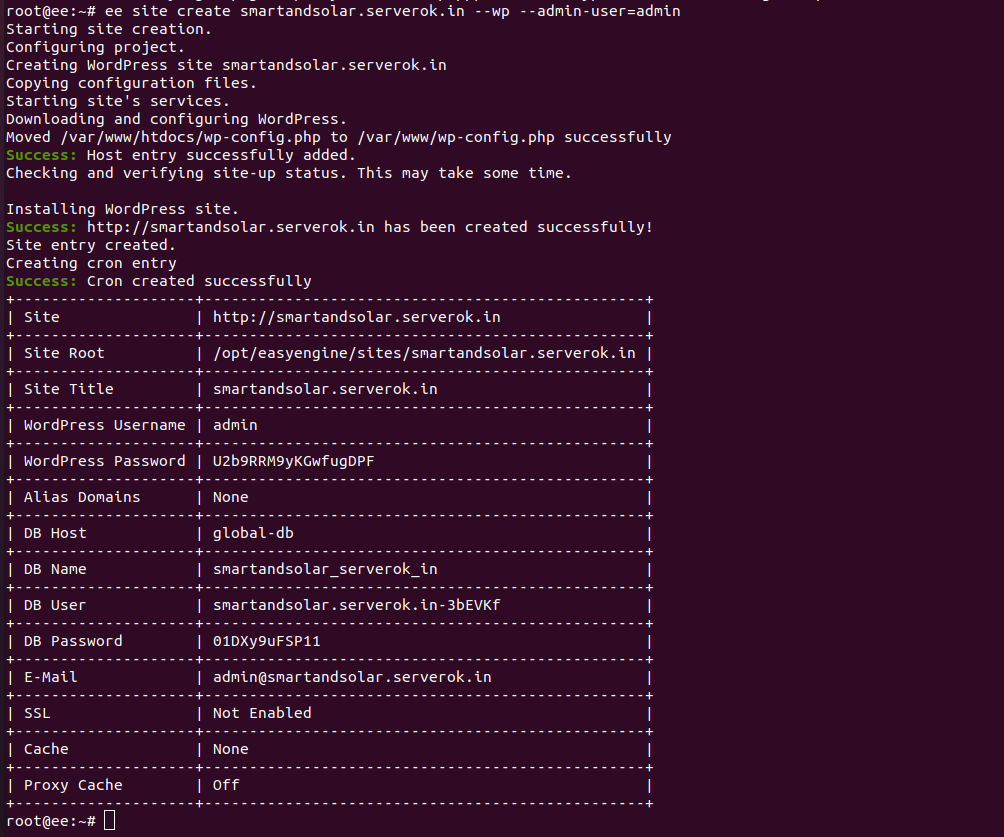
This is because EasyEngine try to create a WordPress admin user, that failed to create due to length. To fix the error, you can specify a shorter wordpress admin user name with option –admin-user=admin
ee site create smartandsolar.serverok.in --wp --admin-user=admin
See EasyEngine
To Enable FTP for EasyEngine web sites, we need to install pure-ftpd. On Ubuntu/Debian, run
apt install -y pure-ftpd
Enable virtial FTP users
ln -s /etc/pure-ftpd/conf/PureDB /etc/pure-ftpd/auth/PureDB
touch /etc/pure-ftpd/pureftpd.pdb
In EasyEngine, we sites files are owned by www-data user, this user have a UID of 33. By default pure-ftpd won’t allow this. To enable users with UD 33 to login, run
echo 1 > /etc/pure-ftpd/conf/MinUID
Now lets create FTP user for a web site running in EasyEngine.
pure-pw useradd FTP_USER_HERE -u www-data -g www-data -d /opt/easyengine/sites/DOMAIN_NAME_HERE/app/
In above command replace
FTP_USER_HERE = FTP user for the web site, this can be any name, no space
DOMAIN_NAME_HERE = the domain name of the web site that is hosted in EasyEngine, that you need FTP access.
When you run above command, you will be asked to select password for the FTP user, this can be used to login to FTP server.
Before you can login to FTP server with newly created virtual FTP user, you need to run
pure-pw mkdb
systemctl restart pure-ftpd
If you want to change FTP user for a user, you can run
pure-pw passwd FTP_USER_HERE
pure-pw mkdb
systemctl restart pure-ftpd
Many cloud hosting providers like AWS, Google Cloud, Oracle Cloud, AliCloud servers use NAT networking. That is your VM have private IP and your public IP is routed to your VM. In such case, you need to enable Passive FTP, for this run
echo "30000 50000" > /etc/pure-ftpd/conf/PassivePortRange
echo "YOUR_PUBLIC_IP" > /etc/pure-ftpd/conf/ForcePassiveIP
YOUR_PUBLIC_IP = replace this with your public IP address.
Restart pure-ftpd
systemctl restart pure-ftpd
For Passive FTP, you need to open following ports in your firewall
tcp 21
tcp 30000:50000
On Oracle Cloud server, i edited file
vi /etc/iptables/rules.v4
Find
-A INPUT -p tcp -m state --state NEW -m tcp --dport 22 -j ACCEPT
Replace with
-A INPUT -p tcp -m state --state NEW -m tcp --dport 21 -j ACCEPT
-A INPUT -p tcp -m state --state NEW -m tcp --dport 22 -j ACCEPT
-A INPUT -p tcp -m state --state NEW -m tcp --dport 30000:50000 -j ACCEPT
Now restore firewall rules with
iptables-restore < /etc/iptables/rules.v4
Now FTP will work.
See EasyEngine
To create HTML web site
ee site create example.com --htmlTo create PHP web site
ee site create example.com --phpTo create PHP/MySQL web site
ee site create example.com --mysqlTo enable LetsEncrypt SSL, add –letsencrypt
ee site create example.com --letsencryptee site create example.com --wp # install wordpress without any page caching
ee site create example.com --w3tc # install wordpress with w3-total-cache plugin
ee site create example.com --wpsc # install wordpress with whisp-super-cache plugin
ee site create example.com --wpfc # install wordpress + nginx fastcgi_cache
ee site create example.com --wpredis # install wordpress + nginx redis_cacheCreate WordPress site with PHP 7.3 and cache enabled
ee site create domain.com --type=wp --php=7.3 --cache --ssl=leSecify wordpress admin user and email during site creation
ee site create stunningbeachwear.ee.serverok.in --type=wp --php=7.4 --cache --ssl=le --admin-user=admin --wp-mail=admin@serverok.inee site create example.com --wpsubdir # install wpmu-subdirectory without any page caching
ee site create example.com --wpsubdir --w3tc # install wpmu-subdirectory with w3-total-cache plugin
ee site create example.com --wpsubdir --wpsc # install wpmu-subdirectory with wp-super-cache plugin
ee site create example.com --wpsubdir --wpfc # install wpmu-subdirectory + nginx fastcgi_cache
ee site create example.com --wpsubdir --wpredis # install wpmu-subdirectory + nginx redis_cacheee site create example.com --wpsubdom # install wpmu-subdomain without any page caching
ee site create example.com --wpsubdom --w3tc # install wpmu-subdomain with w3-total-cache plugin
ee site create example.com --wpsubdom --wpsc # install wpmu-subdomain with wp-super-cache plugin
ee site create example.com --wpsubdom --wpfc # install wpmu-subdomain + nginx fastcgi_cache
ee site create example.com --wpsubdom --wpredis # install wpmu-subdomain + nginx redis_cacheRef: https://easyengine.io/docs/commands/site/create/
See EasyEngine
EasyEngine run database of web sites in a Docker container. To take backup of MySQL database used by a WordPress website, you can run command
ee shell DOMAIN_NAME --command='wp db export'
This will create database backup on document root of the web site.
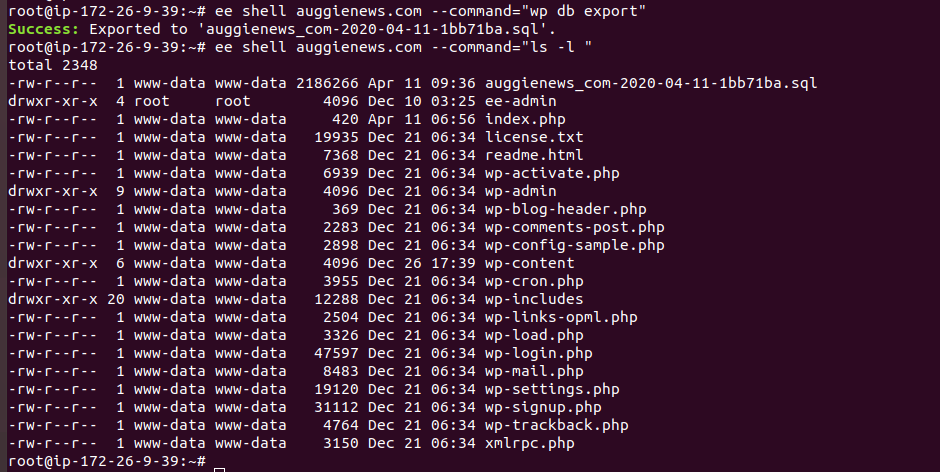
Backup will be available in your web sites document root
/opt/easyengine/sites/YOUR_DOMAIN.EXTN/app/htdocs/
You can also download using
http://YOUR_DOMAIN.EXTN/backup-file-name.sql
See EasyEngine
EasyEngine come admin tools. This include phpMyAdmin, phpinfo, OpCache GUI, nginx status.

To enable admin tool, run
ee admin-tools enable example.com
Admin tools are password protected, to get login details, run
ee auth list global
You can login to admin tools at
http://example.com/ee-admin/
The pma link in EasyEngine Admin tools take you to phpMyAdmin login page. To login, you need to use MySQL login details for your web site. This you can get by checking your web site configuration file.
You will be able to find your web site files in document root of your web site at
/opt/easyengine/sites/YOUR-DOMAIN/app/htdocs
See EasyEngine
To Find MySQL root password on EasyEngine, run
cd /opt/easyengine/services && docker-compose exec global-db bash -c 'echo $MYSQL_ROOT_PASSWORD'
Or
cat /opt/easyengine/services/docker-compose.yml | grep MYSQL_ROOT_PASSWORD | awk -F'=' '{print $2}'
cat /opt/easyengine/services/docker-compose.yml | grep MYSQL_ROOT_PASSWORD | cut -d'=' -f2
To connect to MySQL console, run
cd /opt/easyengine/services && docker-compose exec global-db bash -c 'mysql -uroot -p${MYSQL_ROOT_PASSWORD}'
See EasyEngine
To renew SSL for site hosted in EasyEngine, run
ee site ssl-renew --all
You can set a cronjob to run every month to auto renew the SSL certificates.
To upgrade EasyEngine, run
ee cli update
It is recommended you run this in tmux or screen to avoid disconnection while upgrading.

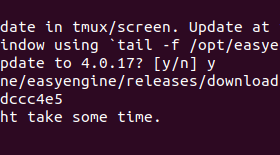
Example
root@ip-172-26-9-39:~# ee cli update
Note: It is recommended to run EasyEngine update in tmux/screen. Update at times may take some time.
To view progress, tail logs in a different window using `tail -f /opt/easyengine/logs/ee.log`.
You have version 4.0.14. Would you like to update to 4.0.17? [y/n] y
Downloading from https://github.com/EasyEngine/easyengine/releases/download/v4.0.17/easyengine.phar...
md5 hash verified: cb9041faecdae54e51aafdc9adccc4e5
Updating EasyEngine to new version. This might take some time.
New version works. Proceeding to replace.
Success: Updated EE to 4.0.17.
root@ip-172-26-9-39:~#
Related Posts
EasyEngine is a command line tool to manage/configure Nginx web server.
To install EasyEngine, run
wget -qO ee rt.cx/ee4 && sudo bash ee| /opt/easyengine/services/docker-compose.yml | docker-compose file |
| /opt/easyengine/sites/DOMAIN_NAME_HERE/app/htdocs | Website document root |
| /opt/easyengine/services/mariadb | MySQL data dir |
Restart Nginx container for a site
ee site restart SITE_URL_HERE --nginxClear Object cache for a site
ee site clean SITE_URL_HERE