Tag: linux

  • DMARC

    DMARC is used to protect your email from email spoofing. DMARC use SPF and DKIM record to validate your email.

    DMARC is a TXT record added in your domain DNS.

    DMARC record look like

    v=DMARC1;p=POLICY_HERE;pct=100;rua=mailto:[email protected];ruf=mailto:[email protected];rf=afrf
    

    p=POLICY_HERE

    This specifies what to do with incoming email that fails DMARC.

    Valid options are none, quarantine and reject.

    p=none – used for monitoring. If DMARC fails, the remote mail server will send a mail to “rua” or “ruf” tags specified in the DMARC record.

    p=quarantine – tell the recipient mail server to put the message in the SPAM folder if DMARC fails.

    p=reject – reject mail if DMARC fails.

    rf=afrf – Specify the type of report you will get.

    Reject Emails that fail DKIM/SPF check

    v=DMARC1; p=reject; rua=mailto:[email protected]
    

    Filter and Reject Only 95% mails

    v=DMARC1; p=reject; pct=95; rua=mailto:[email protected]
    

    Quarantine Emails that fail DKIM/SPF check

    v=DMARC1; p=quarantine; rua=mailto:[email protected]
    

    Back to Mail

  • Redirect OLD site to NEW using htaccess

    To redirect old site to new url using .htacces, use following

    RewriteCond %{HTTP_HOST} ^old-url.com$ [OR]
    RewriteCond %{HTTP_HOST} ^www.old-url.com$
    RewriteRule (.*)$ http://www.new-url.com/$1 [R=301,L]
    

    See htaccess

  • List kernel modules

    To list kernal modules, use

    lsmod
    

    Example

    boby@sok-01:~$ lsmod | grep rtl
    rtl8xxxu              122880  0
    mac80211              778240  2 ath9k_htc,rtl8xxxu
    boby@sok-01:~$ 
    
  • Logging Linux Commands for all users

    To log commands executed by users on Linux shell, edit file

    vi /etc/bash.bashrc
    

    Add

    export PROMPT_COMMAND='RETRN_VAL=$?;logger -p local6.debug "$(whoami) [$$]: $(history 1 | sed "s/^[ ]*[0-9]\+[ ]*//" ) [$RETRN_VAL]"'
    

    Create file

    vi  /etc/rsyslog.d/bash.conf
    

    Add

    local6.*    /var/log/commands.log
    

    Restart rsyslog

    systemctl restart rsyslog
    

    Now log off and login, you will be able to see all commends executed by users on bash shell in file /var/log/commands.log

    Log rotating

    edit

    vi /etc/logrotate.d/rsyslog
    

    Find

    /var/log/kern.log
    

    Add below

    /var/log/commands.log
    
  • xinput

    xinput command on linux shows all available input devices.

    xinput
    

    Example

  • Adding Backup Disk on a Linux Server

    It is better to have a second hard disk on servers for backup. Here, we will partition a fresh disk, format and mount it as /backup.

    parted /dev/sdX print free
    parted /dev/sdX mktable gpt
    parted /dev/sdX mkpart primary ext4 0% 100%
    mkfs.ext4 /dev/sdX1

    Replace /dev/sdX with the actual device name of your backup disk.

    Now you need to find the UUID for this new drive with the command

    blkid

    Create a folder to mount the disk, in this case, we use /backup

    mkdir /backup

    Edit /etc/fstab

    vi /etc/fstab

    Add

    UUID=1c7b33ed-ea6d-4694-9925-edfd0e8a2837  /backup ext4 defaults 0 1

    Replace “1c7b33ed-ea6d-4694-9925-edfd0e8a2837” with the actual UUID for your new disk, that you found using blkid command.

    Now run

    mount -a

    This will mount all disks specified in /etc/fstab, verify /backup is mounted with the command

    df -h

    Partitioning New HDD

    Here we partition the device /dev/sdb and mount it as /backup.

    First, we check free space on the server with

    [root@sok ~]# parted /dev/sdb print free
    Error: /dev/sdb: unrecognised disk label
    Model: ATA WDC WD1003FBYX-0 (scsi)                                        
    Disk /dev/sdb: 1000GB
    Sector size (logical/physical): 512B/512B
    Partition Table: unknown
    Disk Flags: 
    [root@sok ~]#

    Lets make the partition table of type GPT

    [root@sok ~]# parted /dev/sdb mktable gpt
    Information: You may need to update /etc/fstab.
    
    [root@sok ~]#

    Now you will see we have 1000 GB free space.

    [root@sok ~]# parted /dev/sdb print free                                
    Model: ATA WDC WD1003FBYX-0 (scsi)
    Disk /dev/sdb: 1000GB
    Sector size (logical/physical): 512B/512B
    Partition Table: gpt
    Disk Flags: 
    
    Number  Start   End     Size    File system  Name  Flags
            17.4kB  1000GB  1000GB  Free Space
    
    [root@sok ~]#

    Let’s create a partition of type ext4 using 100% of the disk.

    [root@sok ~]# parted /dev/sdb mkpart primary ext4 0% 100%
    Information: You may need to update /etc/fstab.
    
    [root@sok ~]# parted /dev/sdb print free                
    Model: ATA WDC WD1003FBYX-0 (scsi)
    Disk /dev/sdb: 1000GB
    Sector size (logical/physical): 512B/512B
    Partition Table: gpt
    Disk Flags: 
    
    Number  Start   End     Size    File system  Name     Flags
            17.4kB  1049kB  1031kB  Free Space
     1      1049kB  1000GB  1000GB               primary
            1000GB  1000GB  729kB   Free Space
    
    [root@sok ~]#

    Formatting the Disk

    [root@sok ~]# mkfs.ext4 /dev/sdb1
    mke2fs 1.42.9 (28-Dec-2013)
    Filesystem label=
    OS type: Linux
    Block size=4096 (log=2)
    Fragment size=4096 (log=2)
    Stride=0 blocks, Stripe width=0 blocks
    61054976 inodes, 244190208 blocks
    12209510 blocks (5.00%) reserved for the super user
    First data block=0
    Maximum filesystem blocks=2392850432
    7453 block groups
    32768 blocks per group, 32768 fragments per group
    8192 inodes per group
    Superblock backups stored on blocks: 
    	32768, 98304, 163840, 229376, 294912, 819200, 884736, 1605632, 2654208, 
    	4096000, 7962624, 11239424, 20480000, 23887872, 71663616, 78675968, 
    	102400000, 214990848
    
    Allocating group tables: done                            
    Writing inode tables: done                            
    Creating journal (32768 blocks): done
    Writing superblocks and filesystem accounting information: done     
    
    [root@sok ~]# 

    Mounting Disk

    First, find the UUID of the disk with command blkid

    [root@thor ~]# blkid
    /dev/sda2: UUID="aba6f962-366b-455a-959a-b9d04a9bfa34" TYPE="ext4" 
    /dev/sda1: UUID="3432e015-01e6-4f09-9991-ff73a90f340b" TYPE="swap" 
    /dev/sdb1: UUID="1c7b33ed-ea6d-4694-9925-edfd0e8a2837" TYPE="ext4" PARTLABEL="primary" PARTUUID="7c182896-e88f-44cf-b3fe-e369b88044a1" 
    /dev/loop0: UUID="63f812e0-51e0-4cf8-8ae4-da70d61ce272" TYPE="ext3" 
    /dev/sdd1: UUID="5cabe12d-a575-4374-af15-c8bb3abe8fe8" TYPE="ext4" PARTLABEL="primary" PARTUUID="0eca4648-25a4-4b89-a93b-bc3ad781caa0" 
    /dev/sdc1: UUID="01cc1cfd-888b-42e2-bb1c-e0461c6b989d" TYPE="ext4" PARTLABEL="primary" PARTUUID="74cd1045-fbfc-44a0-9a7d-e0965db53d06" 
    [root@thor ~]# 

    UUID for the disk /dev/sdb1 is

    UUID="1c7b33ed-ea6d-4694-9925-edfd0e8a2837"

    To mount this disk as /backup, first create a folder

    mkdir /backup

    Now edit /etc/fstab

    vi /etc/fstab

    Add the following line

    UUID=1c7b33ed-ea6d-4694-9925-edfd0e8a2837  /backup ext4 defaults 0 1
    

    Run

    mount -a

    This will mount all disks specified in /etc/fstab

    Verify your new drive is mounted with the command df -h

    [root@thor ~]# df -h | grep backup
    /dev/sdb1       917G   77M  871G   1% /backup
    [root@thor ~]# 
  • Linux How to Disable a user account

    To disable or lock a linux user account, run

    passwd -l USERNAME_HERE
    

    Or

    usermod -L USERNAME_HERE
    

    To verify if a user is locked, run

    passwrd --status USERNAME_HERE
    

    If account is disabled/locked, it will show L.

  • How to extract RAR file in Linux

    unar is a utility to extract rar archive files.

    Using unrar

    To extract a rar file, run

    unrar x filename.rar
    

    Install unare on Ubuntu/Debian

    To install unrar on Ubuntu/Debian, run

    apt install unrar -y
    

    Install Unrar from source

    Download unrar from

    http://www.rarlab.com/download.htm

    cd /usr/local/src
    wget https://www.rarlab.com/rar/rarlinux-x64-6.0.b1.tar.gz
    tar zxvf rarlinux-x64-6.0.b1.tar.gz
    cd rar
    cp rar unrar /usr/bin
    
  • set default view to list in nemo file manager

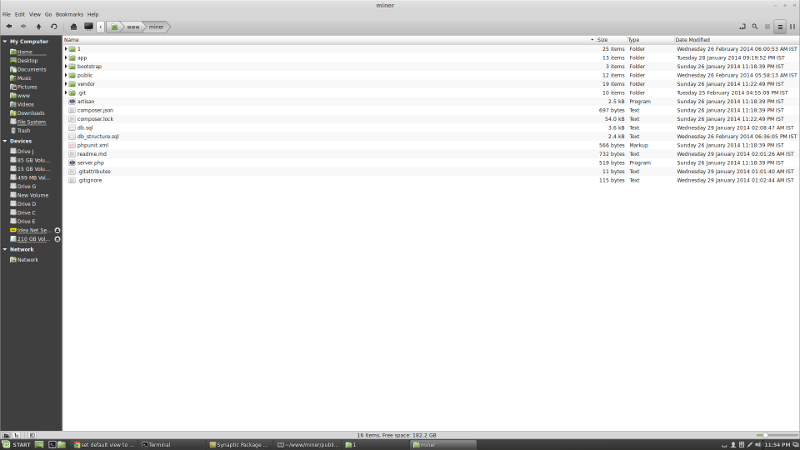
    By default files are displayed with “Icon View”

    linux mint nemo

    I prefer list view.

    linux mint nemo

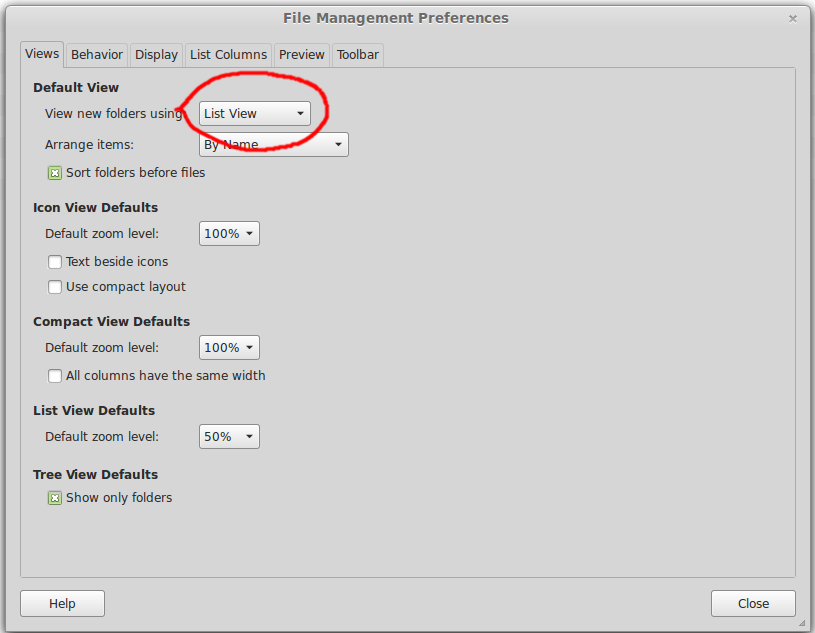
    To set default view in Nemo, go to

    Edit -> Preferences -> Views (tab) -> View new folders using -> List View
    

    linux mint nemo Preferences