Tag: mysql

  • ISPConfig fail to create MySQL database

    ISPConfig fail to create MySQL database

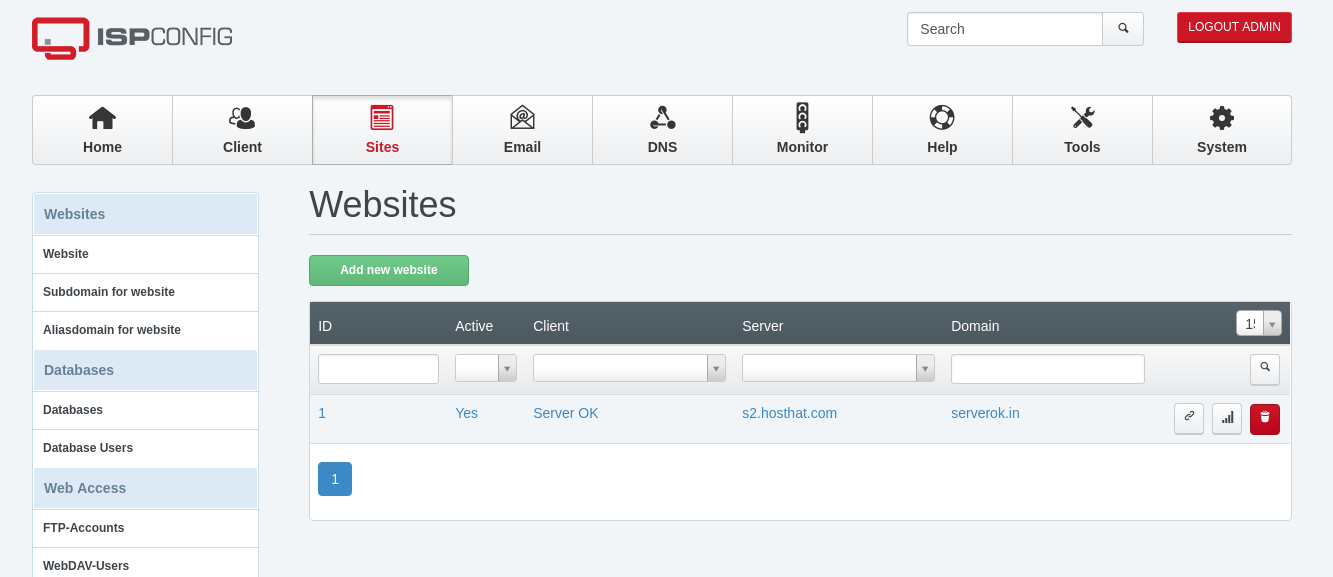
    Whem creating MySQL database in ISPConfig, no database get created. To debug, i disabled the cronjob. Created a database in ISPConfig control panel, run cronjob manually, it shows following error

    [root@vs-sok ~]# /usr/local/ispconfig/server/server.sh
    PHP Warning:  mysqli::mysqli(): (28000/1045): Access denied for user 'root'@'localhost' (using password: YES) in /usr/local/ispconfig/server/plugins-available/mysql_clientdb_plugin.inc.php on line 528
    11.11.2019-13:45 - ERROR - Unable to connect to mysqlAccess denied for user 'root'@'localhost' (using password: YES)
    PHP Warning:  mysqli::mysqli(): (28000/1045): Access denied for user 'root'@'localhost' (using password: YES) in /usr/local/ispconfig/server/plugins-available/mysql_clientdb_plugin.inc.php on line 184
    11.11.2019-13:45 - ERROR - Unable to connect to mysqlAccess denied for user 'root'@'localhost' (using password: YES)
    finished.
    [root@vs-sok ~]# /usr/local/ispconfig/server/server.sh
    PHP Warning:  mysqli::mysqli(): (28000/1045): Access denied for user 'root'@'localhost' (using password: YES) in /usr/local/ispconfig/server/plugins-available/mysql_clientdb_plugin.inc.php on line 472
    11.11.2019-13:46 - ERROR - Unable to connect to mysql: Access denied for user 'root'@'localhost' (using password: YES)
    finished.
    [root@vs-sok ~]# 
    

    This is because ISPConfig can’t connect to MySQL server for creating new MySQL database. To fix, edit file /usr/local/ispconfig/server/lib/mysql_clientdb.conf

    vi /usr/local/ispconfig/server/lib/mysql_clientdb.conf
    

    Update MySQL password for user root on this file. The content of the file look like


    Related Posts

    ISPConfig

  • MySQL ERROR Access denied  you need SUPER privilege for this operation

    MySQL ERROR Access denied you need SUPER privilege for this operation

    WHen restoring a MySQL database, i get following error

    root@ns3043014:~# mysql -u NEW_DB_USER -p'PASSOWRD_HERE' DB_NAME < BACKUP_FILE.sql
    ERROR 1227 (42000) at line 4382: Access denied; you need (at least one of) the SUPER privilege(s) for this operation
    root@ns3043014:~# 
    

    I opened the file in vim editor. On checking line 4382, i found following

    /*!50013 DEFINER=`OLD_DB_USER`@`localhost` SQL SECURITY DEFINER */
    

    This is because some stored procedures use old database user as definer. To fix you need to find and replace all entry for old username with new username.

    In vim, i can run

    :%s/OLD_DB_USER/NEW_DB_USER/g
    

    Or delete the DEFINER line from SQL file.

    sed 's/\sDEFINER=`[^`]*`@`[^`]*`//g' BACKUP_FILE.sql > BACKUP_FILE-modified.sql
    

    Or

    sed -i old 's/\DEFINER\=`[^`]*`@`[^`]*`//g' BACKUP_FILE.sql
    

    Now restore BACKUP_FILE-modified.sql with

    mysql -u NEW_DB_USER -p'PASSOWRD_HERE' DB_NAME < BACKUP_FILE-modified.sql
    
  • Install MySQL as Service in Windows

    Install MySQL as Service in Windows

    When you manually install MySQL from zip, no MySQL service get created.

    To run MySQL Server as a service in windows, go to the folder where “mysqld.exe” is located and run following command

    mysqld.exe install
    

    If you want a differnt name for service, run

    mysqld.exe install SERVICE_NAME
    

    You can delete service with command

    sc delete SERVICE_NAME
    
  • Deploy MySQL Server in Kubernetes using Helm

    To install MySQL server in Kubernetes, run

    helm install stable/mysql
    

    Once install is completed, you will get something like

    NOTES:
    MySQL can be accessed via port 3306 on the following DNS name from within your cluster:
    incendiary-monkey-mysql.default.svc.cluster.local
    
    To get your root password run:
    
        MYSQL_ROOT_PASSWORD=$(kubectl get secret --namespace default incendiary-monkey-mysql -o jsonpath="{.data.mysql-root-password}" | base64 --decode; echo)
    
    To connect to your database:
    
    1. Run an Ubuntu pod that you can use as a client:
    
        kubectl run -i --tty ubuntu --image=ubuntu:16.04 --restart=Never -- bash -il
    
    2. Install the mysql client:
    
        $ apt-get update && apt-get install mysql-client -y
    
    3. Connect using the mysql cli, then provide your password:
        $ mysql -h incendiary-monkey-mysql -p
    
    To connect to your database directly from outside the K8s cluster:
        MYSQL_HOST=127.0.0.1
        MYSQL_PORT=3306
    
        # Execute the following command to route the connection:
        kubectl port-forward svc/incendiary-monkey-mysql 3306
    
        mysql -h ${MYSQL_HOST} -P${MYSQL_PORT} -u root -p${MYSQL_ROOT_PASSWORD}
    

    To connect to this MySQL, you need to create a temporary Ubuntu server in Kubernetes as MySQL is only available inside the cluster.

    To create a server, run

    kubectl run -i --tty ubuntu --image=ubuntu:18.04 --restart=Never -- bash -il
    

    Install MySQL client inside this server with

    apt update
    apt install mariadb-client -y
    

    To connect to MySQL, use the command provided after install, in my case

    mysql -h incendiary-monkey-mysql -u root -p
    

    You can get password by running

    kubectl get secret --namespace default incendiary-monkey-mysql -o jsonpath="{.data.mysql-root-password}" | base64 --decode; echo
    

    You can list packages installed using helm with

    boby@sok-01:~$ helm list
    NAME             	REVISION	UPDATED                 	STATUS  	CHART       	APP VERSION	NAMESPACE
    incendiary-monkey	1       	Tue Feb 26 22:24:13 2019	DEPLOYED	mysql-0.15.0	5.7.14     	default  
    boby@sok-01:~$ 
    

    To delete, run

    boby@sok-01:~$ helm delete incendiary-monkey
    release "incendiary-monkey" deleted
    boby@sok-01:~$ 
    
  • MySQL 8 apt Error The following signatures were invalid

    When trying to install MySQL 8 on Ubuntu 18.04, i get following error

    root@ssdnodes-45790:~# apt update
    Ign:1 http://download.webmin.com/download/repository sarge InRelease
    Hit:2 http://download.webmin.com/download/repository sarge Release                  
    Get:3 http://repo.mysql.com/apt/ubuntu bionic InRelease [16.9 kB]                                              
    Hit:5 http://archive.ubuntu.com/ubuntu cosmic InRelease                                                            
    Hit:6 http://archive.ubuntu.com/ubuntu cosmic-security InRelease
    Err:3 http://repo.mysql.com/apt/ubuntu bionic InRelease
      The following signatures were invalid: EXPKEYSIG 8C718D3B5072E1F5 MySQL Release Engineering 
    Hit:7 http://archive.ubuntu.com/ubuntu cosmic-updates InRelease
    Reading package lists... Done                     
    W: GPG error: http://repo.mysql.com/apt/ubuntu bionic InRelease: The following signatures were invalid: EXPKEYSIG 8C718D3B5072E1F5 MySQL Release Engineering 
    E: The repository 'http://repo.mysql.com/apt/ubuntu bionic InRelease' is not signed.
    N: Updating from such a repository can't be done securely, and is therefore disabled by default.
    N: See apt-secure(8) manpage for repository creation and user configuration details.
    root@ssdnodes-45790:~# 
    

    To fix this error, run

    apt-key adv --keyserver keys.gnupg.net --recv-keys 8C718D3B5072E1F5
    

    Now apt update will work.

    To list keys, run

    root@ssdnodes-45790:~# apt-key list
    /etc/apt/trusted.gpg
    --------------------
    pub   dsa1024 2003-02-03 [SCA] [expires: 2022-02-16]
          A4A9 4068 76FC BD3C 4567  70C8 8C71 8D3B 5072 E1F5
    uid           [ unknown] MySQL Release Engineering 
    
    pub   dsa1024 2002-02-28 [SCA]
          1719 003A CE3E 5A41 E2DE  70DF D97A 3AE9 11F6 3C51
    uid           [ unknown] Jamie Cameron 
    sub   elg1024 2002-02-28 [E]
    
    /etc/apt/trusted.gpg.d/ondrej_ubuntu_php.gpg
    --------------------------------------------
    pub   rsa1024 2009-01-26 [SC]
          14AA 40EC 0831 7567 56D7  F66C 4F4E A0AA E526 7A6C
    uid           [ unknown] Launchpad PPA for Ondřej Surý
    
    /etc/apt/trusted.gpg.d/ubuntu-keyring-2012-archive.gpg
    ------------------------------------------------------
    pub   rsa4096 2012-05-11 [SC]
          790B C727 7767 219C 42C8  6F93 3B4F E6AC C0B2 1F32
    uid           [ unknown] Ubuntu Archive Automatic Signing Key (2012) 
    
    /etc/apt/trusted.gpg.d/ubuntu-keyring-2012-cdimage.gpg
    ------------------------------------------------------
    pub   rsa4096 2012-05-11 [SC]
          8439 38DF 228D 22F7 B374  2BC0 D94A A3F0 EFE2 1092
    uid           [ unknown] Ubuntu CD Image Automatic Signing Key (2012) 
    
    /etc/apt/trusted.gpg.d/ubuntu-keyring-2018-archive.gpg
    ------------------------------------------------------
    pub   rsa4096 2018-09-17 [SC]
          F6EC B376 2474 EDA9 D21B  7022 8719 20D1 991B C93C
    uid           [ unknown] Ubuntu Archive Automatic Signing Key (2018) 
    
    root@ssdnodes-45790:~# 
    
  • MySQL Got error 24 Too many open files

    For ubuntu, see Ubuntu 18.04 MariaDB 10.2 Too many open files

    On taking MySQL backup with mysqldump, i get following error

    mysqldump: Got error: 1030: "Got error 24 "Too many open files" from storage engine MyISAM" when using LOCK TABLES
    mysqldump: Error: 'Out of resources when opening file '/tmp/#sql_f68_2.MAD' (Errcode: 24 "Too many open files")' when trying to dump tablespaces
    

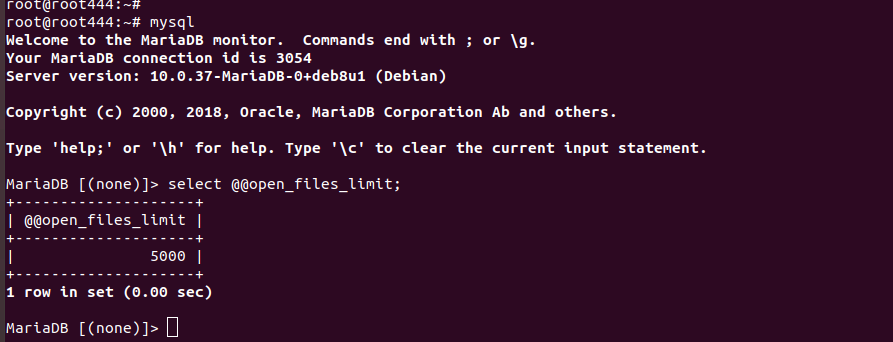
    This is because open_files_limit limit in MySQL. To verify login to MySQL server and run

    select @@open_files_limit;
    

    This will give you current value of open_files_limit.

    To increase, edit /etc/my.cnf file, add

    vi /etc/my.cnf
    

    Add under [mysqld] section

    open_files_limit = 5000
    

    Now restart MySQL server

    systemctl restart mysql
    
  • MySQL Out of resources when opening file

    MySQL Out of resources when opening file

    On a MySQL server got the error

    Out of resources when opening file '/tmp/#sql_318d_0.MAD' (Errcode: 24 "Too many open files")
    

    This is because number of files allowed to open by MySQL is set to too low. To view current settings, in MySQL command prompt, run

    select @@open_files_limit;
    

    Or

    show variables like "open%";
    

    To increase the value, edit MySQL configuration file, this normally located in /etc/my.cnf, on some servers, it will be on /etc/mysql/my.cnf, add following under [mysqld] section.

    open_files_limit = 5000
    

    Now restart MySQL

    systemctl restart mysql
    

    Verify it is changed with command

    select @@open_files_limit;
    

    MySQL open_files_limit

  • mysqldump packet bigger than max_allowed_packet

    mysqldump packet bigger than max_allowed_packet

    When backing up a MySQL database using mysqldump command, got following error

    [root@vps189 ~]# mysqldump sok_main > sok_main.sql
    mysqldump: Error 2020: Got packet bigger than 'max_allowed_packet' when dumping table `wp_options` at row: 7068
    [root@vps189 ~]#
    

    To fix, you need to edit MySQL config file

    vi /etc/my.cnf
    

    Add following under [mysqld] section

    max_allowed_packet=2G
    

    Now restart MySQL with

    systemctl restart mysql
    

    You can verify the value is changed by running following SQL command in MySQL prompt

    show variables like 'max_allowed_packet';
    

    Or my running following command in command line

    mysqladmin variables | grep max_allowed_packet
    

    On a VPS, editing /etc/my.cnf did not changed the value in MySQL for some reason. I got it fixed by running mysqldump with –max_allowed_packet=2G option.

    mysqldump --max_allowed_packet=2G DB_NAME > DB_NAME.sql
    
  • Reset MySQL 5.7 root password on Ubuntu 16.04

    First stop MySQL with command

    service mysql stop
    

    Now run

    mysqld_safe --skip-grant-tables
    

    On Ubuntu 16.04 server with MySQL 5.7, when i run, i get following error.

    root@sok-06:~# mysqld_safe --skip-grant-tables
    2018-12-29T06:13:26.191918Z mysqld_safe Logging to syslog.
    2018-12-29T06:13:26.195961Z mysqld_safe Logging to '/var/log/mysql/error.log'.
    2018-12-29T06:13:26.199396Z mysqld_safe Directory '/var/run/mysqld' for UNIX socket file don't exists.
    root@sok-06:~#
    

    To fix, this error, create a the folder and change ownership to user mysql

    mkdir /var/run/mysqld
    chown -R mysql:mysql /var/run/mysqld
    

    Now start a new terminal, login to MySQL with command

    mysql -u root -p
    

    You can press enter for password, you will be logged in with no password.

    To reset MySQL root password, run

    FLUSH PRIVILEGES;
    ALTER USER 'root'@'localhost' IDENTIFIED BY 'YOUR_NEW_MYSQL_PW';
    exit
    

    Now kill the MySQL process with command

    killall mysqld
    

    Start MySQL normally with

    service mysql start
    
  • MySQL Permission denied

    MySQL Permission denied

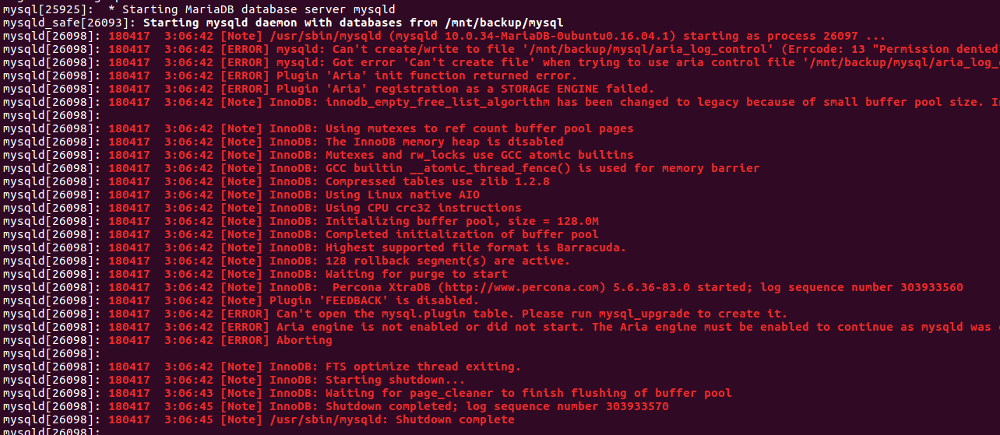
    After changing MySQL data directory, i get error

    Apr 17 03:01:20 hon-pc-01 mysqld[25298]: 180417 3:01:20 [Note] /usr/sbin/mysqld (mysqld 10.0.34-MariaDB-0ubuntu0.16.04.1) starting as process 25297 …
    Apr 17 03:01:20 hon-pc-01 mysqld[25298]: 180417 3:01:20 [ERROR] mysqld: Can’t create/write to file ‘/mnt/backup/mysql/aria_log_control’ (Errcode: 13 “Permission denied”)
    Apr 17 03:01:20 hon-pc-01 mysqld[25298]: 180417 3:01:20 [ERROR] mysqld: Got error ‘Can’t create file’ when trying to use aria control file ‘/mnt/backup/mysql/aria_log_control’

    To fix error, you need following permissions.

    chown -R mysql:mysql /var/lib/mysql
    chmod -R 700 /var/lib/mysql
    

    Replace /var/lib/mysql with path to mysql data directory.

    If this don’t resolve the problem, you need to check permission for parent folder.

    What i did was to login as user “mysql” and see if i can change to MySQL data directory folder, if you have problem going to this folder, fix the permission that block you, mostly it is due to parent folder permission.

    By default mysql user don’t have SSH access, to enable use vipw and change

    mysql:x:122:130:MySQL Server,,,:/nonexistent:/bin/false
    

    To

    mysql:x:122:130:MySQL Server,,,:/mnt/backup/mysql:/bin/bash
    

    Here /mnt/backup/mysql is where i store my MySQL data. Change it to whatever directory you store MySQL.

    MySQL

  • Change MySQL root password

    If you have MYSQL root password and want to change the MySQL root password, first log in to MYSQL with the command

    mysql -u root -p
    

    Method 1

    UPDATE mysql.user SET Password=PASSWORD('MYSQL_ROOT_PASSWORD') WHERE User='root';
    FLUSH PRIVILEGES;
    

    Method 2

    ALTER USER 'root'@'localhost' IDENTIFIED  BY 'MYSQL_ROOT_PASSWORD';
    

    OR

    ALTER USER 'root'@'localhost' IDENTIFIED WITH mysql_native_password BY 'MYSQL_ROOT_PASSWORD';
    

    Method 3

    Use command

    mysqladmin -u root -p password
    

    This command will ask for new and old MySQL password.

    MySQL Password mysql