Category: Linux

  • Easy Kubernetes setup on Ubuntu with microk8s

    Easy Kubernetes setup on Ubuntu with microk8s

    To install microk8s, run

    sudo snap install microk8s --classic
    

    Enable rules in firewall

    sudo ufw allow in on cni0
    sudo ufw allow out on cni0
    sudo ufw default allow routed
    

    Enable addons

    microk8s enable dns dashboard storage
    

    To see status of current addons, run

    microk8s status
    

    Here is status for a defaul install

    root@ip-172-26-0-217:~# microk8s status
    microk8s is running
    high-availability: no
      datastore master nodes: 127.0.0.1:19001
      datastore standby nodes: none
    addons:
      enabled:
        ha-cluster           # Configure high availability on the current node
      disabled:
        ambassador           # Ambassador API Gateway and Ingress
        cilium               # SDN, fast with full network policy
        dashboard            # The Kubernetes dashboard
        dns                  # CoreDNS
        fluentd              # Elasticsearch-Fluentd-Kibana logging and monitoring
        gpu                  # Automatic enablement of Nvidia CUDA
        helm                 # Helm 2 - the package manager for Kubernetes
        helm3                # Helm 3 - Kubernetes package manager
        host-access          # Allow Pods connecting to Host services smoothly
        ingress              # Ingress controller for external access
        istio                # Core Istio service mesh services
        jaeger               # Kubernetes Jaeger operator with its simple config
        keda                 # Kubernetes-based Event Driven Autoscaling
        knative              # The Knative framework on Kubernetes.
        kubeflow             # Kubeflow for easy ML deployments
        linkerd              # Linkerd is a service mesh for Kubernetes and other frameworks
        metallb              # Loadbalancer for your Kubernetes cluster
        metrics-server       # K8s Metrics Server for API access to service metrics
        multus               # Multus CNI enables attaching multiple network interfaces to pods
        portainer            # Portainer UI for your Kubernetes cluster
        prometheus           # Prometheus operator for monitoring and logging
        rbac                 # Role-Based Access Control for authorisation
        registry             # Private image registry exposed on localhost:32000
        storage              # Storage class; allocates storage from host directory
        traefik              # traefik Ingress controller for external access
    root@ip-172-26-0-217:~# 
    

    To see all pods/services/deploymens, run

    microk8s kubectl get all --all-namespaces
    

    To avoid typing microk8s before kubectl, run

    alias kubectl="microk8s kubectl"
    

    You can add this to .bashrc to make it permanent.

    To run an nginx container

    root@ip-172-26-0-217:~# microk8s kubectl create deployment nginx --image=nginx:latest
    deployment.apps/nginx created
    root@ip-172-26-0-217:~# microk8s kubectl get pods
    NAME                     READY   STATUS    RESTARTS   AGE
    nginx-55649fd747-xngk5   1/1     Running   0          106s
    root@ip-172-26-0-217:~# 
    

    To expose the nginx deployment to public, run

    kubectl expose deployment nginx --port 80 --target-port 80  --type ClusterIP --name nginx --external-ip 172.26.0.217
    

    Here –external-ip 172.26.0.217 is IP of the node. In this case, it is internal IP of Amazon ec2 sevrer (eth0 IP).

    The above expose command create a service

    root@ip-172-26-0-217:~# kubectl get services
    NAME         TYPE        CLUSTER-IP      EXTERNAL-IP    PORT(S)   AGE
    kubernetes   ClusterIP   10.152.183.1             443/TCP   45m
    nginx        ClusterIP   10.152.183.11   172.26.0.217   80/TCP    8s
    root@ip-172-26-0-217:~# 
    

    To undo the expose command, you need to delete the service with name nginx.

    root@ip-172-26-0-217:~# kubectl delete services nginx
    service "nginx" deleted
    root@ip-172-26-0-217:~# 
    

    See Kubernetes
  • How to use HTTP Basic authentication with cURL

    To access sites that use HTTP Basic authentication with curl, use command

    curl -u USERNAME_HERE:PASSWORD_HERE http://domain.extn
    

    Or

    curl -u USERNAME_HERE http://domain.extn
    

    If you don’t specify password, curl will promt for password.

    See curl

  • How to install Imunify360 antivirus

    Imunify360 is a security software that includes antivirus, firewall, intruder detection, and web application firewall (WAF). It can block attacks and malware uploads in real time.

    To start the installation, run the following script with your activation key:

    wget https://repo.imunify360.cloudlinux.com/defence360/i360deploy.sh
    bash i360deploy.sh --key

    If you have an IP-based license, run the same script with no arguments:

    wget https://repo.imunify360.cloudlinux.com/defence360/i360deploy.sh
    bash i360deploy.sh

    See imunify

  • Show IP address in history

    On the Linux Server, the history command shows previously executed commands. If you have many people working on a server, it is better log IP address of the user who run the command along with time for security reason.

    To log, IP and date, create a file

    vi /usr/local/bin/sok_detailed_history

    In the file, add

    #!/bin/bash
    # Author: ServerOK.in
    # Email: [email protected]
    # Web; https://serverok.in
    
    SET_IP=`echo -n $SSH_CLIENT|cut -d' ' -f1`
    if [[ `tail -n1 ~/.bash_history|rev|cut -c -4|rev` != `date +%Y` ]]
    then
        sed -i "\$s/$/ #entered by `echo -n $SET_IP` on `date`/g" ~/.bash_history
    fi

    Make it executable

    chmod 755 /usr/local/bin/sok_detailed_history

    Create file

    vi  /etc/profile.d/sok_detailed_history.sh

    Add the following to the file

    export PROMPT_COMMAND="history -a; /bin/bash /usr/local/bin/sok_detailed_history"

    Log out and log in to the server. Now your history will also record IP address that is used to login to server. PROMPT_COMMAND environment variable allows you to execute a command every time command promt is shown. To see how PROMPT_COMMAND works, just run

    PROMPT_COMMAND="echo I am here"

    Example

    boby@sok-01:~$ PROMPT_COMMAND="echo I am here"
    I am here
    boby@sok-01:~$ 
    I am here
    boby@sok-01:~$ 
    I am here
    boby@sok-01:~$ 

    Every time I press enter, the command specified in the PROMPT_COMMAND variable gets executed. Just close the current terminal to undo the change.

    See history

  • elasticsearch insufficient memory

    When starting elasticsearch on CentOS 7 server, it failed with error. Checking the logs with

    journalctl -u elasticsearch
    

    Found following errors

    systemd[1]: Starting Elasticsearch...
    systemd-entrypoint[2438]: Exception in thread "main" java.lang.RuntimeException: starting java failed with [1]
    systemd-entrypoint[2438]: output:
    systemd-entrypoint[2438]: #
    systemd-entrypoint[2438]: # There is insufficient memory for the Java Runtime Environment to continue.
    systemd-entrypoint[2438]: # Native memory allocation (mmap) failed to map 16710107136 bytes for committing reserved memory.
    systemd-entrypoint[2438]: # An error report file with more information is saved as:
    systemd-entrypoint[2438]: # /var/log/elasticsearch/hs_err_pid2576.log
    systemd-entrypoint[2438]: error:
    systemd-entrypoint[2438]: OpenJDK 64-Bit Server VM warning: INFO: os::commit_memory(0x00000003dc000000, 16710107136, 0) failed; error='Not enough space' (errno=
    systemd-entrypoint[2438]: at org.elasticsearch.tools.launchers.JvmOption.flagsFinal(JvmOption.java:119)
    systemd-entrypoint[2438]: at org.elasticsearch.tools.launchers.JvmOption.findFinalOptions(JvmOption.java:81)
    systemd-entrypoint[2438]: at org.elasticsearch.tools.launchers.JvmErgonomics.choose(JvmErgonomics.java:38)
    systemd-entrypoint[2438]: at org.elasticsearch.tools.launchers.JvmOptionsParser.jvmOptions(JvmOptionsParser.java:135)
    systemd-entrypoint[2438]: at org.elasticsearch.tools.launchers.JvmOptionsParser.main(JvmOptionsParser.java:86)
    systemd[1]: elasticsearch.service: main process exited, code=exited, status=1/FAILURE
    systemd[1]: Failed to start Elasticsearch.
    systemd[1]: Unit elasticsearch.service entered failed state.
    systemd[1]: elasticsearch.service failed.
    

    To fix it, edit file

    /etc/elasticsearch/jvm.options
    

    At end of the file, add

    -Xms1g
    -Xmx1g
    

    Restart elasticsearch with

    systemctl restart elasticsearch
    

    Verify elasticsearch is running with

    systemctl restart elasticsearch
    curl localhost:9200
    

    See elasticsearch

  • Change MySQL root password in Virtualmin

    Change MySQL root password in Virtualmin

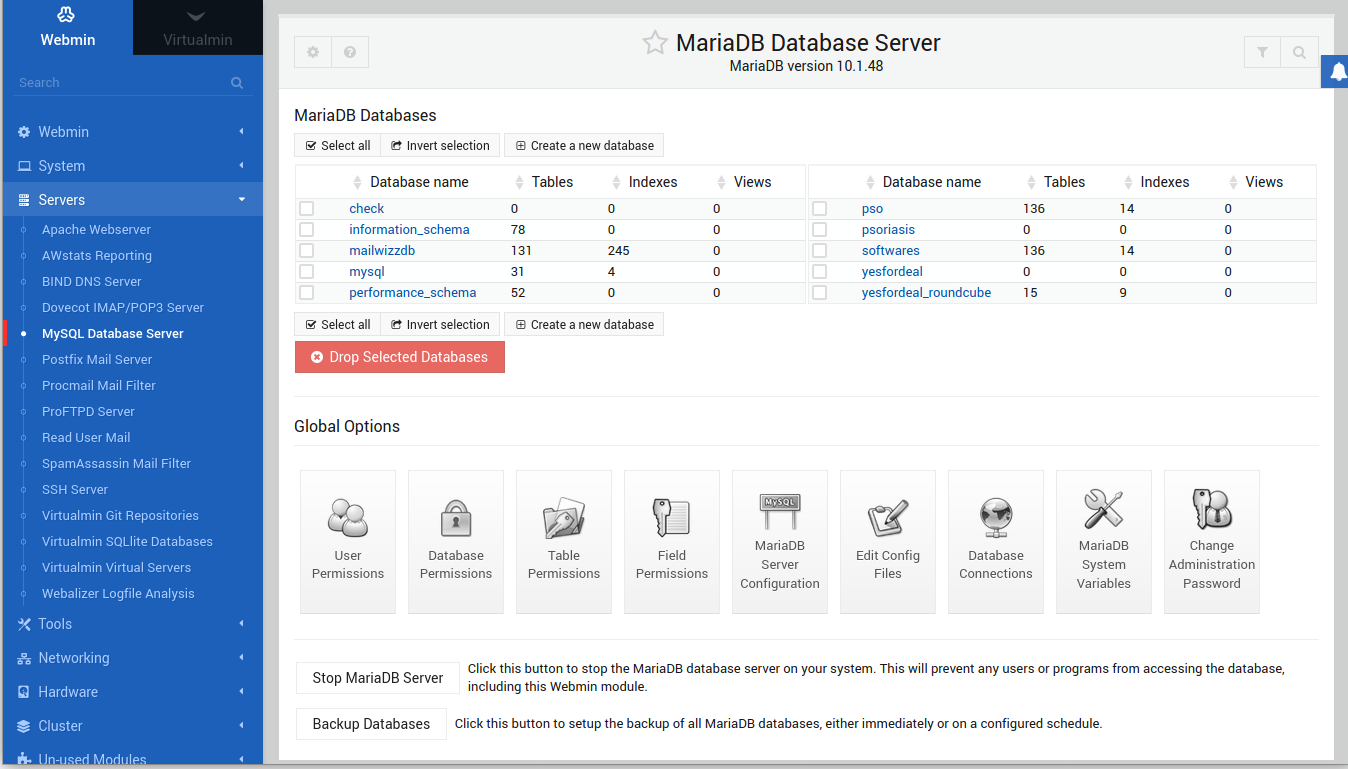
    To change MySQL root password in Virualmin server, login to virtualmin, navigate to

    Webmin > Servers > MySQL Database Server
    

    virtualmin mysql password

    Click on “Change Administration Password” button. On next page, it will show current MySQL root password and provide option to change MySQL root password.

    See Virtualmin

  • Drupal

    Drupal

    Drupal 7 Enable/Disable Maintenance Mode
    How to change URL of a Drupal site

    Get information about drupal installation

    drush status
    

    How to list all users

    drush uinf $(drush sqlq "SELECT GROUP_CONCAT(name) FROM users_field_data")
    

    How to change password of a user

    drush user:password admin "PASSWORD_HERE"
    
  • setfacl

    The setfacl utility sets Access Control Lists (ACLs) of files and directories.

    To install setfacl on Ubuntu/Debian, run

    apt install acl
    

    Here is an example, where we create 2 users, one user will be given access to folder inside another users home directory.

    useradd -m --shell /bin/bash  user1
    useradd -m --shell /bin/bash  user2
    su - user1
    mkdir share
    setfacl -m u:user2:rwx share
    

    in setfacl, -m option is used to modify. u specify user, if you need to set acl for a group, use g instead of u.

    See Linux Commands

  • cryptsetup

    cryptsetup is used to encypt disk on Linux. I used TrueCrypt before this. After TrueCrypt stopped the project, i started using cryptsetup for my encrypted drive.

    To mount an encrypted disk, run

    cryptsetup luksOpen /dev/sda3 sda3_crypt
    

    Example

    cryptsetup luksOpen /dev/sdb4 enfs1
    mount /dev/mapper/enfs1 /mnt/tmp
    

    See mount

  • Elasticsearch failed to start on CentOS 7

    Elasticsearch failed to start on CentOS 7

    After installing elasticsearch on CentOS 7, it failed to start with error

    [root@ns3160182 ~]# systemctl start elasticsearch.service
    
    Job for elasticsearch.service failed because the control process exited with error code. See "systemctl status elasticsearch.service" and "journalctl -xe" for details.
    [root@ns3160182 ~]# 
    [root@ns3160182 ~]# systemctl status elasticsearch.service
    ● elasticsearch.service - Elasticsearch
       Loaded: loaded (/usr/lib/systemd/system/elasticsearch.service; enabled; vendor preset: disabled)
       Active: failed (Result: exit-code) since Sat 2021-03-06 11:10:24 CET; 28s ago
         Docs: https://www.elastic.co
      Process: 10234 ExecStart=/usr/share/elasticsearch/bin/systemd-entrypoint -p ${PID_DIR}/elasticsearch.pid --quiet (code=exited, status=1/FAILURE)
     Main PID: 10234 (code=exited, status=1/FAILURE)
       CGroup: /system.slice/elasticsearch.service
    
    Mar 06 11:10:24 ns3160182.ip-151-106-34.eu systemd-entrypoint[10234]: at org.elasticsearch.bootstrap.Elasticsearch.execute(Elasticsearch.java:161)
    Mar 06 11:10:24 ns3160182.ip-151-106-34.eu systemd-entrypoint[10234]: at org.elasticsearch.cli.EnvironmentAwareCommand.execute(EnvironmentAwareCommand.java:86)
    Mar 06 11:10:24 ns3160182.ip-151-106-34.eu systemd-entrypoint[10234]: at org.elasticsearch.cli.Command.mainWithoutErrorHandling(Command.java:127)
    Mar 06 11:10:24 ns3160182.ip-151-106-34.eu systemd-entrypoint[10234]: at org.elasticsearch.cli.Command.main(Command.java:90)
    Mar 06 11:10:24 ns3160182.ip-151-106-34.eu systemd-entrypoint[10234]: at org.elasticsearch.bootstrap.Elasticsearch.main(Elasticsearch.java:126)
    Mar 06 11:10:24 ns3160182.ip-151-106-34.eu systemd-entrypoint[10234]: at org.elasticsearch.bootstrap.Elasticsearch.main(Elasticsearch.java:92)
    Mar 06 11:10:24 ns3160182.ip-151-106-34.eu systemd[1]: elasticsearch.service: main process exited, code=exited, status=1/FAILURE
    Mar 06 11:10:24 ns3160182.ip-151-106-34.eu systemd[1]: Failed to start Elasticsearch.
    Mar 06 11:10:24 ns3160182.ip-151-106-34.eu systemd[1]: Unit elasticsearch.service entered failed state.
    Mar 06 11:10:24 ns3160182.ip-151-106-34.eu systemd[1]: elasticsearch.service failed.
    [root@ns3160182 ~]#
    

    On checking journalctl, i get

    [root@ns3160182 ~]# journalctl -u elasticsearch
    -- Logs begin at Sat 2021-02-13 16:48:02 CET, end at Sat 2021-03-06 11:12:02 CET. --
    Mar 06 11:10:01 ns3160182.ip-151-106-34.eu systemd[1]: Starting Elasticsearch...
    Mar 06 11:10:24 ns3160182.ip-151-106-34.eu systemd-entrypoint[10234]: fatal error in thread [main], exiting
    Mar 06 11:10:24 ns3160182.ip-151-106-34.eu systemd-entrypoint[10234]: java.lang.NoClassDefFoundError: Could not initialize class com.sun.jna.Native
    Mar 06 11:10:24 ns3160182.ip-151-106-34.eu systemd-entrypoint[10234]: at org.elasticsearch.systemd.Libsystemd.lambda$static$0(Libsystemd.java:34)
    Mar 06 11:10:24 ns3160182.ip-151-106-34.eu systemd-entrypoint[10234]: at java.base/java.security.AccessController.doPrivileged(AccessController.java:312)
    Mar 06 11:10:24 ns3160182.ip-151-106-34.eu systemd-entrypoint[10234]: at org.elasticsearch.systemd.Libsystemd.(Libsystemd.java:33)
    Mar 06 11:10:24 ns3160182.ip-151-106-34.eu systemd-entrypoint[10234]: at org.elasticsearch.systemd.SystemdPlugin.sd_notify(SystemdPlugin.java:126)
    Mar 06 11:10:24 ns3160182.ip-151-106-34.eu systemd-entrypoint[10234]: at org.elasticsearch.systemd.SystemdPlugin.onNodeStarted(SystemdPlugin.java:137)
    Mar 06 11:10:24 ns3160182.ip-151-106-34.eu systemd-entrypoint[10234]: at java.base/java.util.ArrayList.forEach(ArrayList.java:1511)
    Mar 06 11:10:24 ns3160182.ip-151-106-34.eu systemd-entrypoint[10234]: at org.elasticsearch.node.Node.start(Node.java:902)
    Mar 06 11:10:24 ns3160182.ip-151-106-34.eu systemd-entrypoint[10234]: at org.elasticsearch.bootstrap.Bootstrap.start(Bootstrap.java:317)
    Mar 06 11:10:24 ns3160182.ip-151-106-34.eu systemd-entrypoint[10234]: at org.elasticsearch.bootstrap.Bootstrap.init(Bootstrap.java:402)
    Mar 06 11:10:24 ns3160182.ip-151-106-34.eu systemd-entrypoint[10234]: at org.elasticsearch.bootstrap.Elasticsearch.init(Elasticsearch.java:170)
    Mar 06 11:10:24 ns3160182.ip-151-106-34.eu systemd-entrypoint[10234]: at org.elasticsearch.bootstrap.Elasticsearch.execute(Elasticsearch.java:161)
    Mar 06 11:10:24 ns3160182.ip-151-106-34.eu systemd-entrypoint[10234]: at org.elasticsearch.cli.EnvironmentAwareCommand.execute(EnvironmentAwareCommand.java:86)
    Mar 06 11:10:24 ns3160182.ip-151-106-34.eu systemd-entrypoint[10234]: at org.elasticsearch.cli.Command.mainWithoutErrorHandling(Command.java:127)
    Mar 06 11:10:24 ns3160182.ip-151-106-34.eu systemd-entrypoint[10234]: at org.elasticsearch.cli.Command.main(Command.java:90)
    Mar 06 11:10:24 ns3160182.ip-151-106-34.eu systemd-entrypoint[10234]: at org.elasticsearch.bootstrap.Elasticsearch.main(Elasticsearch.java:126)
    Mar 06 11:10:24 ns3160182.ip-151-106-34.eu systemd-entrypoint[10234]: at org.elasticsearch.bootstrap.Elasticsearch.main(Elasticsearch.java:92)
    Mar 06 11:10:24 ns3160182.ip-151-106-34.eu systemd[1]: elasticsearch.service: main process exited, code=exited, status=1/FAILURE
    Mar 06 11:10:24 ns3160182.ip-151-106-34.eu systemd[1]: Failed to start Elasticsearch.
    Mar 06 11:10:24 ns3160182.ip-151-106-34.eu systemd[1]: Unit elasticsearch.service entered failed state.
    Mar 06 11:10:24 ns3160182.ip-151-106-34.eu systemd[1]: elasticsearch.service failed.
    [root@ns3160182 ~]# 
    

    To fix this, edit file

    vi /etc/sysconfig/elasticsearch
    

    At end of the file, add

    ES_TMPDIR=/var/log/elasticsearch
    

    Now elasticsearch will start

    systemctl start elasticsearch
    

    elasticsearch CentOS 7 error

    Verify service is running with

    systemctl status elasticsearch
    

    To confirm elasticsearch is running, use command

    curl localhost:9200
    

    See elasticsearch

  • Install dnsmasq on Ubuntu

    dnsmasq is a very powerful tool that can provide basic dns services/caching, act as dhcp server and also as tftp server.

    To install dnsmasq, run

    apt install dnsmasq
    

    When you start dnsmasq, if it complain about port 53 alreay in use

    dnsmasq: failed to create listening socket for port 53: Address already in use
    

    This is because some other service is running on port 53. To find what service is listening on port 53, run

    root@first-vm:~# netstat -lntp
    Active Internet connections (only servers)
    Proto Recv-Q Send-Q Local Address           Foreign Address         State       PID/Program name    
    tcp        0      0 0.0.0.0:2222            0.0.0.0:*               LISTEN      4934/sshd: /usr/sbi 
    tcp        0      0 127.0.0.53:53           0.0.0.0:*               LISTEN      93/systemd-resolved 
    tcp        0      0 127.0.0.1:3306          0.0.0.0:*               LISTEN      26081/mysqld        
    tcp6       0      0 :::2222                 :::*                    LISTEN      4934/sshd: /usr/sbi 
    tcp6       0      0 :::80                   :::*                    LISTEN      10467/apache2       
    tcp6       0      0 :::3128                 :::*                    LISTEN      17606/(squid-1)     
    root@first-vm:~#
    

    In this case, it is systemd-resolved. To stop it, run

    systemctl disable systemd-resolved
    systemctl stop systemd-resolved
    

    Now you can start dnsmasq with

    systemctl start dnsmasq
    

    After starting dnsmasq, if you try resolve a domain, it will fail

    root@first-vm:~# nslookup yahoo.com localhost
    ;; connection timed out; no servers could be reached
    
    
    root@first-vm:~#
    

    This is because default configuration don’t have anything enabled. To enable DNS caching/resolver, you need to edit file

    vi /etc/dnsmasq.conf
    

    Add line

    server=8.8.8.8
    server=1.1.1.1
    

    Restart dnsmasq

    systemctl restart dnsmasq
    

    Now you will be able to resolve domain name using localhost as the dns server.

    root@first-vm:~# nslookup serverok.in localhost
    Server:		localhost
    Address:	::1#53
    
    Non-authoritative answer:
    Name:	serverok.in
    Address: 172.67.133.148
    Name:	serverok.in
    Address: 104.21.14.2
    Name:	serverok.in
    Address: 2606:4700:3030::ac43:8594
    Name:	serverok.in
    Address: 2606:4700:3035::6815:e02
    
    root@first-vm:~# 
    

    If you need dnsmasq listen to only local ip, add following in /etc/dnsmasq.conf and restart dnsmasq.

    listen-address=127.0.0.1
    

    If you need to override MX record for a domain, you can add following to dnsmasq.conf

    mx-host=example.com,mail.example.com,5
    

    To set txt record for a domain

    txt-record=example.com,"v=spf1 a -all"
    

    See dnsmasq