Load Balancer is used to distribute incoming traffic to multiple backend servers.
Here are some of the popular software load balancers
Load Balancer is used to distribute incoming traffic to multiple backend servers.
Here are some of the popular software load balancers
CentovaCast is a control panel to manage online streaming services. It support shoucast, liqudsoap and icecast streaming servers.
To change MySQL Password in CentovaCast, update following files.
/usr/local/centovacast/etc/centovacast.conf
You will see something like
# Enter your database connection information. DB_NAME=centovacastdb DB_USER=centovacast DB_PASS=MySQLPasswordHere DB_HOST=localhost
Following files is auto generated, this file also contain MySQL login details
/usr/local/centovacast/system/autoconfig.php
See CentovaCast
I got error “Can’t locate version.pm in @INC” running awk.
[root@vmi431969 /]# ack mp3pdjSu5B0 Can't locate version.pm in @INC (@INC contains: /usr/local/lib64/perl5 /usr/local/share/perl5 /usr/lib64/perl5/vendor_perl /usr/share/perl5/vendor_perl /usr/lib64/perl5 /usr/share/perl5 .) at /usr/local/bin/ack line 18. BEGIN failed--compilation aborted at /usr/local/bin/ack line 18. [root@vmi431969 /]#
On CentOS, this error is fixed by running
yum install perl-version.x86_64 -y
See Errors
Wildcard DNS zone will act as authoritative DNS for any domain name. This is useful when you have a service like domain name parking service, where customers will change name servers of their domain name to your private label name servers. You need all thse domains get resolved to a specific IP address with out manually configuring DNS zone for each of the domain name.
Install Bind DNS server.
On Ubuntu/Debian
apt-get install bind9
On CentOS/RHEL
yum install bind9
Create a Catch-All zone file.
vi /etc/bind/catch-all.zone
Add following content to the file
@ IN SOA ns1.yourdomain.com. hostmaster.yourdomain.com. ( 1 3h 1h 1w 1d ) IN NS YOUR_IP_ADDR_HERE * IN A YOUR_IP_ADDR_HERE
In above, replace
YOUR_IP_ADDR_HERE = IP you need all domains resolve to.
yourdomain.com = replace with your private label name server domain.
To make this zone active, you need to add it to named.conf, edit
On CentOS
vi /etc/bind/named.conf.local
On Debian
vi /etc/bind/named.conf
At the end of the file, add
zone "." IN { type master; file "/etc/bind/catch-all.zone"; };
Verify there is no error.
named-checkconf
Restart bind
systemctl restart bind9
Now verify Catch all DNS zone works with
nslookup serverok.in YOUR_DNS_SERVER_IP_HERE
It should resolve to the IP address specified in DNS zone file catch-all.zone. In above example, i used serverok.in for testing, you can use any domain, that should resolve to the IP address.
If you need to set MX rcord for the domains, you can add following to end of catch-all.zone file
IN MX 0 mx1.mail-server.com. IN MX 5 mx2.mail-server.com.
See bind
On my local computer, i have installed openssh-server, but i don’t want it always enabled.
To disable openssh-server from auto start on boot, run
systemctl disable ssh
Example
root@lab:~# systemctl disable ssh Synchronizing state of ssh.service with SysV service script with /lib/systemd/systemd-sysv-install. Executing: /lib/systemd/systemd-sysv-install disable ssh Removed /etc/systemd/system/sshd.service. Removed /etc/systemd/system/multi-user.target.wants/ssh.service. root@lab:~#
If you want to start ssh server on boot, run systelctl enable ssh
root@lab:~# systemctl enable ssh Synchronizing state of ssh.service with SysV service script with /lib/systemd/systemd-sysv-install. Executing: /lib/systemd/systemd-sysv-install enable ssh Created symlink /etc/systemd/system/sshd.service → /lib/systemd/system/ssh.service. Created symlink /etc/systemd/system/multi-user.target.wants/ssh.service → /lib/systemd/system/ssh.service. root@lab:~#
See Ubuntu
To upgrade centovacast installation, run
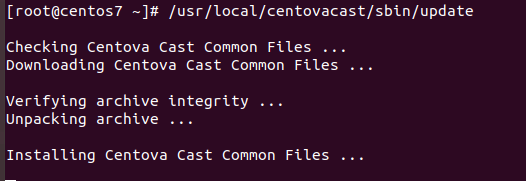
/usr/local/centovacast/sbin/update
If you don’t want to upgrade shotcast/icecast/luquidsoap, you can run
for f in /usr/local/centovacast/etc/update.d/80*; do mv ${f} ${f}.disabled; done
This will disable updating these services. Sometimes newer version need a differnt config file, so maybe disabling updating these helps.
[root@centos7 ~]# cd /usr/local/centovacast/etc/update.d/ [root@centos7 update.d]# ls -la total 56 drwxr-x---. 2 root centovacast 4096 Dec 3 08:50 . drwxr-x--x. 8 root centovacast 4096 Aug 17 01:03 .. -rw-r-----. 1 root centovacast 117 Nov 18 2019 01_cc-common.update -rw-r-----. 1 root centovacast 134 Nov 16 2019 30_cc-app.update -rw-r-----. 1 root centovacast 105 Jun 2 2017 35_cc-imaged.update -rw-r-----. 1 root centovacast 109 Sep 13 2019 35_cc-web.update -rw-r-----. 1 root centovacast 114 Apr 28 2015 40_cc-comet.update -rw-r-----. 1 root centovacast 129 Feb 7 2017 50_cc-control.update -rw-r-----. 1 root centovacast 110 Jun 2 2017 75_cc-ftpd.update -rw-r-----. 1 root centovacast 100 Oct 2 2015 80_cc-icecast.update.disabled.disabled -rw-r-----. 1 root centovacast 109 Dec 26 2016 80_cc-liquidsoap.update.disabled.disabled -rw-r-----. 1 root centovacast 108 Apr 14 2014 80_cc-sctrans2.update.disabled.disabled -rw-r-----. 1 root centovacast 109 Apr 14 2014 80_cc-shoutcast1.update.disabled.disabled -rw-r-----. 1 root centovacast 109 Apr 28 2015 80_cc-shoutcast2.update.disabled.disabled [root@centos7 update.d]#
Updating centovacast
[root@centos7 ~]# /usr/local/centovacast/sbin/update Checking Centova Cast Common Files ... Downloading Centova Cast Common Files ... Verifying archive integrity ... Unpacking archive ... Installing Centova Cast Common Files ... Failed to execute operation: Connection timed out Failed to start centovacast.service: Connection timed out See system logs and 'systemctl status centovacast.service' for details. Installation successful Checking Centova Cast Application Server ... Downloading Centova Cast Application Server ... Verifying archive integrity ... Unpacking archive ... Installing Centova Cast Application Server ... Stopping any existing Centova Cast web service ... Attempting to stop web: cc-web Stopping any existing Centova Cast application server service ... Attempting to stop app: cc-appserver Upgrading database ... OK Installation successful Starting Centova Cast application server service... Attempting to start app: cc-appserver Re-starting Centova Cast web service ... Attempting to start web: cc-web Checking Centova Cast Image Daemon ... Not updated, skipping Checking Centova Cast Web Server ... Downloading Centova Cast Web Server ... Verifying archive integrity ... Unpacking archive ... Installing Centova Cast Web Server ... Stopping any existing Centova Cast web service ... Attempting to stop web: cc-web Installation successful Starting Centova Cast web service... Attempting to start web: cc-web Checking Centova Cast Comet Daemon ... Not updated, skipping Checking Centova Cast Control Daemon ... Not updated, skipping Checking Centova Cast FTP Server ... Not updated, skipping [root@centos7 ~]#
See Centovacast
To see systemd logs, run
journalctl -f
To see a service specific logs (example postfix)
journalctl -f -u postfix
To see logs for a specific service, run
journalctl --unit apache2
Logs with out pagination
journalctl --no-pager -u nginx
journalctl -u lxc-net.service -n 30
Modify file
vi /etc/systemd/journald.conf
Set disk usage limit by modifying value of SystemMaxUse
SystemMaxUse=500M
to free up disk,run
journalctl --vacuum-size=500M
See systemd
To install elasticsearch, first install java
yum -y install java-1.8.0-openjdk
Import key
rpm --import https://artifacts.elastic.co/GPG-KEY-elasticsearch
Create file
vi /etc/yum.repos.d/elasticsearch.repo
Paste following
[elasticsearch] name=Elasticsearch repository for 7.x packages baseurl=https://artifacts.elastic.co/packages/7.x/yum gpgcheck=1 gpgkey=https://artifacts.elastic.co/GPG-KEY-elasticsearch enabled=0 autorefresh=1 type=rpm-md
Install elasticsearch
yum install --enablerepo=elasticsearch elasticsearch
Set elastic search to start on boot
systemctl enable elasticsearch
To start/stop/status
systemctl stop elasticsearch.service systemctl start elasticsearch.service systemctl status elasticsearch.service
To see logs
tail -f /var/log/elasticsearch/elasticsearch.log
ElasticSearch runs on port 9200
[root@server ~]# netstat -lntp | grep java tcp6 0 0 127.0.0.1:9200 :::* LISTEN 1289/java tcp6 0 0 ::1:9200 :::* LISTEN 1289/java tcp6 0 0 127.0.0.1:9300 :::* LISTEN 1289/java tcp6 0 0 ::1:9300 :::* LISTEN 1289/java [root@server ~]#
If you get error starting elasticsearch, check Elasticsearch failed to start on CentOS 7
If you have a previous installation, make sure you delete left over files before you install differnt version of elasticsearch. I removed following files/folders when i had to downgrade elasticsearch.
/etc/sysconfig/elasticsearch.rpmsave /var/lib/elasticsearch /var/log/elasticsearch
See elasticsearch
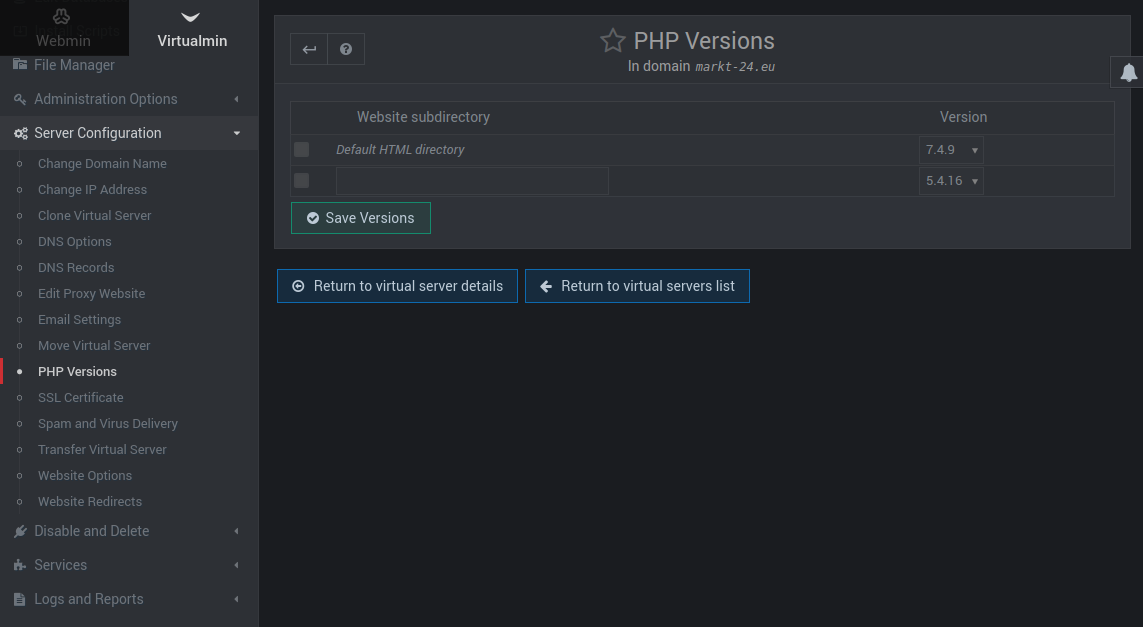
To change PHP version for a web site hosted in Virtualmin, click on the Virtualmin tab. Select the domain from drop down that you need to change PHP version for.
Virtualmin > YourDomain > Server Configuration > PHP Versions
On this page, select PHP version from drop down.
See Virtualmin
To protect files on Linux by accidently overwritten by > operator, you can use
set -o noclobber
Now if you try to overwrite a file with >, you will get error
root@ok:~# echo "Hello" > 1.txt -bash: 1.txt: cannot overwrite existing file root@ok:~#
If you really need to overwrite, use >! operator.
echo "Hello" >! FILE_NAME
Example
root@ok:~# echo "Hello" > 1.txt -bash: 1.txt: cannot overwrite existing file root@ok:~# echo "Hello" >! 1.txt root@ok:~#
Instead of running the command “set -o noclobber” everytime, you can add it to .bashrc file.
To extract Audio from Video using ffmpeg, run
ffmpeg -i VIDEO_FILE.mp4 audio.mp3
On web servers, you may need to get email alert when someone logs in to your server using SSH. To do this edit file
vi ~/.bashrc
Add
echo "ALERT - Bash shell access by user \"`whoami`\" to server $HOSTNAME on `date` " | mail -s "Alert: Shell access detected from user \"`whoami`\" from IP_Address: `who | cut -d"(" -f2 | cut -d")" -f1`" you@your-domain.com
In above, replace you@your-domain.com with your actual email address. You need a mail server installed on your server for this to work.
If you want to log to a file, add
echo 'ALERT - Root Shell Access (' `hostname` ') on:' `date` `who` >> /var/log/user-logins
See SSH