Category: Linux
-
Separate Google Hangout icon in Ubuntu 18.04/20.04
On Ubuntu 18.04/20.4, when you install google hangout plugin in google chrome, it shows samne as Google Chrome Icon. It act like you have opened 2 windows, it is hard to switch between as every time you click on Google chrome icon in side bar, it ask you to select which window to switch to.
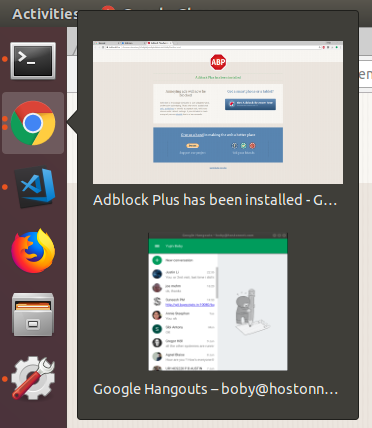
On Ubuntu 16.04, it shows same icon, but windows won’t combine in side bar, so you can click them seperately. To make Hangout show differnt icon in Ubuntu 18.04, first find ID of Google Hangout plugin. Go to Menu > More Tools > Extensions.
You need to enable “Developer mode” to see Extension ID, this can be done on extension page top-right side.
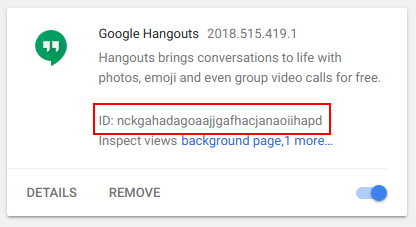
In this cause, we found ID of Google Hangout Extension as “nckgahadagoaajjgafhacjanaoiihapd”. This can change, so always find ID of extension you have installed.
Now create a file (make sure you replace GOOGLE_HANGOUT_PLUGIN_ID with ID you found in step above).
vi ~/.local/share/applications/chrome-GOOGLE_HANGOUT_PLUGIN_ID-Default.desktop
Add following to the file
#!/usr/bin/env xdg-open [Desktop Entry] Version=1.0 Terminal=false Type=Application Name=Gmail Exec=/opt/google/chrome/google-chrome --profile-directory=Default --app-id=GOOGLE_HANGOUT_PLUGIN_ID Icon=chrome-GOOGLE_HANGOUT_PLUGIN_ID-Default NoDisplay=true StartupWMClass=crx_GOOGLE_HANGOUT_PLUGIN_ID
Save and exit. Here is what i have on my computer.
boby@ok-pc-01:~$ cat ~/.local/share/applications/chrome-nckgahadagoaajjgafhacjanaoiihapd-Default.desktop #!/usr/bin/env xdg-open [Desktop Entry] Version=1.0 Terminal=false Type=Application Name=Gmail Exec=/opt/google/chrome/google-chrome --profile-directory=Default --app-id=nckgahadagoaajjgafhacjanaoiihapd Icon=chrome-nckgahadagoaajjgafhacjanaoiihapd-Default NoDisplay=true StartupWMClass=crx_nckgahadagoaajjgafhacjanaoiihapd boby@ok-pc-01:~$
Now if you start Google Hangout, it will show as differnt application. But Hangout won’t show generic icon.
To get hangout show proper icon, right click and save following icon file
Rename it as “chrome-GOOGLE_HANGOUT_PLUGIN_ID-Default.png”. Make sure to replace “GOOGLE_HANGOUT_PLUGIN_ID” with your actial plugin id. In my case, the name of the file is “chrome-nckgahadagoaajjgafhacjanaoiihapd-Default.png”
Put the icon file in following location.
~/.local/share/icons/hicolor/128x128/apps/chrome-GOOGLE_HANGOUT_PLUGIN_ID-Default.png
Now restart your computer or restart Gnome Shell, you will have new shiny icon for google hangout.
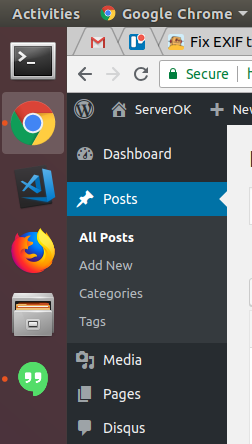
See Ubuntu 18.04
-
Enable Native Notification in Google Chrome
UPDATE: Google Chrome have this option removed now. But you still can manually enable it by editing config file. See Disable Native Notification on Google Chrome Ubuntu
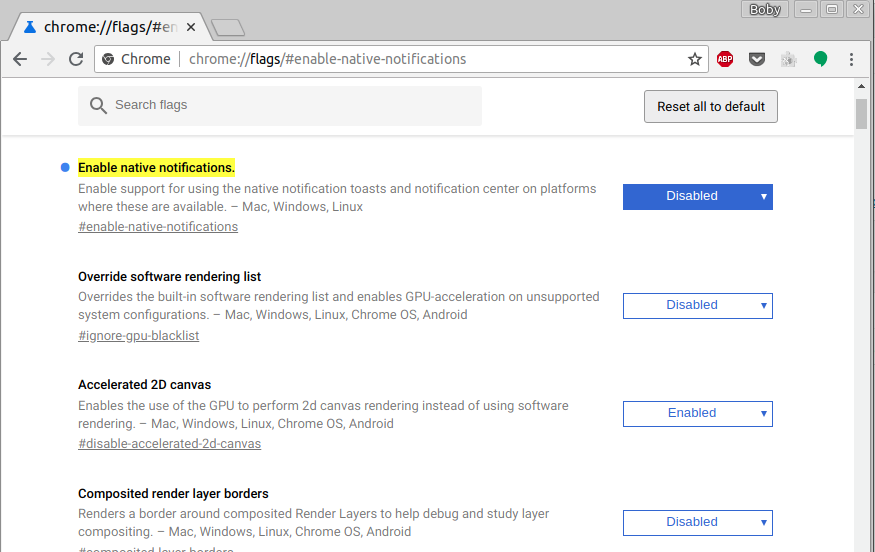
To enable/disable native notification in Google chrome, go to
chrome://flags/#enable-native-notifications
Once native notification is enabled/disabled, you will be asked to restart browser.
On Ubuntu 18.04, i disable Native Notification as it is buggy, come can’t control how long notification shown if you use native notification. With chrome provided notification, you can use javascript to disable notification after predefined time. On Ubuntu 16.04, native notification is disabled by default.
-
Install x2Go Client in Ubuntu
x2go client is available in Ubuntu repoitory. To install, run
apt install x2goclient
Here are some useful shortcuts
- Ctrl + Alt + F = Switch between full screen and window mode
- Ctrl + Alt + arrow keys = change view port.
-
Install Unity Desktop in Ubuntu 18.04
After installing Ubuntu 18.04, i have several small issues with new Gnome desktop, most of it i solved with plugins. But i decided to switch back to Unity desktop as for a while until i am ready to Gnome desktop.
To install Unity Desktop in Ubuntu 18.04, run
sudo apt install ubuntu-unity-desktop
You will be asked to select display manager. Select lightdm.
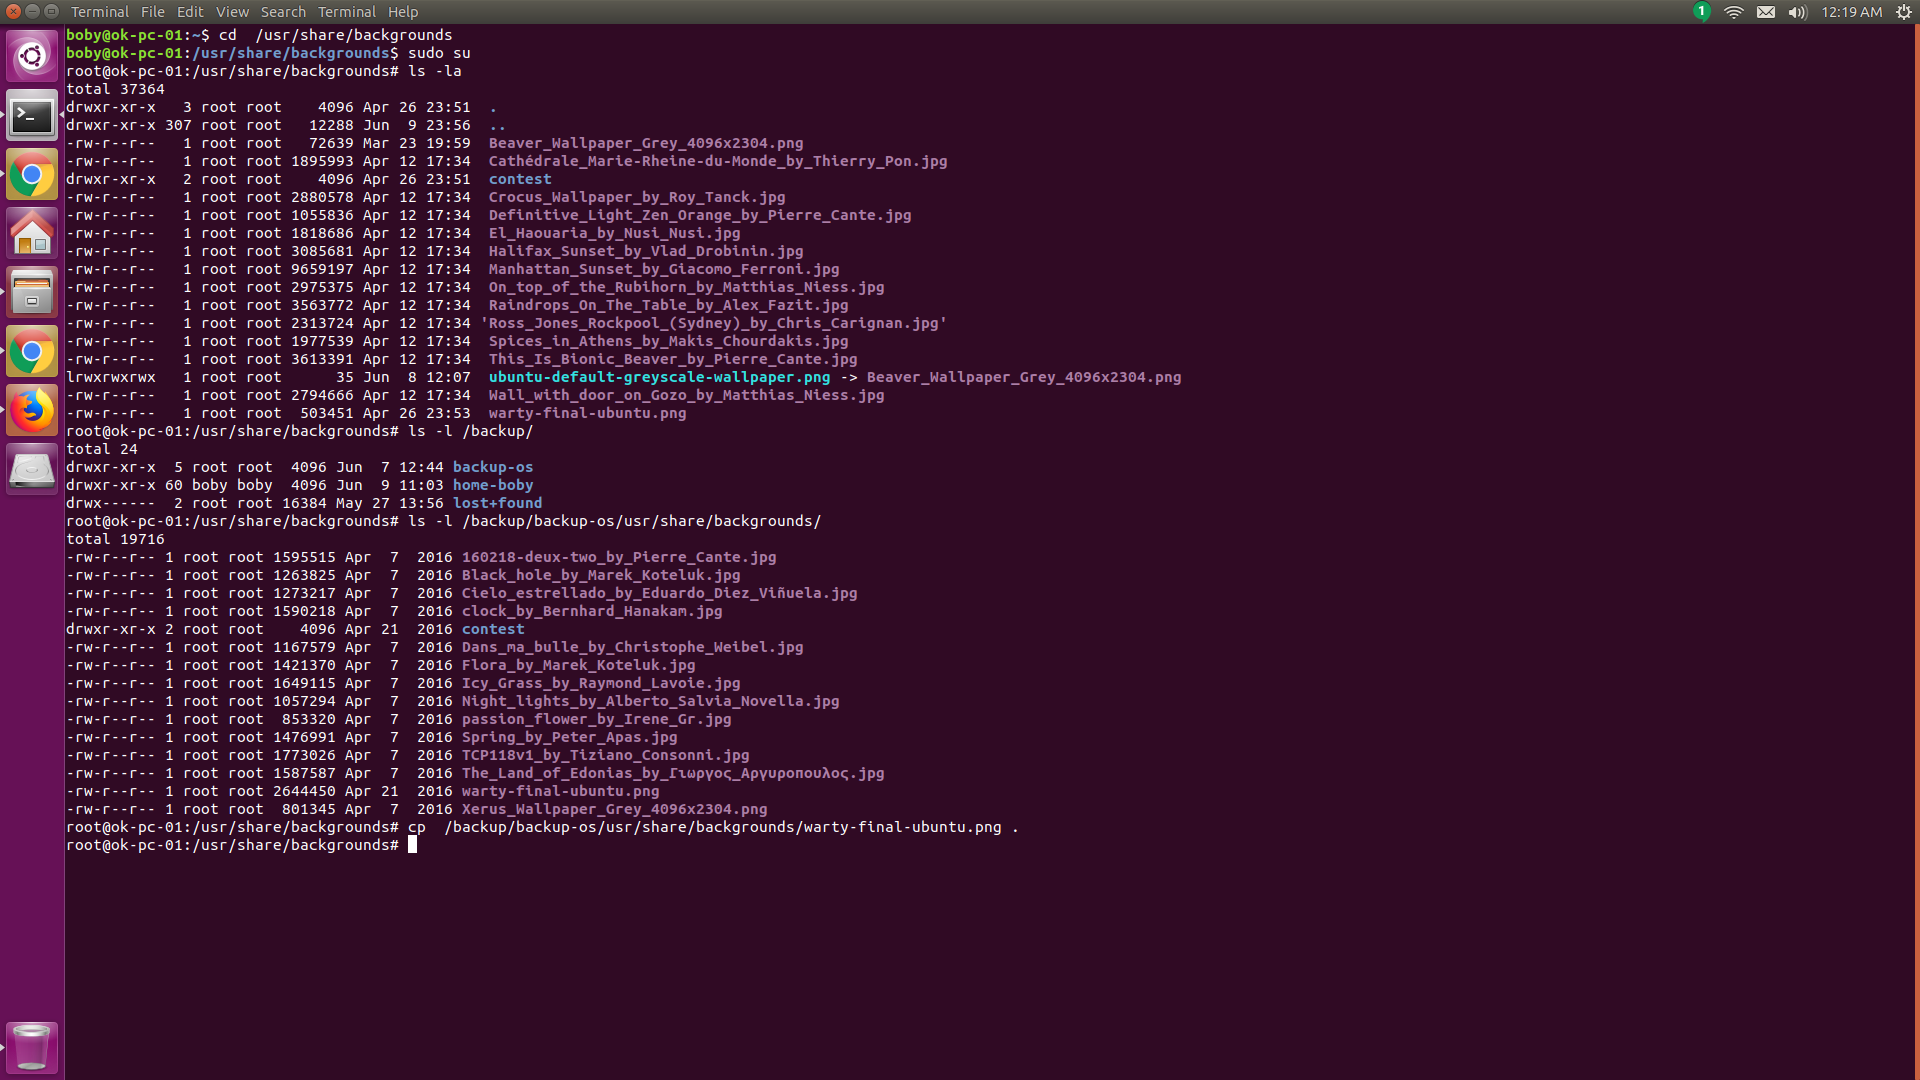
To make it look like Ubuntu 16.04, i copied old wallpaper used by Ubuntu 16.04
sudo cp /backup/backup-os/usr/share/backgrounds/warty-final-ubuntu.png /usr/share/backgrounds/warty-final-ubuntu.png
-
Things to do after installing Ubuntu 18.04
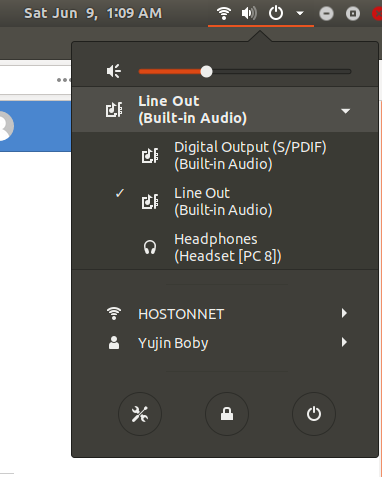
Today i installed Ubuntu 18.04. Ubuntu 18.04 use GNOME desktop instead of Unity Desktop. I like some of the new features, but missed some feeatured i am used to in Ubuntu 16.04. First thing i notice was i can’t easy change sound output device like in Ubuntu 16.04, i expected Ubuntu 18.04 made it easier. But after spending some time, i found out i can customize Gnome to make it work like i need.
Show date in top bar
I want to show date along with time in top bar. To enable this, you need to install gnome-tweek-tool.
sudo apt-get install gnome-tweak-tool
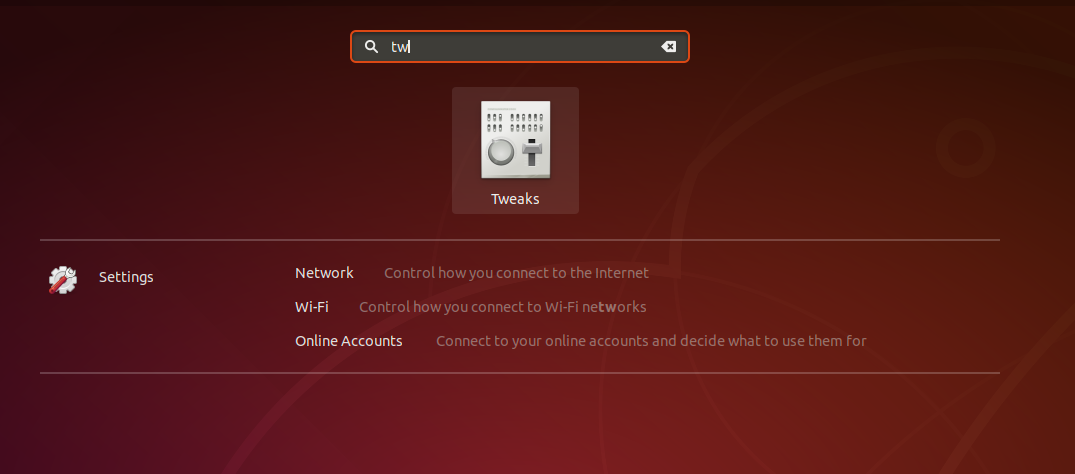
Now start gnome tweak tool, this is available as Tweaks
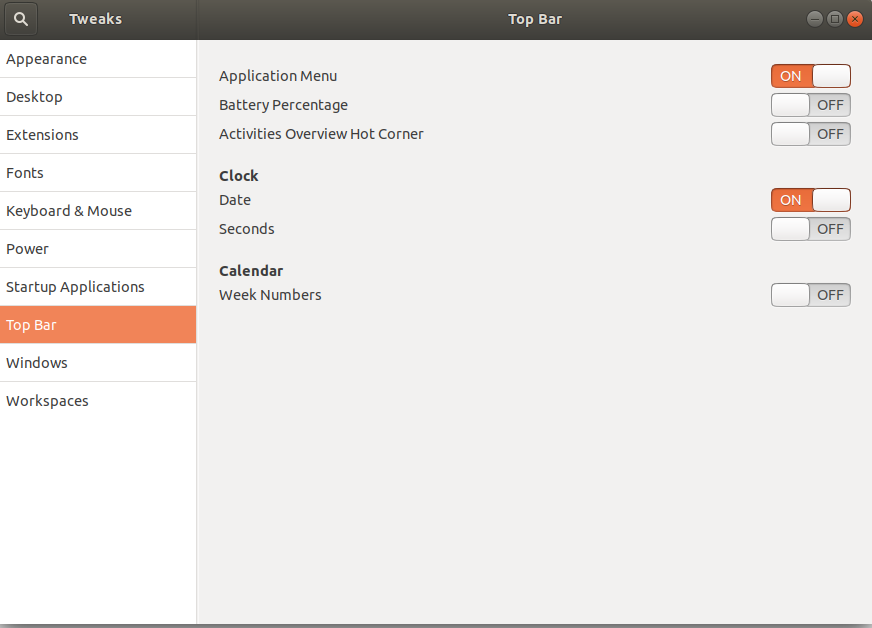
Go to Tweaks > Top Bar. Under clock, set “Date” to On.
Now you will see full date along with time.
Set time 12 Hour format
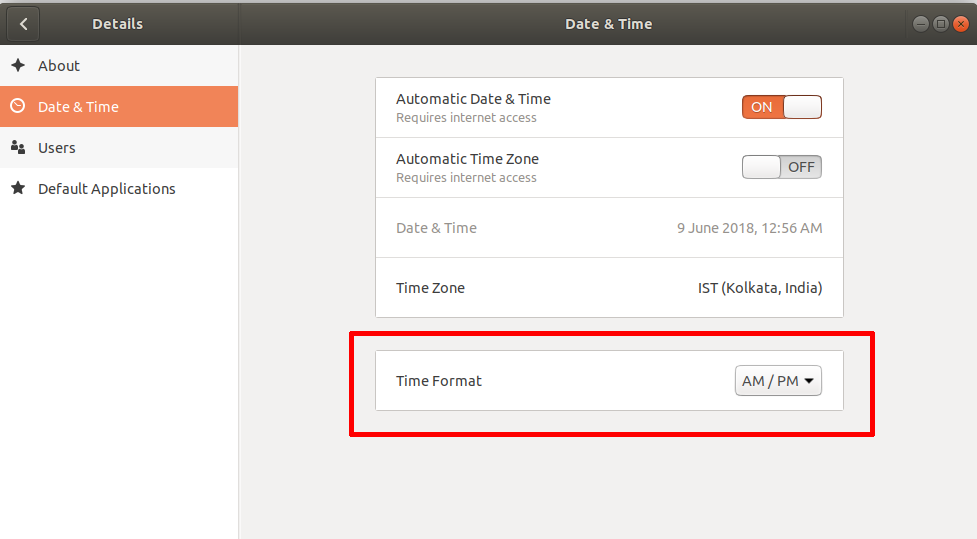
By default Ubuntu 18.04 show time in 24 hour format. I prefer 12 hour format with AM/PM.
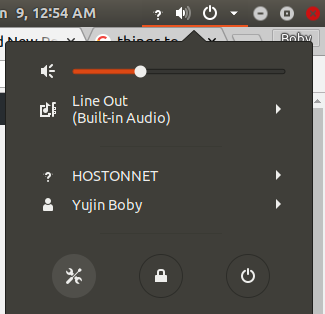
Click on Power button, select Settings.
Go to Details > Date & Time
Gnome Shell Extensions
You can customise how GNOME work by installing extensions. This is just like google chrome/firefox extensions. Installing is easy.
First run
sudo apt install gnome-shell-extensions chrome-gnome-shell
Now open your web browser, visit
This will ask you to install a browser plugin, so you can install Gnome Extensions easily from the browser itself.
For Firefox, install plugin
https://addons.mozilla.org/en-US/firefox/addon/gnome-shell-integration/
Create an account in Gnome.org, so you can manage your extensions.
Here is some of the Gnome Extensions i installed.
Unite
Unite make your Gnome Top bar like Unity. Date get moved to right side. Also application close buttons merge with top bar like in Ubunty. This save from top space. This is highly recommended if you are a Unity user switching to Gnome.
You can install it from
https://extensions.gnome.org/extension/1287/unite/
Sound Input & Output Device Chooser
This Gnome Extension allow you to easily switch sound devices.
You can get it from
https://extensions.gnome.org/extension/906/sound-output-device-chooser/
Remove Totem
Ubuntu come with Torem video player. I perfer VLC. Remove Totem and install VLC with
sudo apt remove --purge totem sudo apt install -y vlc
-
Install Tor on Ubuntu
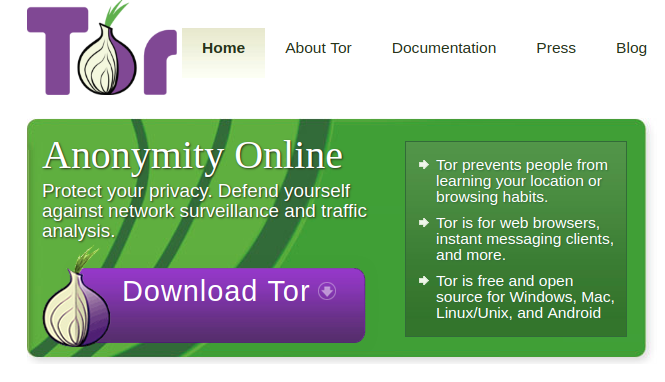
Tor is a highly anonymous proxy network. Tor is used by sites in dark web as it is almost impossible to find who owns a web site when it is hidden using tor.
To install tor on Ubuntu/Debian, run
apt install -y tor
This will start a sock5 proxy server on your PC on port 9050.
To check if proxy is working, run
root@ok-vm:~# curl --socks5 127.0.0.1:9050 http://checkip.amazonaws.com 185.220.101.44 root@ok-vm:~#
You can also use “torify”, that work like proxychains.
root@ok-vm:~# torify curl http://checkip.amazonaws.com 185.220.101.46 root@ok-vm:~#
You can configure your browser to use sock5 proxy server running on 127.0.0.1 on port 9050.
If you are using applications that do not support proxy, then you can use torify or proxychains, for example.
torify google-chrome
-
CloudFlare
- Cloudflare Page Rules for WordPress
- Configure Nginx Reverse Proxy behind Cloudflare
- Allow CloudFlare IP addresses with ipset
- How to block bad bots User-Agents in Cloudflare
Show Real IP
- Cloudflare Restore Real IP Address in Cpanel Server
- Cloudflare Restoring Visitor IP in Ubuntu Plesk Apache Server
- Cloudflare Show Real IP Address on CentOS Plesk Server
- Apache Show Real IP Address when using CloudFlare
- Nginx CloudFlare restore real ip
Whitelist Cloudflare IP in csf firewall
for x in $(curl -s https://www.cloudflare.com/ips-v4); do echo "csf -a $x"; done;
-
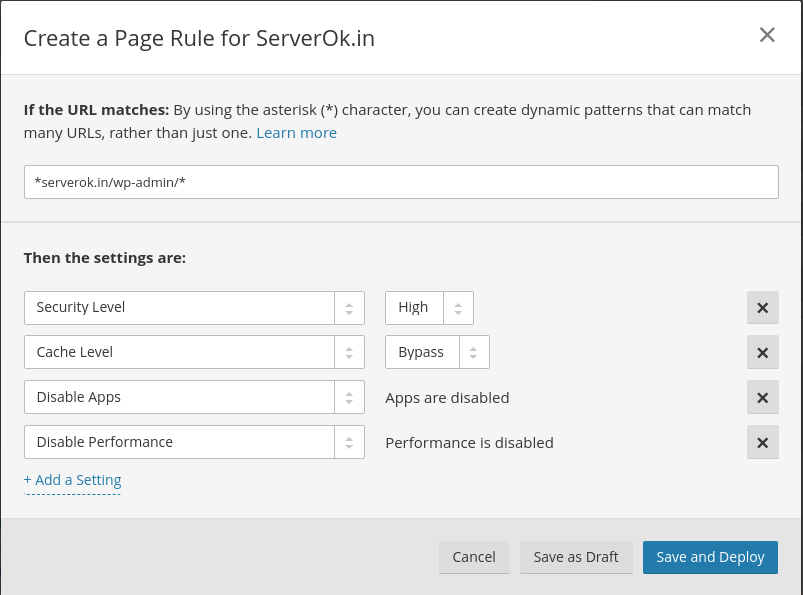
CloudFlare Page Rules for WordPress
Here are CloudFlare page rules for WordPress web site.
yourdomain/xmlrpc.php*
Security Level = High
yourdomain/wp-login.php*
Security Level = High Browser Integrity Check = On
yourdomain/wp-admin/*
Security Level = High Cache Level = Bypass Disable Apps Disable Performance
yourdomain/wp-content/uploads/*
Browser Cache TTL = a day Cache Level = Cache Everything Edge Cache TTL = a month
-
Backup PostgreSQL Database
To backup PostgreSQL database, run
pg_dump -h HOSTNMAME -p PORT -U USER -d DBNAME -W -f file.psql
Example
pg_dump -h ukgaa1vy7o672pj.caqdhl3x5dow.us-east-1.rds.amazonaws.com -p 5432 -U serveroku -d serverokdb -W -f file.psql
If you don’t have PostgreSQL installed, you can use docker, pull the appropriate version of docker image, in this case i used version 13.5, same version used by Amazon RDS, then run
docker run --rm -ti -e PGPASSWORD='PW_HERE' postgres:13.5 pg_dump -h serverok.ckdva7obgq6c.us-west-1.rds.amazonaws.com -U USER_HERE -d DB_NAME_HERE > backup.psql
It will prompt for the password, once you enter the password, the database will be backed up to file backup.psql
-
Microsoft Acquires GitHub, Migrate to GitLab
Microsoft on 4th June 2018 announced it reached agreement to acquire GitHub, worlds largest git repository hosting site used by developers. Under the terms of the agreement, Microsoft will acquire GitHub for $7.5 billion in Microsoft stock.
Git is an open source version control software created by Linus Torvalds, then creator of Linux. Linux kernel developers were using a version control software called BitKeeper, a proprietary closed source version control system. BitKeeper was licensed free of charge to Linux Open source community, later this license was revoked, that made Linus Torvalds make his own version control software GIT. Now GIT is most popular version control software, BitKeeper is almost dead and the company made it open source on GitHub. Maybe a sweet revenge from Git, if BitKeeper did not revoke the license to Linux community, never would have never happened and maybe everyone will be using BitKeeper now.
Until recently Microsoft had very bad relation with Open Source community. In 2001, in an interview with the Chicago Sun-Times, Microsoft CEO Steve Ballmer said that “Linux is a cancer that attaches itself in an intellectual property sense to everything it touches”. Microsoft used it patents against small and large companies using Linux, force them to settlement. Small companies usually don’t have financial freedom to fight Microsoft in court always goes for settlement, purchase whatever license Microsoft ask them to purchase.
Recently Microsoft started loving Linux because they realised they can’t kill Linux. With cloud, containers, mobile devices and IoT Linux is seeing explosive growth, taking away market share from Microsoft. They see no other way other than loving Linux and making windows work like linux.
GitHub being largest software repository, its very valuable for Microsoft. Many small and medium business keep their software in private repository in GitHub. Now Microsoft have access to those software repositories. They can also use GitHub to track software trends.
Many software developers are moving to GitHub alternatives. Here are some popular alternatives.
GitLab
GitLab is open source git hosting platform written in Ruby On Rails, similar to GitHub. Private repository is free with GitLab, on GitHub, you need to pay for private repository.
Many open source organisations prefer using GitLab because it is open source, allow them to modify GitLab to suit their work flow. Recently GNOME project moved to GitLab.
With GitHub, you don’t get the freedom to make custom modifications or workflows. Since GitLab is Open Source, there is no vendor lock in, you can migrate to another software with out much problem.
GitLab have hosted open like GitHub and also self hosted option, that you can run on any Linux server. You can find more at
If you want to install GitLab on VPS or Dedicated Server, email us at [email protected]
BitBucket
BitBucket is another GIT hosting platform. You can create private repository free in BitBucket. It is closed source.
BitBucket is ready to take GitHub users with its Home page update, welcoming GitHub users.
-
Install unrar on Linux
To install unrar on Ubuntu, run
apt install -y unrar
On CentOS/RHEL
yum install unrar
To install from source, download latest version from
https://www.rarlab.com/download.htm
cd /usr/local/src wget https://www.rarlab.com/rar/rarlinux-x64-5.6.b5.tar.gz tar zxvf rarlinux-x64-5.6.b5.tar.gz cd rar cp rar unrar rar_static /usr/bin
Extract a rar file
unrar x FILE_NAME.rar
Extract a rar file to specific folder
unrar x FILE_NAME.rar FOLDER_NAME