Start Nginx
nginx
Stop Nginx
nginx -s stop
Reload Nginx
nginx -s reload
Test Nginx configuration
nginx -t
See Nginx
Start Nginx
nginx
Stop Nginx
nginx -s stop
Reload Nginx
nginx -s reload
Test Nginx configuration
nginx -t
See Nginx
CentOS/RHEL/Fedora
yum groupinstall "Development Tools" -y
yum install glib2-devel openssl-devel pcre-devel bzip2-devel gzip-devel -y
Ubuntu/Debian
apt install build-essential -y
apt-get install libpcre3-dev libssl-dev zlib1g-dev -yuseradd -c "Nginx user" -s /bin/false -r -d /var/lib/nginx nginxYou can download latest version of Nginx source code from
https://nginx.org/en/download.html
To install version 1.19.2, run
cd /usr/local/src
wget http://nginx.org/download/nginx-1.24.0.tar.gz
tar -xzvf nginx-1.24.0.tar.gz
cd nginx-1.24.0
./configure --user=nginx --group=nginx --prefix=/usr/share --sbin-path=/usr/sbin/nginx --conf-path=/etc/nginx/nginx.conf --error-log-path=/var/log/nginx/error.log --http-log-path=/var/log/nginx/access.log --pid-path=/var/log/run/nginx.pid --lock-path=/var/log/lock/subsys/nginx --with-http_ssl_module --with-http_realip_module --with-http_addition_module --with-http_sub_module --with-http_dav_module --with-http_flv_module --with-http_gzip_static_module --with-http_stub_status_module --with-http_mp4_module --with-http_secure_link_module --with-http_v2_module
make
make installTo start nginx run
/usr/sbin/nginxConfiguration file is at
/etc/nginx/nginx.confcd /usr/local/src
curl -O http://nginx.org/download/nginx-1.24.0.tar.gz
tar -xzvf nginx-1.24.0.tar.gz
cd nginx-1.24.0
cd /usr/local/src
git clone https://github.com/arut/nginx-rtmp-module.git
cd /usr/local/src/nginx-1.24.0
./configure --prefix=/usr/local/nginx --with-http_ssl_module --with-http_mp4_module --with-file-aio --with-threads --with-http_stub_status_module --add-module=/usr/local/src/nginx-rtmp-module
make
make installto configure nginx-rtmp module, see
https://github.com/arut/nginx-rtmp-module
See Nginx
Nginx Proxy Manager is Docker based GUI for managing Nginx reverse proxy. It support LetsEncrypt free SSL.
https://nginxproxymanager.com
Nginx Proxy Manager Certificate Key is not valid
Install Custom SSL on Nginx Proxy Manager
To install, create a folder
mkdir nginx-proxy-manager
cd nginx-proxy-manager
Creaye docker-compose.yaml file
vi docker-compose.yaml
add following content
version: "3"
services:
  app:
    image: 'jc21/nginx-proxy-manager:latest'
    restart: always
    ports:
      # Public HTTP Port:
      - '80:80'
      # Public HTTPS Port:
      - '443:443'
      # Admin Web Port:
      - '81:81'
    environment:
      # These are the settings to access your db
      DB_MYSQL_HOST: "db"
      DB_MYSQL_PORT: 3306
      DB_MYSQL_USER: "npm"
      DB_MYSQL_PASSWORD: "npm"
      DB_MYSQL_NAME: "npm"
      # If you would rather use Sqlite uncomment this
      # and remove all DB_MYSQL_* lines above
      # DB_SQLITE_FILE: "/data/database.sqlite"
      # Uncomment this if IPv6 is not enabled on your host
      # DISABLE_IPV6: 'true'
    volumes:
      - ./data:/data
      - ./letsencrypt:/etc/letsencrypt
    depends_on:
      - db
  db:
    image: jc21/mariadb-aria:latest
    restart: always
    environment:
      MYSQL_ROOT_PASSWORD: 'npm'
      MYSQL_DATABASE: 'npm'
      MYSQL_USER: 'npm'
      MYSQL_PASSWORD: 'npm'
    volumes:
      - ./data/mysql:/var/lib/mysql
If you need to use other ports, for example, to handle streams, you need to add additional ports
Find
      # Admin Web Port:
      - '81:81'
To add port 3389, add
- '3389:3389'
If you don’t have docker and docker-compose installed, install it with
apt install docker.io docker-compose
To start Nginx Proxy Manager, run
docker-compose up -d
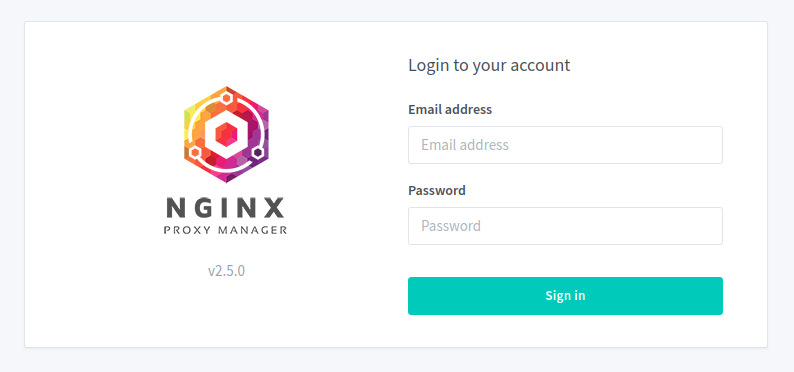
You can access Nginx Proxy Manager GUI at
http://your-server-ip:81/login
Default user name and passwords are
Email:    admin@example.com
Password: changeme
See Nginx
When you develop a web site, you will need it password protected so others won’t see or you don’t want google to index the web pages while you are working on it.
To password protect a web site in nginx, see
Nginx Password Protect a website
If you password protect a web site and try to get LetsEncrypt SSL cerificate using webroot verification method, it will fail. We need to disable password protection for url domain/.well-known. To do this, find
auth_basic "Members Only";
auth_basic_user_file /etc/nginx/.htpasswd;
Add below
location ^~ /.well-known/acme-challenge/ {
    auth_basic "off";
}
Now restart nginx
systemctl restart nginx
See Letsencrypt
To enable CORS in nginx, add the following inside web sites server config.
add_header 'Access-Control-Allow-Origin' '*';
add_header 'Access-Control-Allow-Credentials' 'true';
add_header 'Access-Control-Allow-Methods' 'GET, POST, OPTIONS';
add_header 'Access-Control-Allow-Headers' 'DNT,X-Mx-ReqToken,Keep-Alive,User-Agent,X-Requested-With,If-Modified-Since,Cache-Control,Content-Type';
Restart nginx
systemctl restart nginxSee CORS
To list modules compiled with nginx, you can run nginx -V
nginx -V
This print nginx version along with configuration used to compile nginx.

If you want just the list of modules, you can use following command
nginx -V 2>&1 | tr -- - '\n' | grep _module
Example
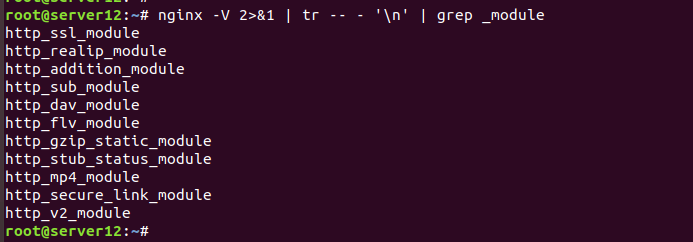
See Nginx
If you have a static website build using plain html files, your url will look like https://yourdomain/page.html. This .html extension is useful for the files when it is on your local computer, it help computer to associate the file with specific application, say your HTML editor. But on a web server this .html extension serve no purpose. If you are using Nginx web server, you can remove .html extension from your web page urls with following code.
location / {
    if ($request_uri ~ ^/(.*)\.html$) {
        return 301 /$1;
    }
    try_files $uri $uri.html $uri/ =404;
}
To remove .php extension, you can use
location / {
	try_files $uri $uri.html $uri/ @extensionless-php;
	index index.html index.htm index.php;
}

location @extensionless-php {
	rewrite ^(.*)$ $1.php last;
}
To retain arguments, use
return 301 /$1$is_args$args;
This will redirect /mypage.html?name= to /mypage?name=
Serve PHP file with .html extension
See Nginx
To show the full URL in the nginx access log, add the following
log_format main '$remote_addr - $remote_user [$time_local] '
                '"$request_method $scheme://$host$request_uri $server_protocol" '
                '$status $body_bytes_sent "$http_referer" '
                '"$http_user_agent" $request_time';
If you are behind a reverse proxy, replace $remote_addr with $http_x_forwarded_for
See Nginx
Logrotate by default rotate logs with numbers like following
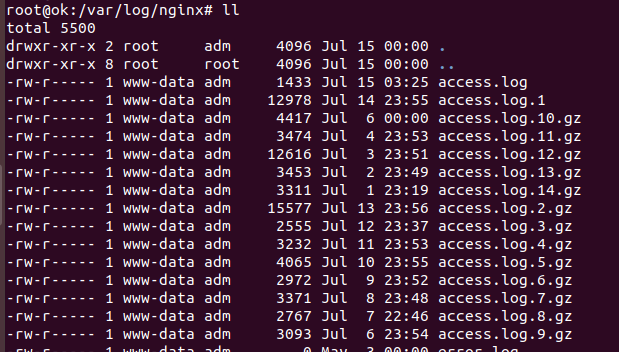
You can configure how many logs to keep and how to rotate lots by editing logrotate configuration file for nginx
root@ok:~# cat /etc/logrotate.d/nginx
/var/log/nginx/*.log {
	daily
	missingok
	rotate 14
	compress
	delaycompress
	notifempty
	create 0640 www-data adm
	sharedscripts
	prerotate
		if [ -d /etc/logrotate.d/httpd-prerotate ]; then \
			run-parts /etc/logrotate.d/httpd-prerotate; \
		fi \
	endscript
	postrotate
		invoke-rc.d nginx rotate >/dev/null 2>&1
	endscript
}
root@ok:~#
rotate 14 – this tells logrotate to keep logs for 14 days.
If you need to rotate logs by date, add
        dateext
        dateformat -%Y-%m-%d
Example
/var/log/nginx/*.log {
        daily
        missingok
        rotate 14
        compress
        delaycompress
        notifempty
        create 0640 www-data adm
        dateext
        dateformat -%Y-%m-%d
        sharedscripts
        prerotate
                if [ -d /etc/logrotate.d/httpd-prerotate ]; then \
                        run-parts /etc/logrotate.d/httpd-prerotate; \
                fi \
        endscript
        postrotate
                invoke-rc.d nginx rotate >/dev/null 2>&1
        endscript
}
See Logrotate
To enable SSL for stream, you can use nginx reverse proxy.
In this case, i have a stream available on
http://my-domain.com:8000/index.html?sid=1
I want to make it available using SSL at
https://my-domain.com:9000/index.html?sid=1
The port will need to be differnt as you can’t run both HTTP and HTTPS on same port. So i used Port 8000 here. All traffic to this port using HTTPS will be forwarded to HTTP port. To do this install nginx
yum install nginx
Add a virtual host configuration at
vi /etc/nginx/conf.d/port8000.conf
with following content
server {
    listen       8000 ssl;
    server_name  your-domain.com;
    root         /usr/share/nginx/html;
    ssl_certificate /etc/letsencrypt/live/your-domain.com/fullchain.pem;
    ssl_certificate_key /etc/letsencrypt/live/your-domain.com/privkey.pem;
    # include /etc/letsencrypt/options-ssl-nginx.conf;
    # ssl_dhparam /etc/letsencrypt/ssl-dhparams.pem;
    proxy_read_timeout 600s;
    location / {
        proxy_set_header X-Real-IP  $remote_addr;
        proxy_set_header X-Forwarded-For $remote_addr;
        proxy_set_header Host $host;
        proxy_pass http://YOUR_IP_HERE:8000;
    }
}
Now restart nginx
systemctl restart nginx
Since we used free LetsEncrypt SSL for the domain, you will need to auto restart Nginx. This can be done by adding a cronjon
@weekly systemctl restart nginx
You may also need to add cronjob for renewing SSL, this you can find at https://serverok.in/letsencrypt. In case of CentovaCast, SSL is managed by CentovaCast, so you need to worry about auto renewing SSL certificate.
To auto start Nginx on Windows, download
http://nssm.cc/download
Extract the file, you will find “nssm.exe” file for 32 and 64 bit windows. Copy the file for your Windows version to a folder like
C:\utils\nssm.exe
Start a command promt as user Administrator, then to go the folder where nssm.exe is, then run
.\nssm.exe install “Nginx”"
In the GUI select the nginx.exe path, click install service.
Now in Service Manager, you will see new service Nginx, that is set to autostart by default.
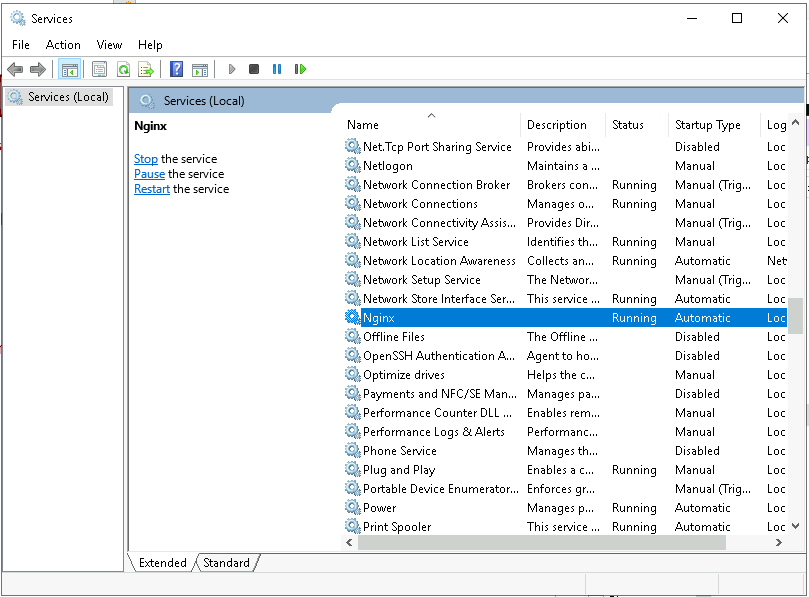
You can right click service name and select start.
On a Nginx server, when accessing a long url, i get error
HTTP 414 Request-URI Too Large

To fix the error, edit
vi /etc/nginx/nginx.conf
inside “http” section, find
large_client_header_buffers
Replace the line with
large_client_header_buffers 4 32k;
If your URL is very large, you may need to increase the 32k to higher or reduce the url length.
Large url like this mostly happend due to bad application design, so if possible try to make URL smaller.
Restart nginx
systemctl restart nginx
On older servers (centos 6, ubuntu 14, etc..), run
service nginx restart