Category: Cloud

  • Getting Started with Amazon ECS

    STEP 1: Creating a Cluster

    First step is creating a cluster. This can be done with CLI or Amazon Console. To do in CLI, run

    aws ecs create-cluster --cluster CLUSTER_NAME
    

    create amazon ecs cluster

    If you login to Amazon ECS console, you will see newly created cluster.
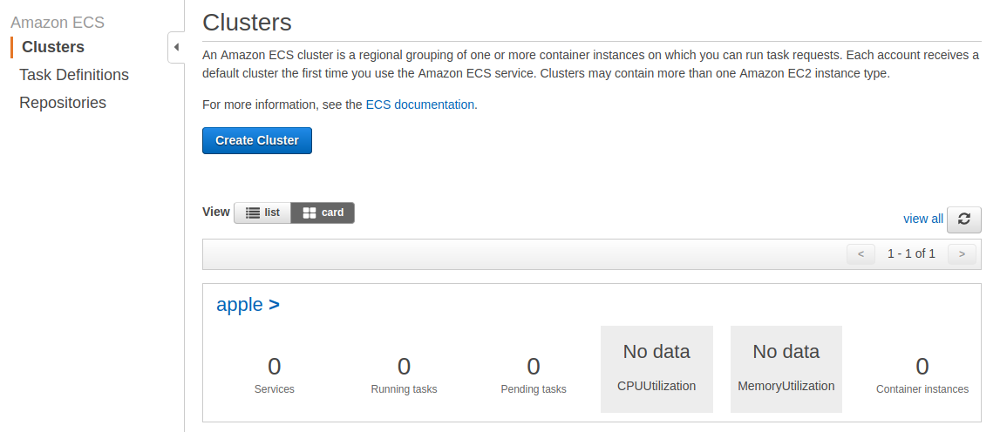
    Amazon ECS cluster console

    If you want to delete cluster, you can do with command line

    aws ecs delete-cluster --cluster CLUSTER_NAME
    

    STEP 2: Creating Task Definition

    Task definition tell Amazon ECS what docker image to run. It is like a blue print of task, not actual task. Once as Task Definition is created, you create Task based on it.

    Create a file “task-def.json” with following content.

    {
      "containerDefinitions": [
        {
          "name": "wordpress",
          "links": [
            "mysql"
          ],
          "image": "wordpress",
          "essential": true,
          "portMappings": [
            {
              "containerPort": 80,
              "hostPort": 80
            }
          ],
          "memory": 500,
          "cpu": 10
        },
        {
          "environment": [
            {
              "name": "MYSQL_ROOT_PASSWORD",
              "value": "password"
            }
          ],
          "name": "mysql",
          "image": "mysql",
          "cpu": 10,
          "memory": 500,
          "essential": true
        }
      ],
      "family": "serverok_blog"
    }
    

    Now run

    aws ecs register-task-definition --cli-input-json file:///path/to/task-def.json
    

    You will see something like
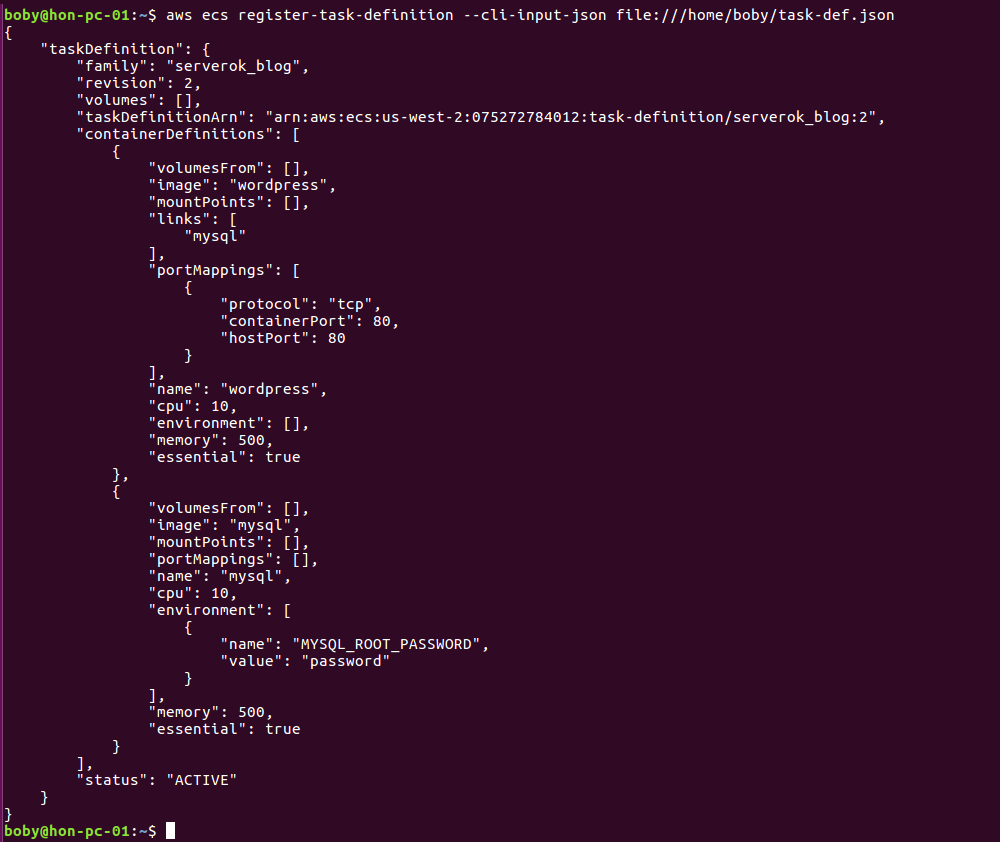
    Amazon ECS register task definition

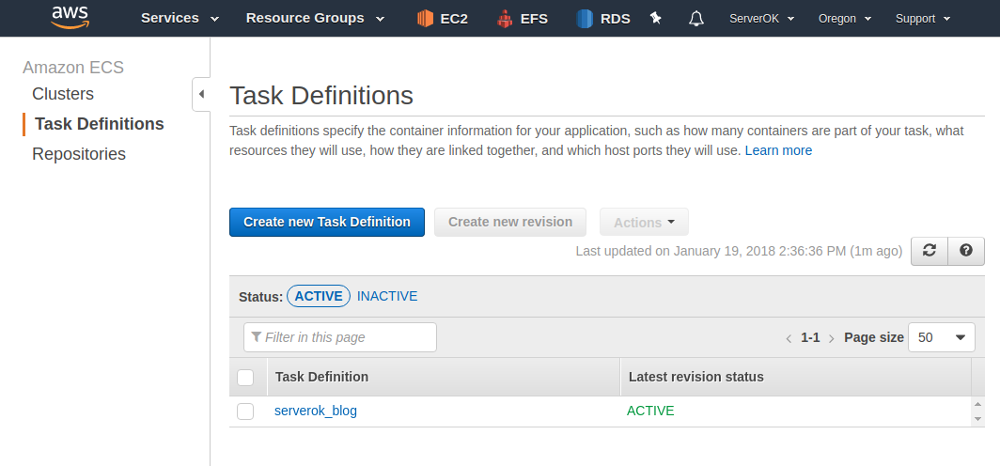
    You will see newly created Task Definition under Amazon AWS Console > ECS > Task Definitions.
    Updating Task Definition

    To change Task Definition, edit the JSON file. Run exactly same command used to register the task definition, it will update the Task Definition.

    In our Task Definition, we used password for MySQL “password”, let change it to secure password, run the command again to update Task Definition.

    boby@hon-pc-01:~$ aws ecs register-task-definition --cli-input-json file:///home/boby/task-def.json
    {
        "taskDefinition": {
            "family": "serverok_blog",
            "containerDefinitions": [
                {
                    "links": [
                        "mysql"
                    ],
                    "essential": true,
                    "memory": 500,
                    "environment": [],
                    "cpu": 10,
                    "name": "wordpress",
                    "mountPoints": [],
                    "image": "wordpress",
                    "volumesFrom": [],
                    "portMappings": [
                        {
                            "containerPort": 80,
                            "protocol": "tcp",
                            "hostPort": 80
                        }
                    ]
                },
                {
                    "essential": true,
                    "memory": 500,
                    "environment": [
                        {
                            "name": "MYSQL_ROOT_PASSWORD",
                            "value": "superman123"
                        }
                    ],
                    "cpu": 10,
                    "name": "mysql",
                    "mountPoints": [],
                    "image": "mysql",
                    "volumesFrom": [],
                    "portMappings": []
                }
            ],
            "taskDefinitionArn": "arn:aws:ecs:us-west-2:075272784012:task-definition/serverok_blog:3",
            "volumes": [],
            "revision": 3,
            "status": "ACTIVE"
        }
    }
    boby@hon-pc-01:~$ 
    
  • aws configure

    To configure awscli, run

    aws configure
    

    If you have multiple aws account, see Named Profiles

    To see list of profiles configured, run

    aws configure list
    

    See aws

  • Microsoft Azure Cross-platform Command Line Interface

    az is command line tool for Microsoft Azure. To install, see Install Microsoft Azure CLI on Ubuntu.

    Once az installed, you need to login. For this, first login to Microsoft Azure on same computer on browser. Open a terminal window, run

    az login
    

    Microsoft Azure Cross-platform Command Line Interface

    Go to the URL and enter the code, it show on the terminal. You get a confirmation message. Now you are logged in and able to use az commands.

  • Install Microsoft Azure CLI on Ubuntu

    To install Microsoft Azure CLI on Ubuntu, run

    AZ_REPO=$(lsb_release -cs)
    echo "deb [arch=amd64] https://packages.microsoft.com/repos/azure-cli/ $AZ_REPO main" | \
        sudo tee /etc/apt/sources.list.d/azure-cli.list
    

    Now run

    curl -L https://packages.microsoft.com/keys/microsoft.asc | sudo apt-key add -
    sudo apt-get install apt-transport-https
    sudo apt-get update && sudo apt-get install azure-cli
    

    You will be able to use az command now.

    Autenticate with Azure

    Run

    az login
    

    See az

  • Cloud Hosting Providers

    Here is a list of popular cloud providers. If you just need a server with a lot of CPU/RAM, it may better go with Dedicated Server, some are very cheap, but you don’t get features of cloud like hourly billing, ability to terminate a server, create another, snapshot, auto-scaling, etc.

    Cloud Servers (VPS)

    Public Cloud

    Cloud Software

  • Create Dummy Data in Amazon EFS

    Disk read/write speed in Amazon EFS depends on how much data you have on the file system.

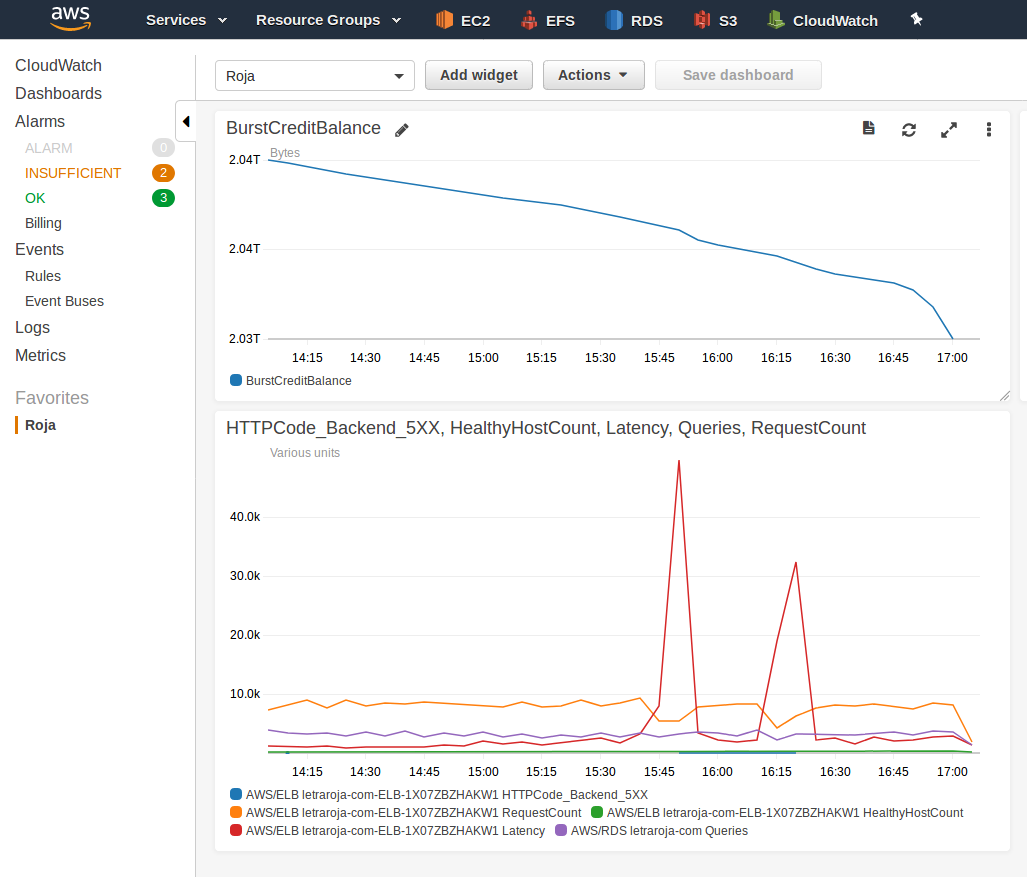
    Amazon EFS have something called BurstCreditBalance, that shows much much data balance you have available. Initially all file system have some 2 TB Burst credit, this is is for you to copy data. If you don’t copy dummy data or real data, your file system performance will degrade after your Burst credit used up.

    Amazon EFS burst credit

    To create dummy data, run

    cd /path/to/efs
    mkdir dummy
    cd dummy
    dd if=/dev/zero of=dymmy-data-1 bs=1M count=1024 oflag=sync
    cp dymmy-data-1 dymmy-data-2
    cp dymmy-data-1 dymmy-data-3
    cp dymmy-data-1 dymmy-data-4
    cp dymmy-data-1 dymmy-data-5
    cp dymmy-data-1 dymmy-data-6
    cp dymmy-data-1 dymmy-data-7
    cp dymmy-data-1 dymmy-data-8
    cp dymmy-data-1 dymmy-data-9
    cp dymmy-data-1 dymmy-data-10
    cp dymmy-data-1 dymmy-data-11
    cp dymmy-data-1 dymmy-data-12
    cp dymmy-data-1 dymmy-data-13
    cp dymmy-data-1 dymmy-data-14
    cp dymmy-data-1 dymmy-data-15
    cp dymmy-data-1 dymmy-data-16
    cp dymmy-data-1 dymmy-data-17
    cp dymmy-data-1 dymmy-data-18
    

    See Amazon EFS

  • Point Domain to Heroku App

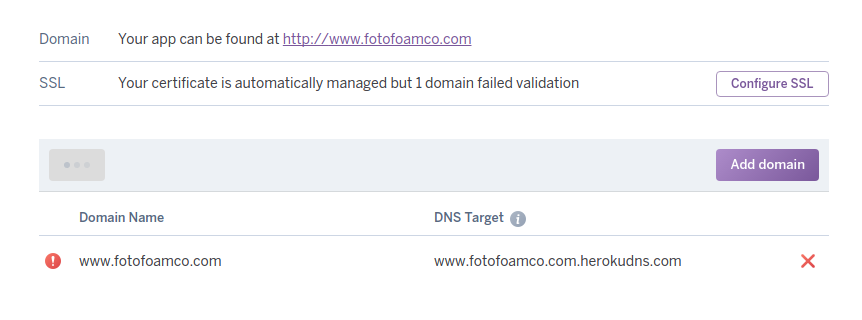
    To point a domain to heroku application, first add a domain to heroku application under Your Application > Settings.

    Once domain is added, you will see DNS record like

    You can login to your domain/DNS provider, add a CNAME record for www and point to the heroku domain provided.

    Naked Domain

    For domains with out www, you cant point to a CNAME. If your domain provider have option for URL forwarding, you need to forward the URL to http://www.yourdomain.com

    If you don’t have one, you may need to get a cheap web hosting and set forwarding for naked domain using .htaccess

  • heroku

    To install heroku cli on Ubuntu, run

    snap install heroku --classic
    
  • gcloud

    Cloud SQL

    gcloud components

    gcloud components list
    gcloud components install beta
    gcloud components update beta
    

    List current gcloud config

    gcloud config list
    

    Set a region

    gcloud config set compute/zone us-west2-b
    

    Config store in

    cat ~/.config/gcloud/configurations/config_default
    

    Swiitch between multiple gcloud users

    gcloud config configurations activate default
    gcloud config configurations activate NAME_HERE
    
  • Detach a disk from Google Compute Instance

    To remove a disk from Google Compute instance, run

    gcloud compute instances detach-disk INSTANCE_NAME --disk=DISK
    

    Example

    Here “indiameds” is name of the disk i want to detach from google compute instance with name “debug-instance”.

    Google Cloud only allow detaching secondary disks. Boot disks can’t be detached, only way to detach a boot disk and attach on a new instance is to delete the instance. Make sure you don’t delete the disk along with the instance.

    See gcloud

  • Amazon RDS ERROR 1040 (08004): Too many connections

    On an Amazon RDS Aurora data base, when i connect, i get error

    root@ip-10-0-0-234:/var/www/html# mysql -h sok.cb21y0qmezhd.us-west-2.rds.amazonaws.com -u sok_wp -p0ZEkrkQx  sok_wp
    ERROR 1040 (08004): Too many connections
    root@ip-10-0-0-234:/var/www/html# 
    

    This error is due to max_connections setting in MySQL exceeded. By default Amazon RDS set max_connections based on size of RDS instance using following formula.

    GREATEST({log(DBInstanceClassMemory/805306368)*45},{log(DBInstanceClassMemory/8187281408)*1000})
    

    To see current value, run

    MySQL [sok_wp]> show variables like 'max_connections';
    +-----------------+-------+
    | Variable_name   | Value |
    +-----------------+-------+
    | max_connections | 90    |
    +-----------------+-------+
    1 row in set (0.00 sec)
    
    MySQL [sok_wp]> 
    

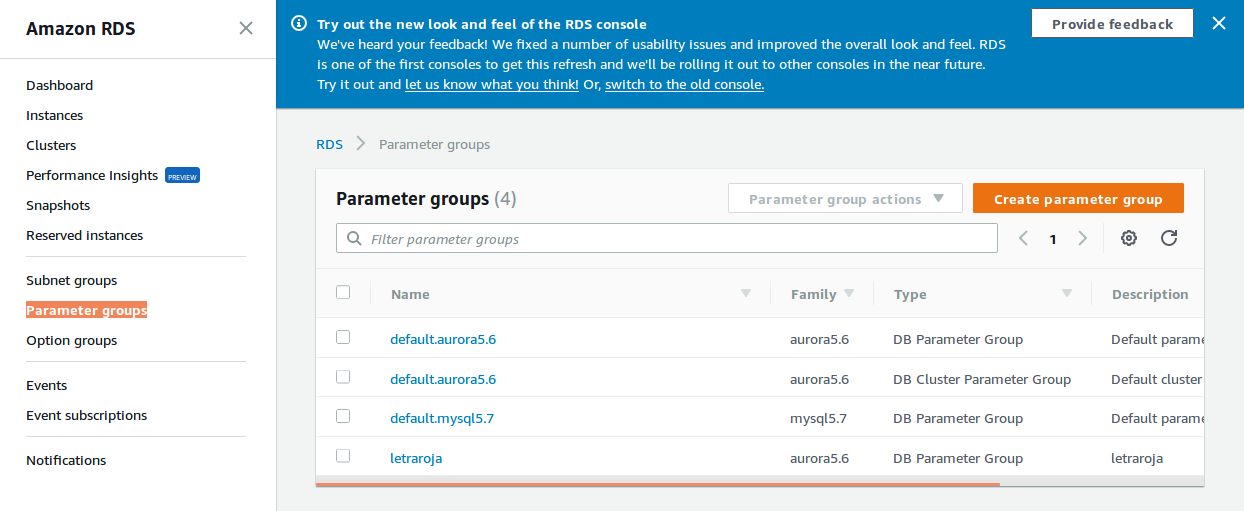
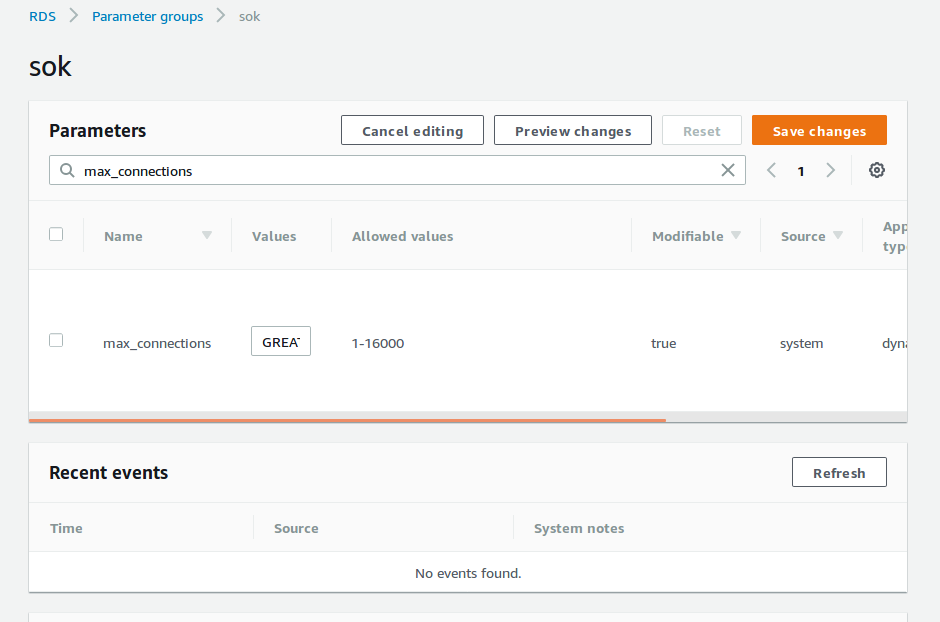
    To change default value, you need to create a “Parameter group” under Amazon RDS > Parameter groups

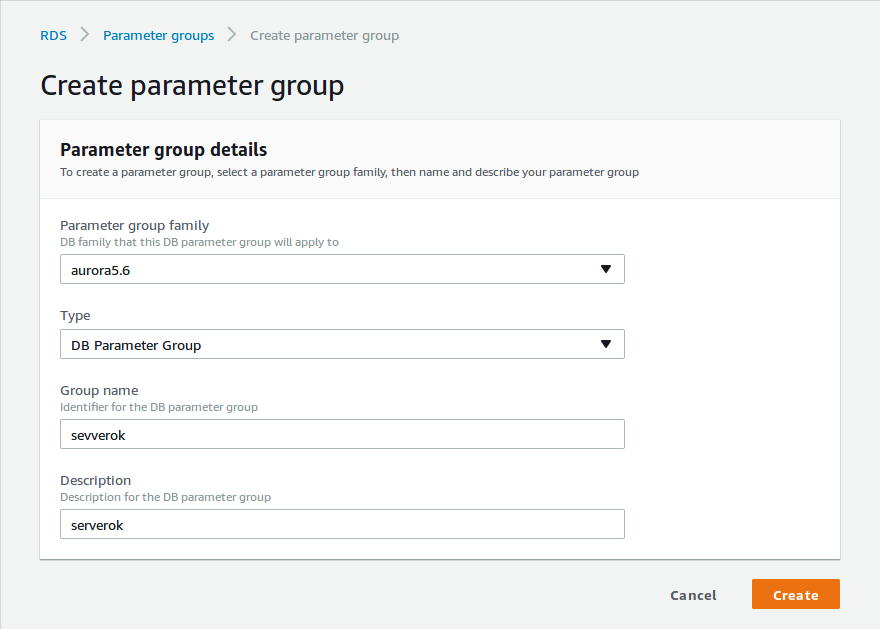
    On next page, select “Parameter group family” based on what ever RDS version you are using. In this cause i use Amazon Aurora database, so i select “aurora5.6”

    Group name and Description, use any value you like, it is just for identification purpose only.

    Once created, it will list all available parameter groups. click on newly created parameter group, on next page, it show all options. In the top search box, type in “max_connections” to find the settings. Edit and save.

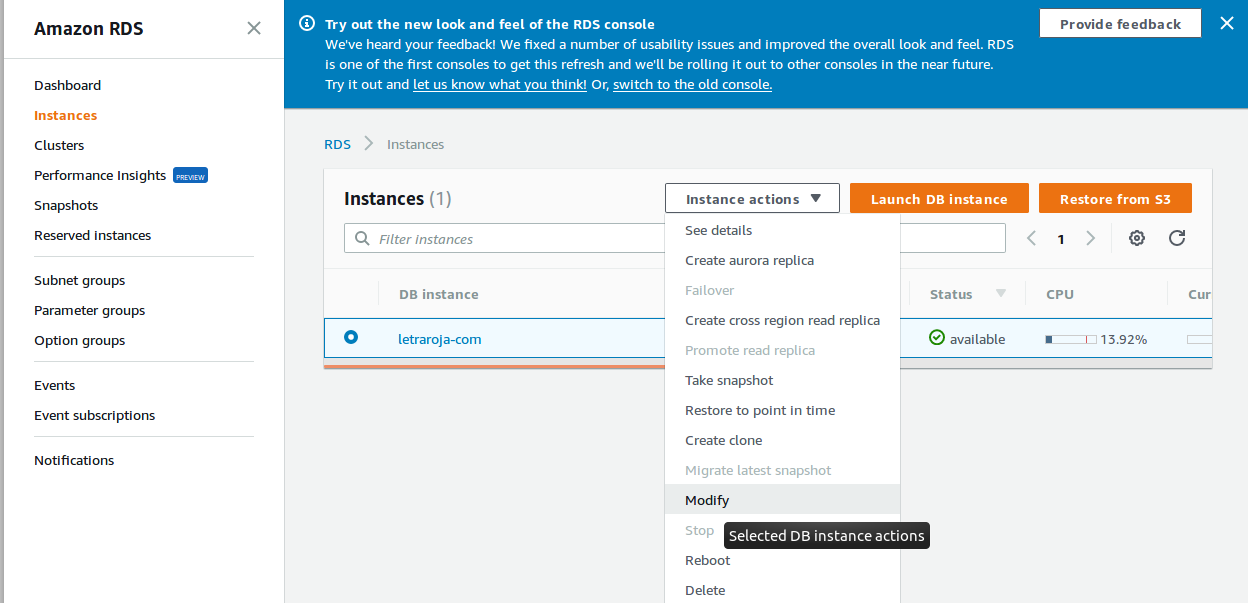
    Now we need to associate this newly created parameter group with Amazon RDS instance, for this go to Amazon RDS > Instances

    Select the instance you need to edit, then from “Instance Actions” drop down menu, select modify.

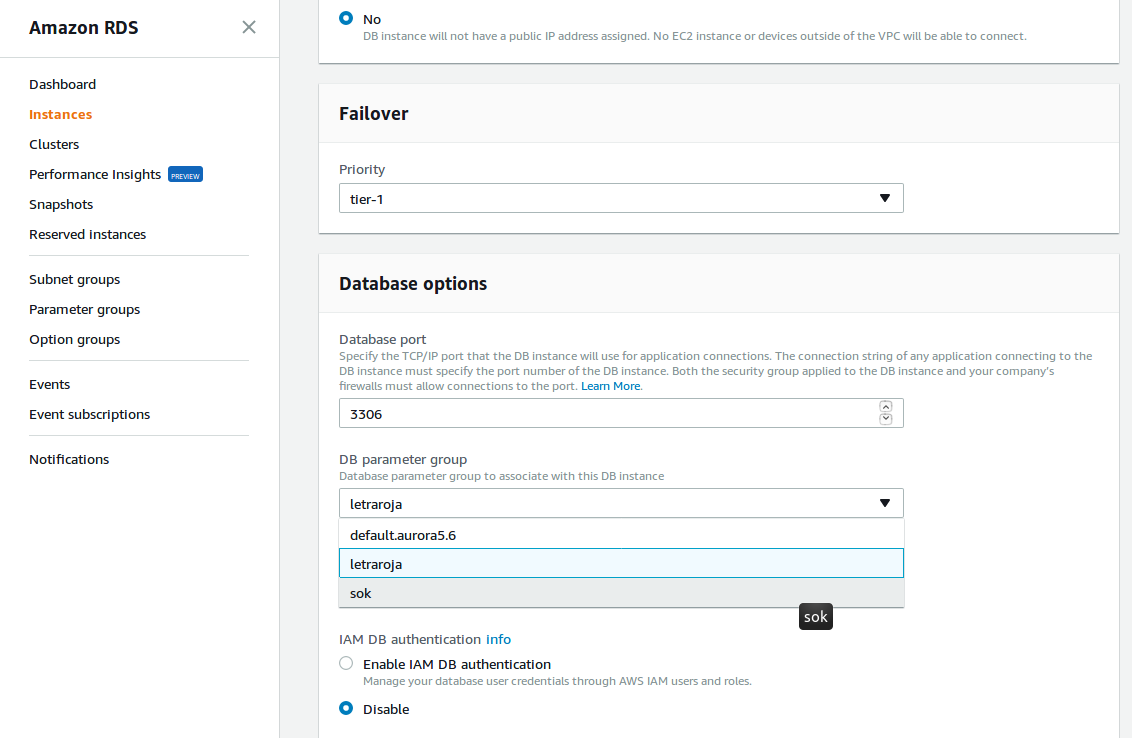
    On next page page, you have the option to select “DB parameter group”, select the newly created parameter group.

    On next page, you have option to apply change immediately or apply during maintenance window.

    You need to reboot the instance to apply the changes.