Category: Linux
-
ISPConfig 3 configuration files
ISPConfig 3 configuration files are are located in folder
/usr/local/ispconfig/interface/lib/config.inc.php
/usr/local/ispconfig/server/lib/config.inc.php
/usr/local/ispconfig/server/lib/mysql_clientdb.conf
DocumentRoot
/usr/local/ispconfig/interface/web/
Config file for webmail/phpmyadmin
/etc/nginx/sites-available/000-apps.vhost
Config for ispconfig web interface
/etc/nginx/sites-available/ispconfig.vhost
-
Odoo apt signatures couldn’t be verified
When updating apt on Ubuntu server, i get following error
root@ip-172-31-25-25:/home/ubuntu# apt-get update
Hit:1 http://ap-south-1.ec2.archive.ubuntu.com/ubuntu xenial InRelease
Hit:2 http://ap-south-1.ec2.archive.ubuntu.com/ubuntu xenial-updates InRelease
Hit:3 http://ap-south-1.ec2.archive.ubuntu.com/ubuntu xenial-backports InRelease
Ign:4 http://nightly.odoo.com/9.0/nightly/deb ./ InRelease
Get:5 http://nightly.odoo.com/9.0/nightly/deb ./ Release [1186 B]
Get:6 http://nightly.odoo.com/9.0/nightly/deb ./ Release.gpg [819 B]
Ign:6 http://nightly.odoo.com/9.0/nightly/deb ./ Release.gpg
Get:7 http://nightly.odoo.com/9.0/nightly/deb ./ Packages [1790 B]
Hit:8 http://security.ubuntu.com/ubuntu xenial-security InRelease
Fetched 3795 B in 2s (1736 B/s)
Reading package lists... Done
W: GPG error: http://nightly.odoo.com/9.0/nightly/deb ./ Release: The following signatures couldn't be verified because the public key is not available: NO_PUBKEY DEF2A2198183CBB5
W: The repository 'http://nightly.odoo.com/9.0/nightly/deb ./ Release' is not signed.
N: Data from such a repository can't be authenticated and is therefore potentially dangerous to use.
N: See apt-secure(8) manpage for repository creation and user configuration details.
root@ip-172-31-25-25:/home/ubuntu#
To fix, run
apt-key adv --keyserver keyserver.ubuntu.com --recv-keys DEF2A2198183CBB5
-
How to enable slow query log in MySQL/MariaDB
To enable MySQL slow query login, edit my.cnf file
vi /etc/my.cnfFor MariaDB, edit
vi /etc/mysql/mariadb.conf.d/50-server.cnfAdd:
slow_query_log = 1
slow_query_log_file = /var/log/mysql/slow.log
log_slow_query_time = 2
For older versions use long_query_time instead of log_slow_query_time
Restart MySQL
systemctl restart mysqlOn CentOS, the command is “systemctl retstart mysqld”. If you are using MariaDB, use “systemctl restart mariadb”.
You can use mysqldumpslow command to view slow queries.
mysqldumpslow /var/log/mysql/slow.logTo test, you can run the command
SELECT SLEEP(10);This will simulate a query, that take 10 seconds.
-
Installing tomcat on Ubuntu
How to find java version
Install Tomcat on CentOS 7To install tomcat on Ubuntu 18.04, run
apt install tomcat9
Start tomcat with
systemctl start tomcat9
Once tomcat started, you will be able to see it at
http://your-ip-addr:8080/
You can verify tomcat running with netstat
root@magmito-server:~# netstat -lntp | grep java
tcp6       0      0 127.0.0.1:8005          :::*                    LISTEN      2921/java
tcp6       0      0 :::8080                 :::*                    LISTEN      2921/java
root@magmito-server:~#
Tomcat default home page is
/var/lib/tomcat9/webapps/ROOT/index.html
Some other folders
CATALINA_HOME=/usr/share/tomcat9
CATALINA_BASE=/var/lib/tomcat9
Deploying Application
You can upload war file to /var/lib/tomcat9/webapps folder. When you upload war file, it get auto extracted to the folder.
To deplay sample application, do following
cd /var/lib/tomcat9/webapps/
wget https://tomcat.apache.org/tomcat-7.0-doc/appdev/sample/sample.war
Now you will see “sample” folder (/var/lib/tomcat9/webapps/sample). You can access the application with url
http://your-ip-addr:8080/sample/
-
Domain Resolver
Disable systemd-resolved
CentOS 7 resolv.conf make changes permanentUbuntu uses systemd-resolve, to see the status, run
systemd-resolve --statusOn Linux, Domain resolver configuration is stored in
/etc/resolv.confOn Ubuntu, it is a symlink.
root@ok-pc-01:/etc# ls -l | grep resol
drwxr-xr-x  3 root root     4096 Apr 26  2018 resolvconf
lrwxrwxrwx  1 root root       39 Jun 13 23:02 resolv.conf -> ../run/systemd/resolve/stub-resolv.conf
root@ok-pc-01:/etc#
You can remove the symlink and create your own file if you don’t want it managed by systemctl. You can see systemctl DNS resolver details with command
systemd-resolve --statusDisable systemd-resolved
If you want to use old /etc/resolv.conf, you can disable systemd-resolved
systemctl disable systemd-resolved.service
systemctl stop systemd-resolved
rm -f /etc/resolv.conf
tee /etc/resolv.conf << END
nameserver 8.8.8.8
nameserver 1.1.1.1
END
On Ubuntu, NetworkManager will update /etc/resolv.conf, to avoid this, edit
vi /etc/NetworkManager/NetworkManager.confUnder [main] section, add
dns=noneHere is what I have on my PC
root@pc10:~# cat  /etc/NetworkManager/NetworkManager.conf
[main]
plugins=ifupdown,keyfile
dns=none

[ifupdown]
managed=false

[device]
wifi.scan-rand-mac-address=no
root@pc10:~#
To configure systemd-resolvd, see Ubuntu Configure systemd-resolved
-
CentOS 7 Apache use PHP-FPM
Install PHP-FPM with command
yum install php-fpm
Edit www.conf
vi /etc/php-fpm.d/www.conf
Find
listen = 127.0.0.1:9000
Replace with
listen = /var/run/php-fpm/default.sock
Find
;listen.owner = nobody
;listen.group = nobody
Replace with
listen.owner = apache
listen.group = apache
Edit php.conf
mv /etc/httpd/conf.d/php.conf /etc/httpd/conf.d/php.conf.old
vi /etc/httpd/conf.d/php.conf
Add
ProxySet disablereuse=off SetHandler proxy:fcgi://php-fpm AddType text/html .php DirectoryIndex index.phpSetHandler application/x-httpd-php-source Restart Apache/php-fpm
systemctl restart httpd
systemctl restart php-fpm
Method 2
Here is php-fpm config using proxy_fcgi
https://gist.github.com/serverok/3d2e43bb951ded9a42ce8bc0c2c3b627
-
Ubuntu AppArmor
To see the status of AppArmor service, run
systemctl status apparmorTo see AppArmour status, run
aa-statusAppArmor config files in
/etc/apparmor.d/You can stop start AppArmor with
systemctl start apparmor
systemctl stop apparmor
systemctl restart apparmor
systemctl disable apparmor
Disable AppArmor
/etc/init.d/apparmor stop /etc/init.d/apparmor teardown update-rc.d -f apparmor remove -

MySQL not starting on Ubuntu 18.04
MySQL did not start on Ubuntu 18.04 server. This is fresh server, i removed all MySQL packages, removed configuration files.
apt remove --purge mysql-client-5.7 mysql-client-core-5.7 mysql-common mysql-server-5.7 mysql-server-core-5.7
Reinstalled MySQL.
apt install mysql-server-5.7
Still MySQL fail to start with some error related to
2018-10-29T21:07:49.311174Z 0 [ERROR] Could not open file '/var/log/mysql/error.log' for error logging: Permission denied
Full error here
https://gist.github.com/serverok/f82d8c891a58db3351c331005498f435
Initially i was thinking the problem is with Ubuntu 18.04 mysql package. So i set up another fresh Ubuntu 18.04 server, installed MySQL 5.7 and it worked prefectly fine.
Now i checked the permission for the folders. For this i enabled shell access for MySQL user.
chsh --shell /bin/bash mysql
Now i change to this user with command
su - mysql
I chaged to /var/log/mysql folder, it worked fine, i can write to the file /var/log/mysql/error.log. Tested with
echo "hello" >> /var/log/mysql/error.log
tail /var/log/mysql/error.log
It is not a permission problem. I checked the /var/log foler, found this is not an actual folder, a symlink to another folder.

This is caused by AppArmor. I disabled AppArmour with
systemctl stop apparmor
Start MySQL with
systemctl start mysql
I get some error related to data directory, i checked folder /var/lib/mysql and found it was empty. I created MySQL data folder with command
mysqld --initialize --explicit_defaults_for_timestamp
On restarting MySQL again, MySQL worked fine. But i can’t login as user root. When you initialize MySQL data folder, MYSQL generate and store temporary password in /var/log/mysql/error.log, to find the password, i run
grep -i "pass" /var/log/mysql/error.log
You need to change this temporary password as it is set as expired by default. This can be done with command
mysql_secure_installation
Set a new secure password when it ask.
Fixing AppArmor
We need to tell AppArmour to allow MySQL to use /mnt/log/mysql folder for logging. To do this, edit file.
vi /etc/apparmor.d/local/usr.sbin.mysqld
Added following to it.
/mnt/log/mysql/** rw,
Now restart AppArmor.
systemctl restart apparmor
Now MySQL will work properly.
-
Clean tmp folder in Linux
On Linux servers, you may face disk space or inode limit reaching on /tmp partition due to large number of temporary files. Most of the time it will be PHP sesion files. To clean these files, you can use a cronjob like the following. It have some common extension i found on shared cpanel server, files in your sever may be differnt. You need to investigate what is taking up disk space on your /tmp folder and modify the script as needed.
Create file
vi /usr/local/bin/cleantmpAdd following
#!/bin/bash
# Author: Yujin Boby
# Web: https://serverok.in

find /tmp -type f -name 'sess_*' -mtime +30 | xargs rm -f
find /tmp -type f -name 'php*' -mtime +30 |xargs rm -f
find /tmp -type f -name '*.zip' -mtime +30 |xargs rm -f
find /tmp -type f -name 'tmp_*' -mtime +30 |xargs rm -f
find /tmp -type f -name '*.jpg' -mtime +30 |xargs rm -f
find /tmp -type f -name '*.tmpvideo' -mtime +30 |xargs rm -f
find /tmp -type f -name '*.params' -mtime +30 |xargs rm -f
find /tmp -type f -name '*.gif' -mtime +30 |xargs rm -f
find /tmp -type f -name '*.png' -mtime +30 |xargs rm -f
-mtime +30 is to find files that are modified 30 or more days ago.
Make it executable
chmod 755 /usr/local/bin/cleantmpCreate a cronjon
crontab -eAdd
0 1 * * * /usr/local/bin/cleantmp > /dev/null 2>&1See tmp
-
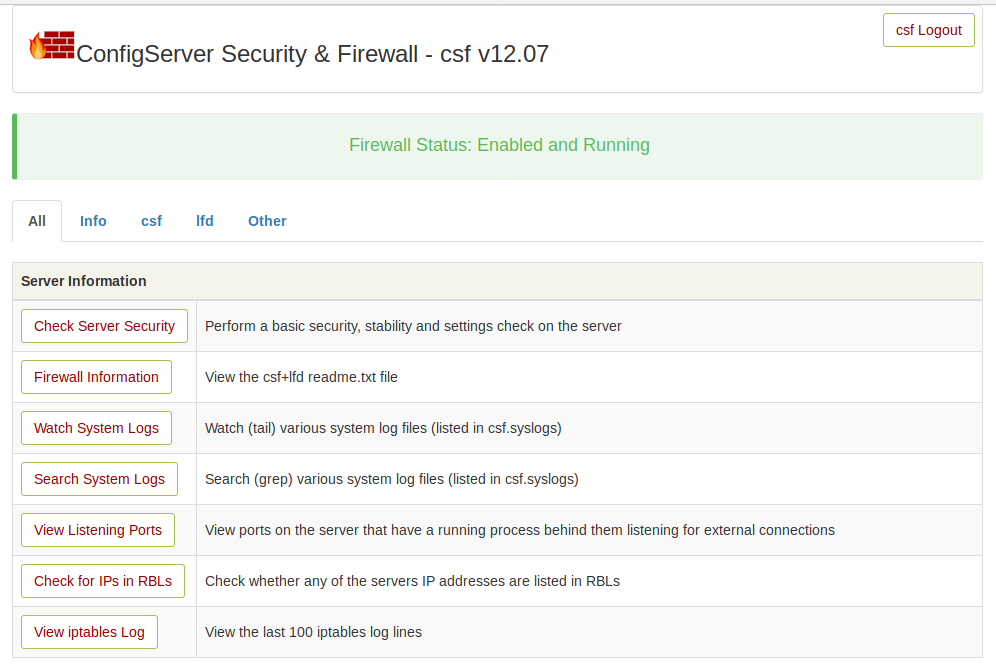
Enable UI in CSF Firewall on CentOS
CSF Firewall come with standalone UI. This is disabled by default. On CentOS, install following requirments
yum install perl-IO-Socket-SSL perl-Net-SSLeay perl-Net-LibIDN perl-IO-Socket-INET6 perl-Socket6
Edit CSF configuration file
vi /etc/csf/csf.conf
Find
UI = "0"
Replace with
UI = "1"
Change following settins as needed.
UI_PORT = "6666"
UI_USER = "username"
UI_PASS = "password"
By Default, only whitelisted IP can access the UI, to white list your IP, run
echo "YOUR_IP_ADDR" >> /etc/csf/ui/ui.allow
If you want to allow CSF UI from all IP address, then set UI_ALLOW to 0 in csf.conf
UI_ALLOW = "0"
CSF use a self signed SSL, if you have an SSL cert, you can use it. SSL certificate is avaiable in folder
/etc/csf/ui/
To use LetsEncrypt Free SSL certificate for CSF UI, i set symlink to ssl cert.
cd /etc/csf/ui
mv server.key server.key.old
mv server.crt server.crt.old
ln -s /etc/letsencrypt/live/DOMAIN/fullchain.pem server.crt
ln -s /etc/letsencrypt/live/DOMAIN/privkey.pem server.key
Now restart CSF and LDF
systemctl restart lfd
systemctl restart csf
You will see CSF UI running on port 6666.
[root@grupo conf.d]# netstat -lntp
Active Internet connections (only servers)
Proto Recv-Q Send-Q Local Address           Foreign Address         State       PID/Program name
tcp        0      0 0.0.0.0:6666            0.0.0.0:*               LISTEN      20605/lfd UI
tcp        0      0 0.0.0.0:3306            0.0.0.0:*               LISTEN      23918/mysqld
tcp        0      0 0.0.0.0:10000           0.0.0.0:*               LISTEN      2203/perl
tcp        0      0 127.0.0.1:25            0.0.0.0:*               LISTEN      1275/master
tcp        0      0 0.0.0.0:3333            0.0.0.0:*               LISTEN      19061/sshd
tcp6       0      0 :::80                   :::*                    LISTEN      19810/httpd
tcp6       0      0 ::1:25                  :::*                    LISTEN      1275/master
tcp6       0      0 :::443                  :::*                    LISTEN      19810/httpd
tcp6       0      0 :::3333                 :::*                    LISTEN      19061/sshd
[root@grupo conf.d]#