Category: Linux

  • Install MySQL 8 on Ubuntu/Debian

    Install MySQL 8 on Ubuntu/Debian

    To install MySQL 8 on Ubuntu/Debian, download the .deb repository file from

    https://dev.mysql.com/downloads/repo/apt/

    Following link may change, so always get newer version download link from above url.

    wget https://dev.mysql.com/get/mysql-apt-config_0.8.24-1_all.deb
    dpkg -i mysql-apt-config_0.8.24-1_all.deb
    

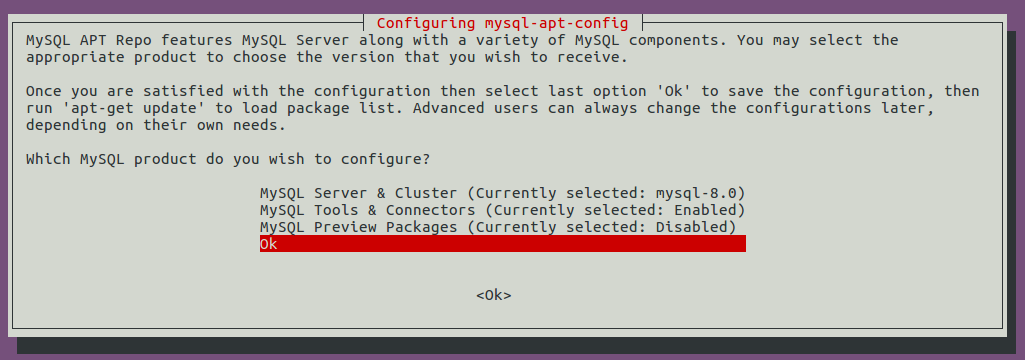
    It ask you to select MySQL version, default is 8, just press down arrow and select “Ok”.

    Now you are ready to install MySQL 8, you need to run apt update before you can install.

    apt update
    apt install mysql-server
    

    It ask you to enter password.

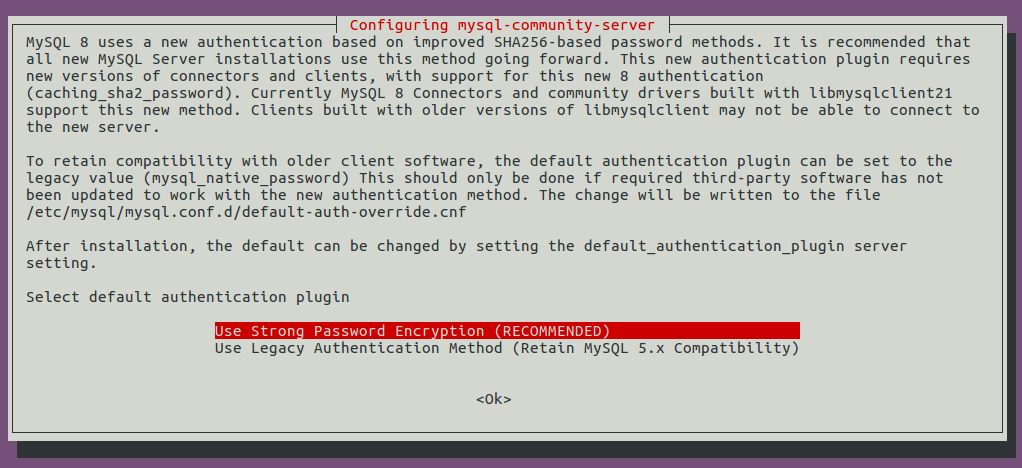
    Next it ask you to select password format.

    MySQL 8 have a different authentication plugin, that use more secure password format. You can select Legacy Authentication for compatibility with MySQL version 5.x

    Changing MySQL version

    if you want to install differnt MySQL version, uninstall current MySQL version, then select a differnt MySQL version by running

    dpkg-reconfigure  mysql-apt-config
    

    MySQL 8 apt Error The following signatures were invalid
    mysql

  • error: no acceptable C compiler found

    When compiling software from source i get error

    configure: error: no acceptable C compiler found in $PATH
    

    To fix error, on CentOS, run

    yum install gcc -y
    

    On Debian/Ubuntu

    apt install build-essential
    

    Errors

  • Dig

    Dig

    dig is a command line tool like nslookup used to check dns

    Find Reverse-DNS/PTR using dig, nslookup, host
    Requesting a zone trasnfer with dig

    Here is the basic usage

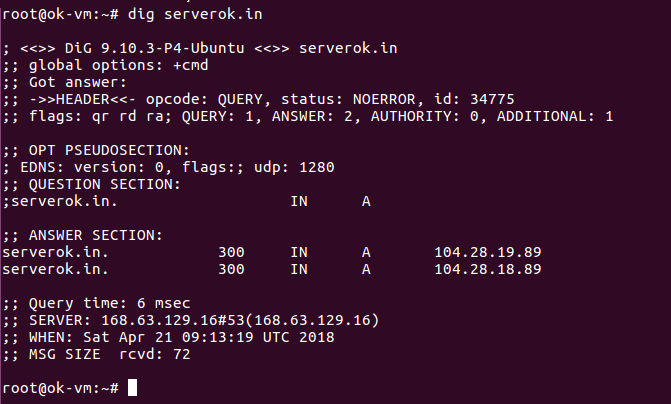
    dig DOMAIN_NAME
    

    dig have multiple sections, ANSWER SECTION is what you need to look for. After answer section, it shows some info about DNS server used to query.

    +short

    +short option allow you to just slow the answer.

    root@ok-vm:~# dig +short serverok.in
    104.28.18.89
    104.28.19.89
    root@ok-vm:~# 
    

    To find Specific Record type

    dig DOMAIN_NAME RECORD_TYPE
    

    Example

    root@ok-vm:~# dig +short serverok.in mx
    5 alt1.aspmx.l.google.com.
    5 alt2.aspmx.l.google.com.
    10 alt3.aspmx.l.google.com.
    11 alt4.aspmx.l.google.com.
    1 aspmx.l.google.com.
    root@ok-vm:~# 
    

    Dig show detailed info

    You can use +trace to get more detailed info on dig query.

    dig +trace RECORD_TYPE DOMAIN_NAME
    

    Example

    dig +trace ns boby.serverok.in
    

    See nslookup, dns

  • Installing PhpStorm on Ubuntu

    Installing PhpStorm on Ubuntu

    Download latest version of PhpStorm from

    https://www.jetbrains.com/phpstorm/download/#section=linux

    You get a file with name like “PhpStorm-2018.1.1.tar.gz”

    Extract the file, put in a folder, i normally put it in directory ~/programs/phpstrom/

    Now open terminal, go to folder

    cd ~/programs/phpstrom/bin
    

    Run phpStrom with command

    ./phpstorm.sh
    

    Create Application Shortcut

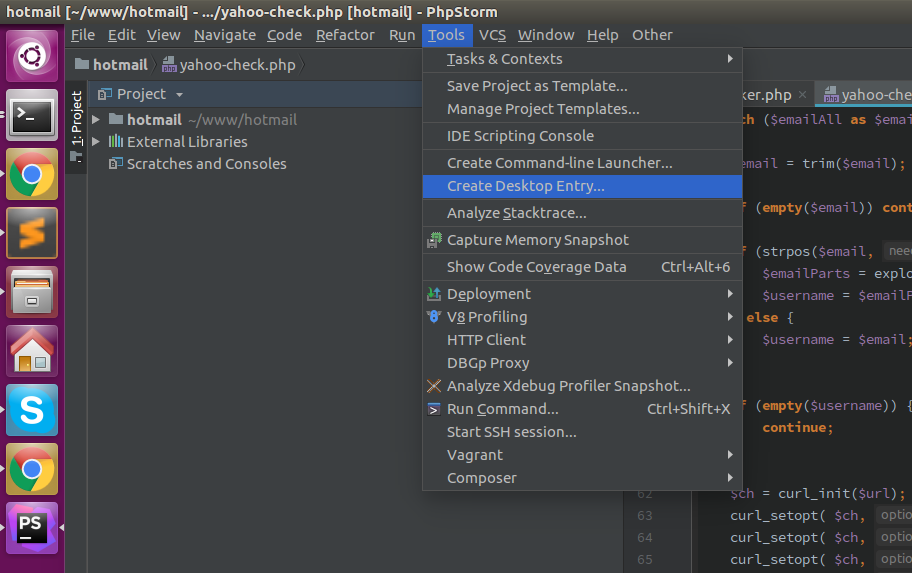
    Creating application shortcut is easy. Just go to Tools > Create Desktop Entry.

    phpstrom

  • Clean Magento session folder

    On a VPS hosting Magento 1.9 disk was getting full. On checking, found var/session folder taking too much disk space.

    Disk usage was 34 GB.

    This folder is used to store PHP session files. You can delete them.

    I created a cronjob to delete the session files that are older.

    mkdir /usr/serverok/
    vi /usr/serverok/clean-session
    

    Add following content

    #!/bin/bash
    
    /bin/find /path/to/var/session -type f -mtime +10 -name "sess_*" -delete
    

    Make it executable

    chmod 755 /usr/serverok/clean-session
    

    Set a cronjob to run everyday

    @daily /usr/serverok/clean-session > /dev/null 2>&1
    

    Method 2 – Strong session in database

    Edit file

    vi app/etc/local.xml
    

    Find


    Replace with


    Magento

  • Install Monit on Ubuntu

    Install Monit on Ubuntu

    Monit can be used to monitor services, restart them if required. To install monit, run

    apt -y install monit
    

    To start monit, run

    systemctl start monit
    

    Monitor Apache

    vi /etc/monit/conf-available/apache2-custom
    

    Add

    check process apache with pidfile /var/run/apache2/apache2.pid
        group www-data
        start program = "/etc/init.d/apache2 start"
        stop program  = "/etc/init.d/apache2 stop"
        if failed host localhost port 80 protocol http then restart
        if 5 restarts within 5 cycles then timeout
    

    Activate the rule with

    ln -s /etc/monit/conf-available/apache2-custom /etc/monit/conf-enabled/apache2-custom
    

    Restart monit with

    systemctl restart monit
    

    Testing If Monit works

    Open 2 terminals. On one, tail the monit logs with

    tail -f /var/log/monit.log
    

    On other terminal, stop Apache

    service apache2 stop
    

    Within 2 minutes, monit will restart apache web server.

    monit

  • Unban an IP from CSF Firewall

    Unban an IP from CSF Firewall

    To unban an IP from CSF firewall, run

    csf -dr IP_ADDR
    

    Here i have an IP blocked in firewall.

    [root@server22 ~]# iptables -L -n | grep 13.224.29.193
    DROP       all  --  13.224.29.193        0.0.0.0/0           
    LOGDROPOUT  all  --  0.0.0.0/0            13.224.29.193       
    [root@server22 ~]# 
    

    To see if CSF is blocking the IP, run

    csf -g IP_ADDR
    

    Example

    This command also give reason for why the IP is blocked.

    Lets unban the IP address with command

    csf -dr IP_ADDR
    

    Now IP should not be listed in iptables, verify it with

    iptables -L -n | grep IP_ADDR
    

    csf

  • Virtualmin Downloading PHP file

    After setting up new site in virtualmin, PHP file get downloaded instead of getting executed.

    To fix the problem, edit file

    vi /etc/httpd/conf.d/php.conf
    

    Find

    
        SetHandler application/x-httpd-php


    Replace with

    AddHandler php7-script .php
    

    Restart apache

    service httpd restart
    

    virtualmin

  • Install ionCube on Debian 9

    Install ionCube on Debian 9

    Download latest version of ionCube loader from

    cd /usr/local/src
    wget https://downloads.ioncube.com/loader_downloads/ioncube_loaders_lin_x86-64.tar.gz
    tar xvf ioncube_loaders_lin_x86-64.tar.gz
    cd ioncube/
    

    Check PHP version with

    php -v
    

    On Debian 9, default will be PHP 7.0, so you need to use file ioncube_loader_lin_7.0.so

    Find PHP extension_dir, this is where you need to put PHP extensions.

    root@ip-172-31-44-173:/usr/local/src/ioncube# php -i | grep  extension_dir
    extension_dir => /usr/lib/php/20151012 => /usr/lib/php/20151012
    root@ip-172-31-44-173:/usr/local/src/ioncube# 
    

    Copy the file to extension directory

    cp /usr/local/src/ioncube/ioncube_loader_lin_7.0.so /usr/lib/php/20151012
    

    Enable ionCube loader with

    echo "zend_extension=ioncube_loader_lin_7.0.so" > /etc/php/7.0/mods-available/ioncube.ini
    ln -s /etc/php/7.0/mods-available/ioncube.ini /etc/php/7.0/cli/conf.d/01-ioncube.ini
    ln -s /etc/php/7.0/mods-available/ioncube.ini /etc/php/7.0/apache2/conf.d/01-ioncube.ini
    

    Now php -m will show ioncube

    root@ip-172-31-44-173:~# php -m | grep ion
    ionCube Loader
    Reflection
    session
    the ionCube PHP Loader (enabled) + Intrusion Protection from ioncube24.com (unconfigured)
    root@ip-172-31-44-173:~# 
    

    Restart apache

    service apache2 restart
    

    ioncube | ionCube on Debian 8

  • Unable to Write to Disk – Inodes Full

    Unable to Write to Disk – Inodes Full

    On a server, can’t write to disk. I checked disk usage with

    df -h
    

    Everything is good. Next i checked Inodes usage with

    df -hi
    

    Inodes usage was 100%

    [root@w8bd-blkx ~]# df -hi
    Filesystem Inodes IUsed IFree IUse% Mounted on
    /dev/ploop36812p1 6.1M 6.1M 5 100% /
    /dev/simfs 6.1M 6.1M 5 100% /tmp
    /dev/simfs 6.1M 6.1M 5 100% /var/tmp
    none 1.0M 160 1.0M 1% /dev
    [root@w8bd-blkx ~]#

    This normally happen when you have too many smaller files.

    First of all free up some Inodes by removing unwanted log files, most of the time you can delete some logs in /var/log folder.

    To find where the Inodes are used up, run command

    find / -xdev -printf '%h\n' | sort | uniq -c | sort -k 1 -n
    

    The command will display Inodes usage for folder sorted by Inodes.

    linux inodes usage

    In this case, httpdocs/var/session had too many session files. I removed all session files, that fixed the problem. To avoid this happening again, i created a cronjob, that delete old session files every day.

    hdd

  • Sync Files between 2 servers

    Here are some tools that can be used to sync files between 2 servers.