Category: Ubuntu

  • Install ionCube on Ubuntu 18.04

    Install ionCube on Ubuntu 18.04

    Download ioncube loader from

    https://www.ioncube.com/loaders.php

    cd /usr/local/src
    wget https://downloads.ioncube.com/loader_downloads/ioncube_loaders_lin_x86-64.tar.gz
    tar xvf ioncube_loaders_lin_x86-64.tar.gz
    cd ioncube/
    

    Find extension diretcory and copy .so file to php extension diretcory. To find php extension directory run

    php -i | grep  extension_dir
    

    For PHP 7.2, run

    cp /usr/local/src/ioncube/ioncube_loader_lin_7.2.so /usr/lib/php/20170718 
    

    Enable ioncube

    echo "zend_extension=ioncube_loader_lin_7.2.so" > /etc/php/7.2/mods-available/ioncube.ini
    ln -s /etc/php/7.2/mods-available/ioncube.ini /etc/php/7.2/cli/conf.d/01-ioncube.ini
    

    for Apache, run

    ln -s /etc/php/7.2/mods-available/ioncube.ini /etc/php/7.2/apache2/conf.d/01-ioncube.ini
    systemctl restart apache2
    

    for php-fpm, run

    ln -s /etc/php/7.2/mods-available/ioncube.ini /etc/php/7.2/fpm/conf.d/01-ioncube.ini
    systemctl restart php7.2-fpm
    
  • Install Node.js on Ubuntu/Debian

    To install Node.js on Ubuntu, first set up repository as per your version requirements.

    For NodeJs v21.x

    curl -sL https://deb.nodesource.com/setup_21.x | bash -

    For NodeJs v20.x

    curl -sL https://deb.nodesource.com/setup_20.x | bash -

    For NodeJs v18.x

    curl -sL https://deb.nodesource.com/setup_18.x | bash -

    For NodeJs v17.x

    curl -sL https://deb.nodesource.com/setup_17.x | bash -

    For NodeJs v16.x

    curl -sL https://deb.nodesource.com/setup_16.x | bash -

    For NodeJs v15.x

    curl -sL https://deb.nodesource.com/setup_15.x | bash -

    For NodeJs v14.x

    curl -sL https://deb.nodesource.com/setup_14.x | bash -

    For NodeJs v12.x

    curl -sL https://deb.nodesource.com/setup_12.x | bash -

    For NodeJs v11.x

    curl -sL https://deb.nodesource.com/setup_11.x | bash -

    Node.js v10.x

    curl -sL https://deb.nodesource.com/setup_10.x | bash -

    Node.js v9.x

    curl -sL https://deb.nodesource.com/setup_9.x | bash -

    Node.js v8.x

    curl -sL https://deb.nodesource.com/setup_8.x | bash -

    Node.js v6.x

    curl -sL https://deb.nodesource.com/setup_6.x | bash -

    Now install node.js with

    apt-get install -y nodejs

    Install build-essential package

    apt install -y build-essential

    See Node.Js

  • AMD Ryzen 3 2200G on Ubuntu 18.04

    AMD Ryzen 3 2200G on Ubuntu 18.04

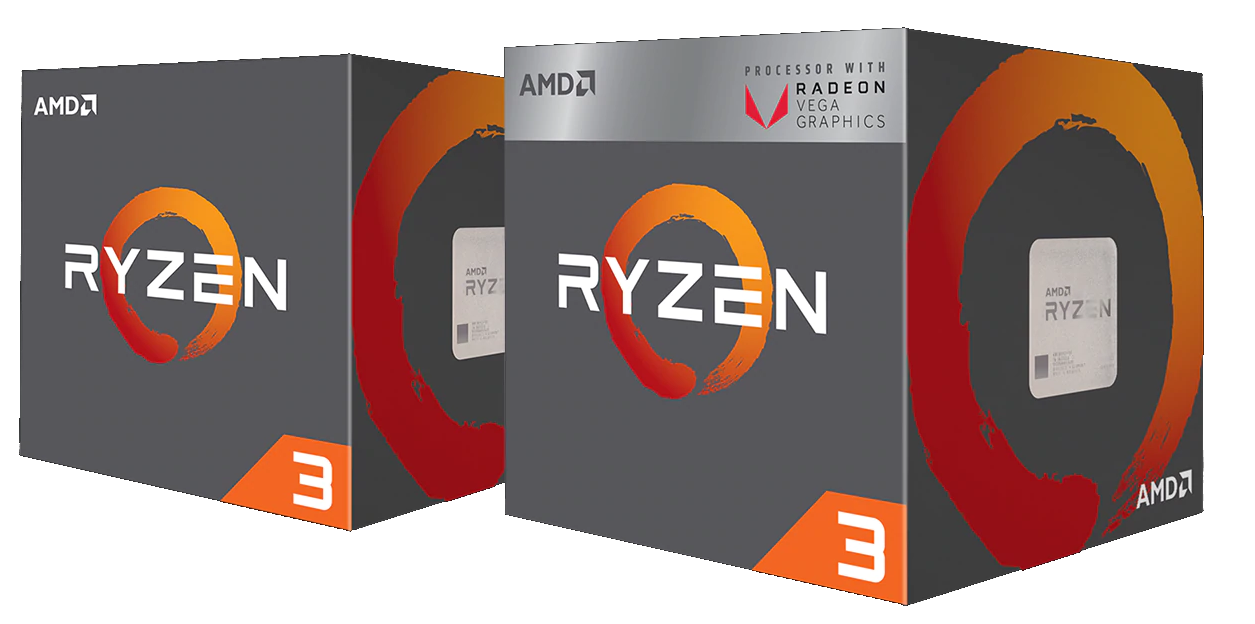
    New PC i have purchased have AMD Ryzen 3 2200G CPU. This come with Vega 8 iGPU.

    If you boot Ubuntu 18.04 on this PC, it fail to boot with some graphics errors. To boot, you need to select advanced option, then recovery, once you get in the menu with differnt options, select continue. This will boot PC with out hardware acceleration.

    You can also set “nomodeset” in /etc/default/grub

    Find

    GRUB_CMDLINE_LINUX_DEFAULT=""
    

    Replace with

    GRUB_CMDLINE_LINUX_DEFAULT="nomodeset"
    

    Now run

    update-grub
    

    But doing this disable hardware acceleration. Proper way is to install AMD drivers. You can use open source or AMD propritery, i dedided to go with AMD propritery drivers.

    Install Latest Kernel

    Support for Vega 8 iGPU only available in latest kernel. So you need to install latest kernel from ubuntu mainline.

    Go to

    http://kernel.ubuntu.com/~kernel-ppa/mainline/?C=N;O=D

    Find the latest kernel, it will be listed on top of the page. At the time of writing this post, it is “v4.19-rc5”
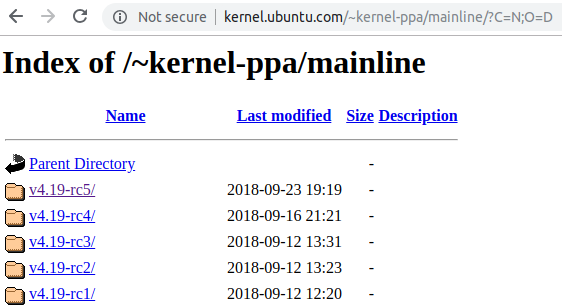
    Click on this folder. You need to download 3 files with name generic for amd64 and install it.

    wget http://kernel.ubuntu.com/~kernel-ppa/mainline/v4.19-rc5/linux-headers-4.19.0-041900rc5-generic_4.19.0-041900rc5.201809231830_amd64.deb
    wget http://kernel.ubuntu.com/~kernel-ppa/mainline/v4.19-rc5/linux-image-unsigned-4.19.0-041900rc5-generic_4.19.0-041900rc5.201809231830_amd64.deb
    wget http://kernel.ubuntu.com/~kernel-ppa/mainline/v4.19-rc5/linux-modules-4.19.0-041900rc5-generic_4.19.0-041900rc5.201809231830_amd64.deb
    

    Install it with

    sudo dpkg -i *.deb
    

    Install AMDGPU PRO driver

    I don’t really know how to find latest driver from AMD site. It only lists Windows deivers. I had to use google to find link to latest AMD driver.

    With some googling, i found a driver released on August 17th , 2018

    https://www.amd.com/en/support/kb/release-notes/rn-prorad-lin-18-30

    On this page, you have download links for differnt linux distributions, for Ubuntu, i run

    wget https://www2.ati.com/drivers/linux/ubuntu/18.04/amdgpu-pro-18.30-641594.tar.xz
    tar xvf amdgpu-pro-18.30-641594.tar.xz
    cd amdgpu-pro-18.30-641594
    ./amdgpu-pro-install
    

    amdgpu-pro-install is actually a symlink to amdgpu-install, but you should run “amdgpu-pro-install” to install the driver as it will run amdgpu-install with –pro switch.

    Now reboot your PC, your iGPU will work.

    Before installing new kernel, glxinfo reported following

    boby@ok-pc-01:~$ glxinfo | grep -i opengl
    OpenGL vendor string: VMware, Inc.
    OpenGL renderer string: llvmpipe (LLVM 6.0, 128 bits)
    OpenGL core profile version string: 3.3 (Core Profile) Mesa 18.1.0-rc4
    OpenGL core profile shading language version string: 3.30
    OpenGL core profile context flags: (none)
    OpenGL core profile profile mask: core profile
    OpenGL core profile extensions:
    OpenGL version string: 3.1 Mesa 18.1.0-rc4
    OpenGL shading language version string: 1.40
    OpenGL context flags: (none)
    OpenGL extensions:
    OpenGL ES profile version string: OpenGL ES 3.0 Mesa 18.1.0-rc4
    OpenGL ES profile shading language version string: OpenGL ES GLSL ES 3.00
    OpenGL ES profile extensions:
    boby@ok-pc-01:~$ 
    

    After install new kernel and AMDGPU Pro driver, i have

    boby@ok-pc-01:~$ glxinfo | grep -i opengl
    OpenGL vendor string: Advanced Micro Devices, Inc.
    OpenGL renderer string: AMD Radeon Graphics
    OpenGL core profile version string: 4.6.13536 Core Profile Context
    OpenGL core profile shading language version string: 4.50
    OpenGL core profile context flags: (none)
    OpenGL core profile profile mask: core profile
    OpenGL core profile extensions:
    OpenGL version string: 4.5.13536 Compatibility Profile Context
    OpenGL shading language version string: 4.50
    OpenGL context flags: (none)
    OpenGL profile mask: compatibility profile
    OpenGL extensions:
    OpenGL ES profile version string: 4.5.13536 Compatibility Profile Context
    OpenGL ES profile shading language version string: 4.50
    OpenGL ES profile extensions:
    boby@ok-pc-01:~$ 
    

    With latest mainline kernal (no AMDGPU PRO)

    boby@ok-pc-01:~$ glxinfo | grep -i opengl
    OpenGL vendor string: X.Org
    OpenGL renderer string: AMD RAVEN (DRM 3.27.0 / 4.19.0-041900rc6-generic, LLVM 6.0.0)
    OpenGL core profile version string: 4.5 (Core Profile) Mesa 18.0.5
    OpenGL core profile shading language version string: 4.50
    OpenGL core profile context flags: (none)
    OpenGL core profile profile mask: core profile
    OpenGL core profile extensions:
    OpenGL version string: 3.0 Mesa 18.0.5
    OpenGL shading language version string: 1.30
    OpenGL context flags: (none)
    OpenGL extensions:
    OpenGL ES profile version string: OpenGL ES 3.1 Mesa 18.0.5
    OpenGL ES profile shading language version string: OpenGL ES GLSL ES 3.10
    OpenGL ES profile extensions:
    boby@ok-pc-01:~$ 
    

    If you don’t install newer kernel, amdgpu-pro-install install will FAIL, i get some segmentation fault.

  • Apache AH00144: couldn’t grab the accept mutex

    On Ubuntu 18.04 server, apache crashed. On checking apache error log, found following

    [Mon Aug 13 23:19:24.625927 2018] [mpm_prefork:emerg] [pid 2378] (43)Identifier removed: AH00144: couldn't grab the accept mutex
    [Mon Aug 13 23:19:24.626990 2018] [mpm_prefork:emerg] [pid 1227] (43)Identifier removed: AH00144: couldn't grab the accept mutex
    [Mon Aug 13 23:19:24.628515 2018] [mpm_prefork:emerg] [pid 1211] (43)Identifier removed: AH00144: couldn't grab the accept mutex
    [Mon Aug 13 23:19:24.628693 2018] [mpm_prefork:emerg] [pid 1309] (43)Identifier removed: AH00144: couldn't grab the accept mutex
    [Mon Aug 13 23:19:24.629122 2018] [mpm_prefork:emerg] [pid 2387] (43)Identifier removed: AH00144: couldn't grab the accept mutex
    [Mon Aug 13 23:19:24.629319 2018] [mpm_prefork:emerg] [pid 1603] (43)Identifier removed: AH00144: couldn't grab the accept mutex
    [Mon Aug 13 23:19:24.629483 2018] [mpm_prefork:emerg] [pid 1637] (43)Identifier removed: AH00144: couldn't grab the accept mutex
    [Mon Aug 13 23:19:24.629659 2018] [mpm_prefork:emerg] [pid 1566] (43)Identifier removed: AH00144: couldn't grab the accept mutex
    [Mon Aug 13 23:19:25.366503 2018] [core:alert] [pid 990] AH00050: Child 1211 returned a Fatal error... Apache is exiting!
    [Mon Aug 13 23:19:25.366568 2018] [:emerg] [pid 990] AH02818: MPM run failed, exiting
    

    To fix the error, edit file

    vi /etc/apache2/apache2.conf
    

    Find

    #Mutex file:${APACHE_LOCK_DIR} default
    

    Replace with

    Mutex posixsem
    

    Restart Apache

    service apache2 restart
    

    See Apache

  • Ubuntu 18.04 Remove Trash Icon from Desktop

    Ubuntu 18.04 Remove Trash Icon from Desktop

    First find the Trash related settings with gsettings command.

    boby@ok-pc-01:~$ gsettings  list-recursively | grep -i trash
    org.gnome.gedit.plugins.filebrowser.nautilus confirm-trash true
    org.gnome.desktop.privacy remove-old-trash-files false
    org.gnome.eog.ui disable-trash-confirmation false
    org.gnome.nautilus.preferences confirm-trash true
    org.gnome.nautilus.preferences show-move-to-trash-shortcut-changed-dialog true
    org.gnome.DejaDup exclude-list ['$TRASH', '$DOWNLOAD']
    org.gnome.nautilus.desktop trash-icon-name 'Trash'
    org.gnome.nautilus.desktop trash-icon-visible true
    boby@ok-pc-01:~$ 
    

    To disable the Trash Icon on desktop, run

    gsettings set org.gnome.nautilus.desktop trash-icon-visible false
    

    Method 2

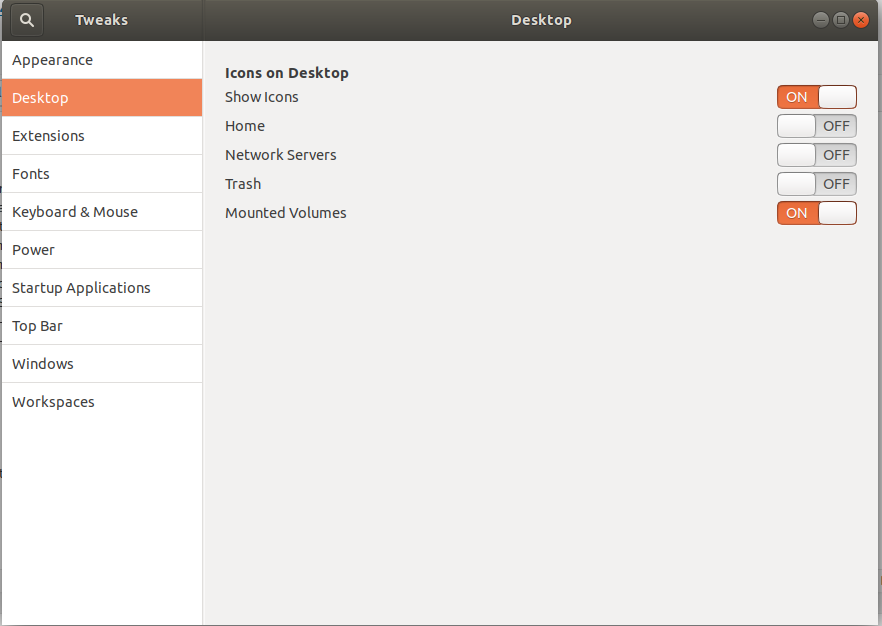
    If you have gnome tweaks tool installed, go to Desktop, you have option to disable Trash Icon.

    Ubuntu 18.04 remove trash

    See Ubuntu 18.04

  • Enable Hot Corner in Ubuntu 18.04

    Enable Hot Corner in Ubuntu 18.04

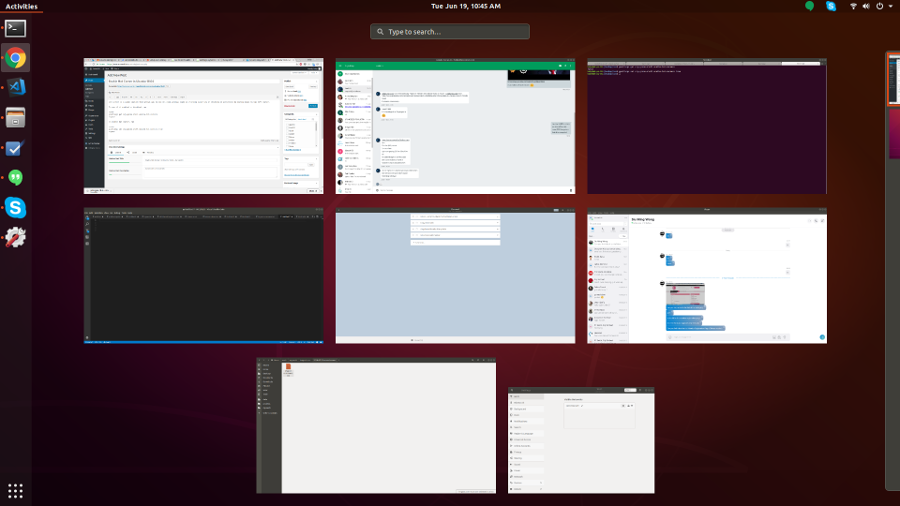
    Hot Corner is a Gnome Feature that allows you to see all open windows (same as clicking Super key or clicking on Activites) by moving mouse to top left corner.

    Ubuntu 18.04 hot corner

    To see if hot corner is enabled or disabled, run

    gsettings get org.gnome.shell enable-hot-corners
    

    To enable hot corner, run

    gsettings set org.gnome.shell enable-hot-corners true
    

    EDIT: After using enable hot corner for a day, i found my mouse reach this corner accidetly multiple times. Seeing activites page unexpectedly when you want someting else is confusing. For Ubuntu, it is better to keep it disabled.

    To disable, run

    gsettings set org.gnome.shell enable-hot-corners false
    

    See Ubuntu 18.04

  • Separate Google Hangout icon in Ubuntu 18.04/20.04

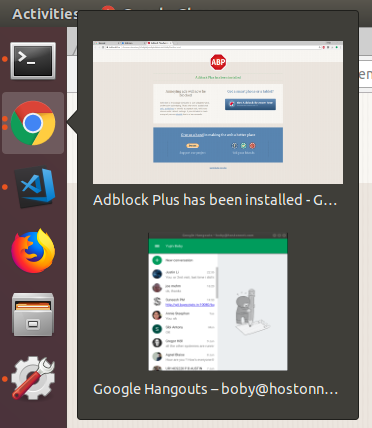
    On Ubuntu 18.04/20.4, when you install google hangout plugin in google chrome, it shows samne as Google Chrome Icon. It act like you have opened 2 windows, it is hard to switch between as every time you click on Google chrome icon in side bar, it ask you to select which window to switch to.

    Ubuntu Google Hangout Icon

    On Ubuntu 16.04, it shows same icon, but windows won’t combine in side bar, so you can click them seperately. To make Hangout show differnt icon in Ubuntu 18.04, first find ID of Google Hangout plugin. Go to Menu > More Tools > Extensions.

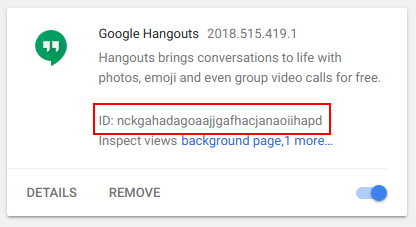
    You need to enable “Developer mode” to see Extension ID, this can be done on extension page top-right side.

    Google Hangout Plugin id

    In this cause, we found ID of Google Hangout Extension as “nckgahadagoaajjgafhacjanaoiihapd”. This can change, so always find ID of extension you have installed.

    Now create a file (make sure you replace GOOGLE_HANGOUT_PLUGIN_ID with ID you found in step above).

    vi ~/.local/share/applications/chrome-GOOGLE_HANGOUT_PLUGIN_ID-Default.desktop
    

    Add following to the file

    #!/usr/bin/env xdg-open
    [Desktop Entry]
    Version=1.0
    Terminal=false
    Type=Application
    Name=Gmail
    Exec=/opt/google/chrome/google-chrome --profile-directory=Default --app-id=GOOGLE_HANGOUT_PLUGIN_ID
    Icon=chrome-GOOGLE_HANGOUT_PLUGIN_ID-Default
    NoDisplay=true
    StartupWMClass=crx_GOOGLE_HANGOUT_PLUGIN_ID
    

    Save and exit. Here is what i have on my computer.

    boby@ok-pc-01:~$ cat ~/.local/share/applications/chrome-nckgahadagoaajjgafhacjanaoiihapd-Default.desktop
    #!/usr/bin/env xdg-open
    [Desktop Entry]
    Version=1.0
    Terminal=false
    Type=Application
    Name=Gmail
    Exec=/opt/google/chrome/google-chrome --profile-directory=Default --app-id=nckgahadagoaajjgafhacjanaoiihapd
    Icon=chrome-nckgahadagoaajjgafhacjanaoiihapd-Default
    NoDisplay=true
    StartupWMClass=crx_nckgahadagoaajjgafhacjanaoiihapd
    boby@ok-pc-01:~$ 
    

    Now if you start Google Hangout, it will show as differnt application. But Hangout won’t show generic icon.

    To get hangout show proper icon, right click and save following icon file

    Google Hangout Icon for Ubuntu 18.04

    Rename it as “chrome-GOOGLE_HANGOUT_PLUGIN_ID-Default.png”. Make sure to replace “GOOGLE_HANGOUT_PLUGIN_ID” with your actial plugin id. In my case, the name of the file is “chrome-nckgahadagoaajjgafhacjanaoiihapd-Default.png”

    Put the icon file in following location.

    ~/.local/share/icons/hicolor/128x128/apps/chrome-GOOGLE_HANGOUT_PLUGIN_ID-Default.png
    

    Now restart your computer or restart Gnome Shell, you will have new shiny icon for google hangout.

    Google Hangout Separate Icon Ubuntu 18.04

    See Ubuntu 18.04

  • Enable Native Notification in Google Chrome

    Enable Native Notification in Google Chrome

    UPDATE: Google Chrome have this option removed now. But you still can manually enable it by editing config file. See Disable Native Notification on Google Chrome Ubuntu

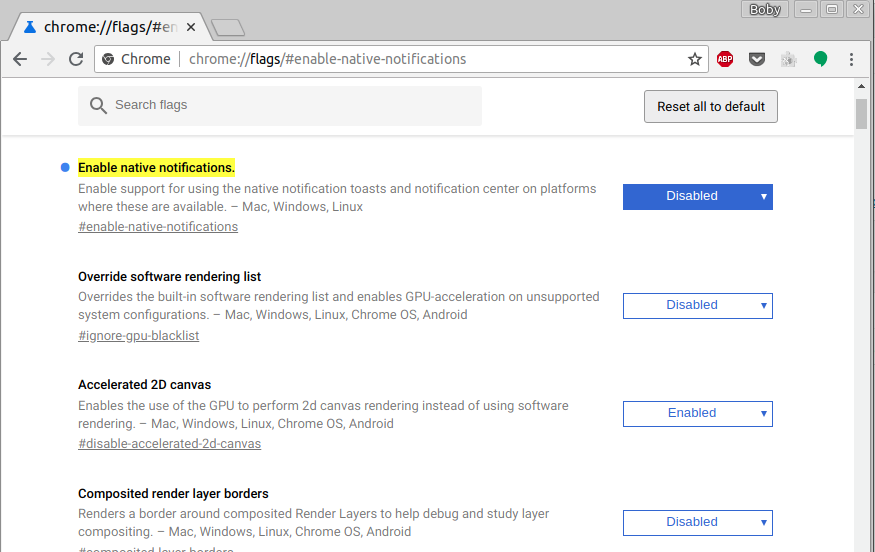
    To enable/disable native notification in Google chrome, go to

    chrome://flags/#enable-native-notifications
    

    Google Chrome Native Notification

    Once native notification is enabled/disabled, you will be asked to restart browser.

    On Ubuntu 18.04, i disable Native Notification as it is buggy, come can’t control how long notification shown if you use native notification. With chrome provided notification, you can use javascript to disable notification after predefined time. On Ubuntu 16.04, native notification is disabled by default.

    Chrome

  • Install x2Go Client in Ubuntu

    x2go client is available in Ubuntu repoitory. To install, run

    apt install x2goclient
    

    Here are some useful shortcuts

    • Ctrl + Alt + F = Switch between full screen and window mode
    • Ctrl + Alt + arrow keys = change view port.

    x2go

  • Install Unity Desktop in Ubuntu 18.04

    Install Unity Desktop in Ubuntu 18.04

    After installing Ubuntu 18.04, i have several small issues with new Gnome desktop, most of it i solved with plugins. But i decided to switch back to Unity desktop as for a while until i am ready to Gnome desktop.

    To install Unity Desktop in Ubuntu 18.04, run

    sudo apt install ubuntu-unity-desktop
    

    You will be asked to select display manager. Select lightdm.

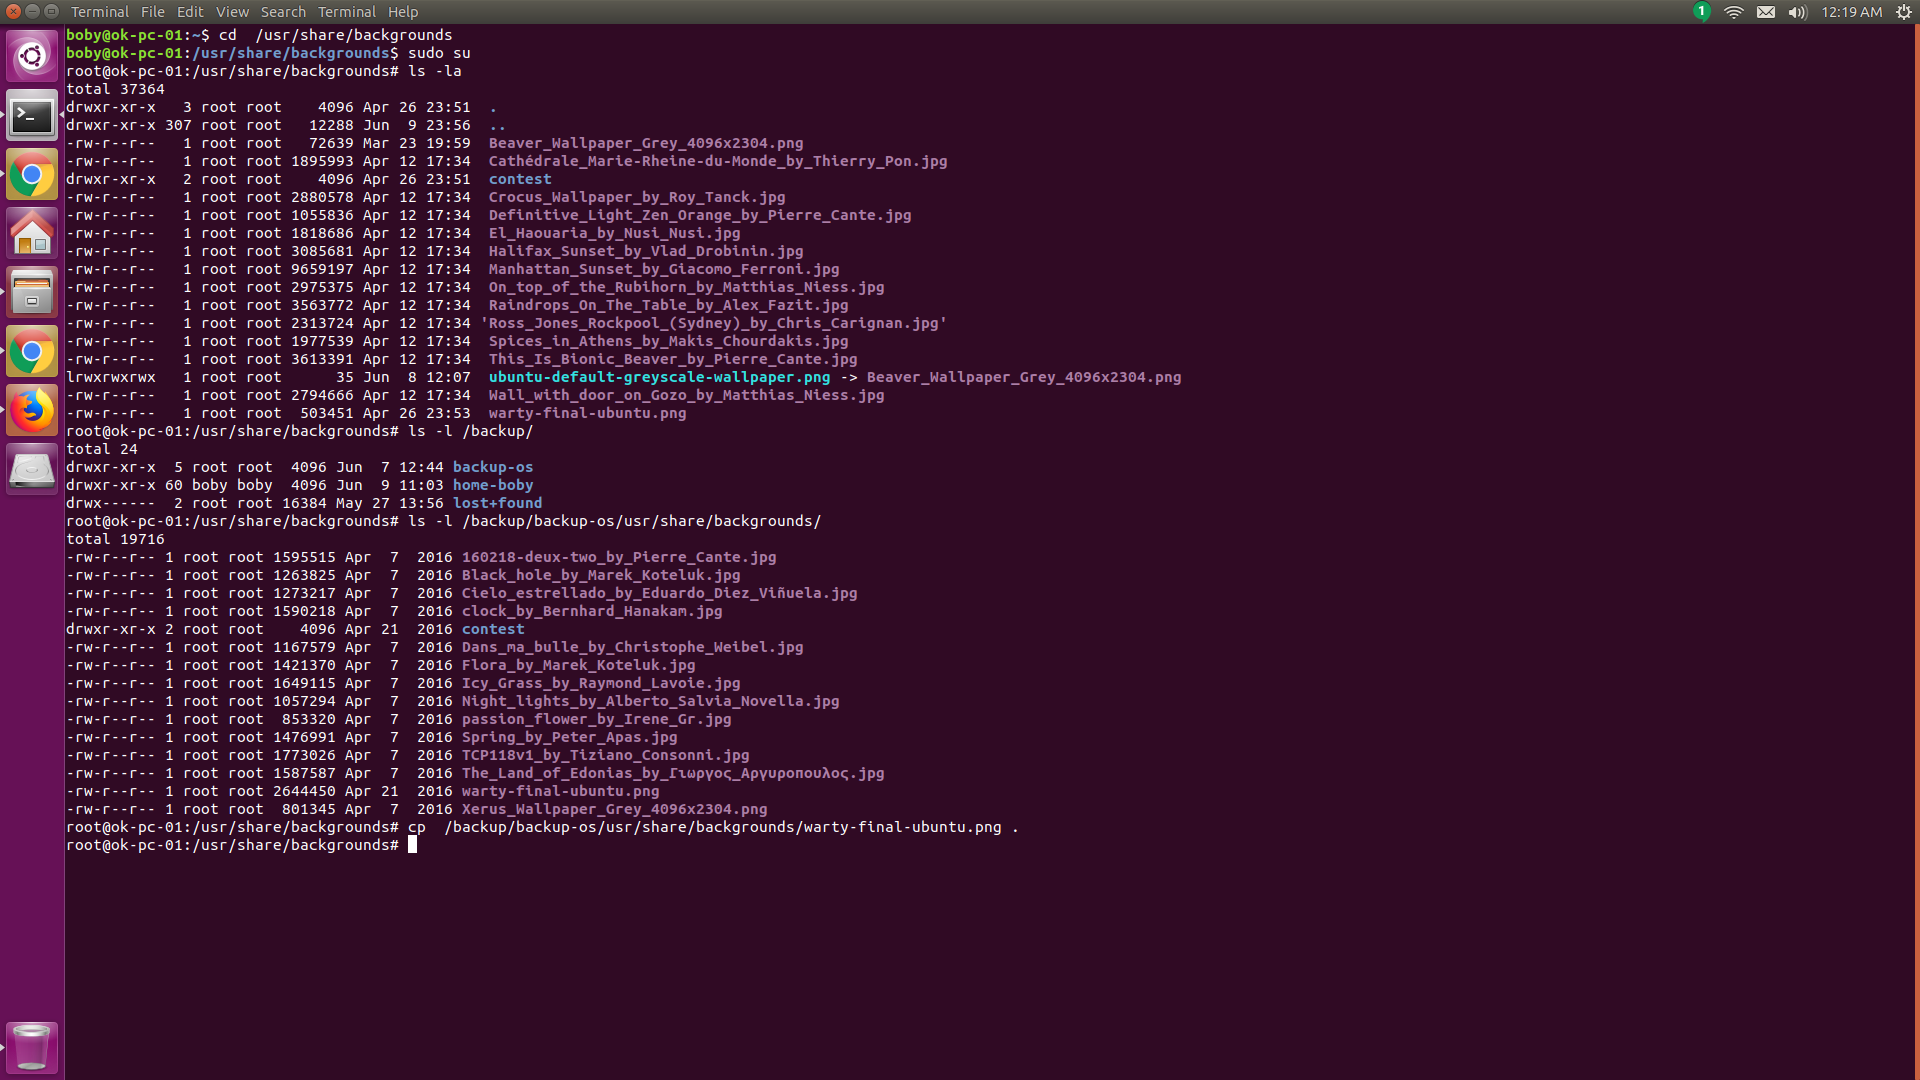
    To make it look like Ubuntu 16.04, i copied old wallpaper used by Ubuntu 16.04

    sudo cp /backup/backup-os/usr/share/backgrounds/warty-final-ubuntu.png /usr/share/backgrounds/warty-final-ubuntu.png
    

  • Things to do after installing Ubuntu 18.04

    Things to do after installing Ubuntu 18.04

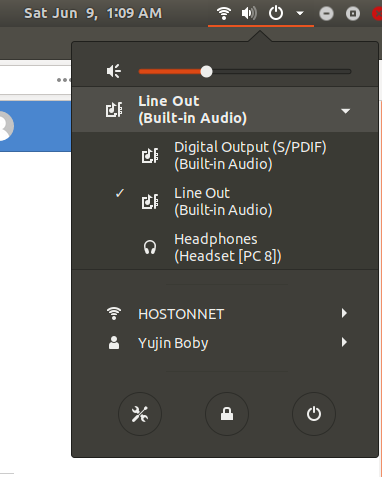
    Today i installed Ubuntu 18.04. Ubuntu 18.04 use GNOME desktop instead of Unity Desktop. I like some of the new features, but missed some feeatured i am used to in Ubuntu 16.04. First thing i notice was i can’t easy change sound output device like in Ubuntu 16.04, i expected Ubuntu 18.04 made it easier. But after spending some time, i found out i can customize Gnome to make it work like i need.

    Show date in top bar

    I want to show date along with time in top bar. To enable this, you need to install gnome-tweek-tool.

    sudo  apt-get install gnome-tweak-tool
    

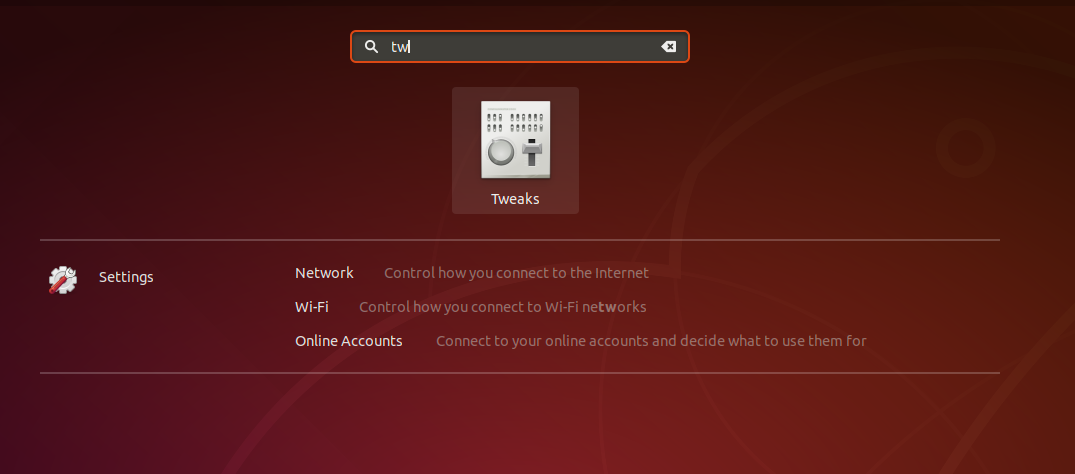
    Now start gnome tweak tool, this is available as Tweaks

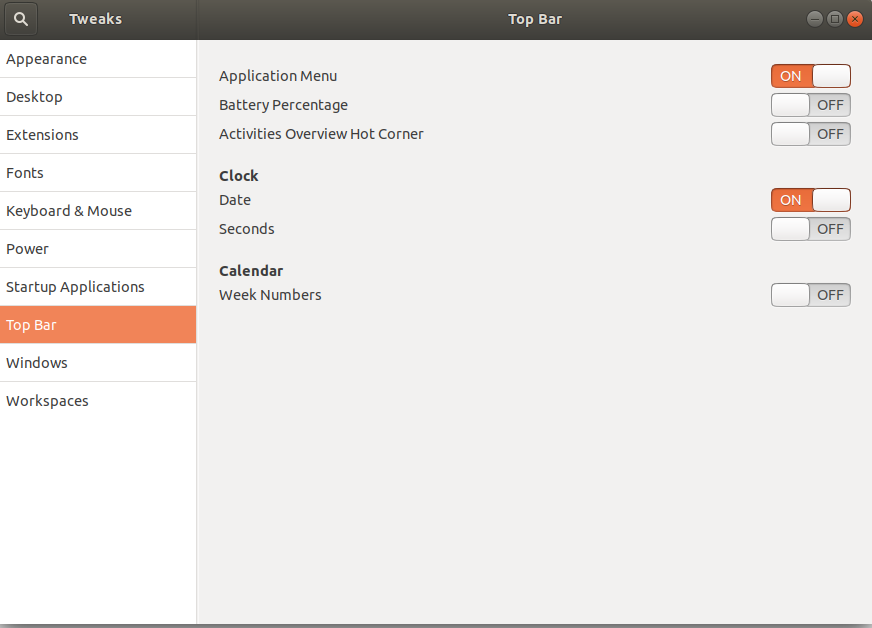
    Gnome Tweaks

    Go to Tweaks > Top Bar. Under clock, set “Date” to On.

    Gnome Tweaks Enable Date

    Now you will see full date along with time.

    Set time 12 Hour format

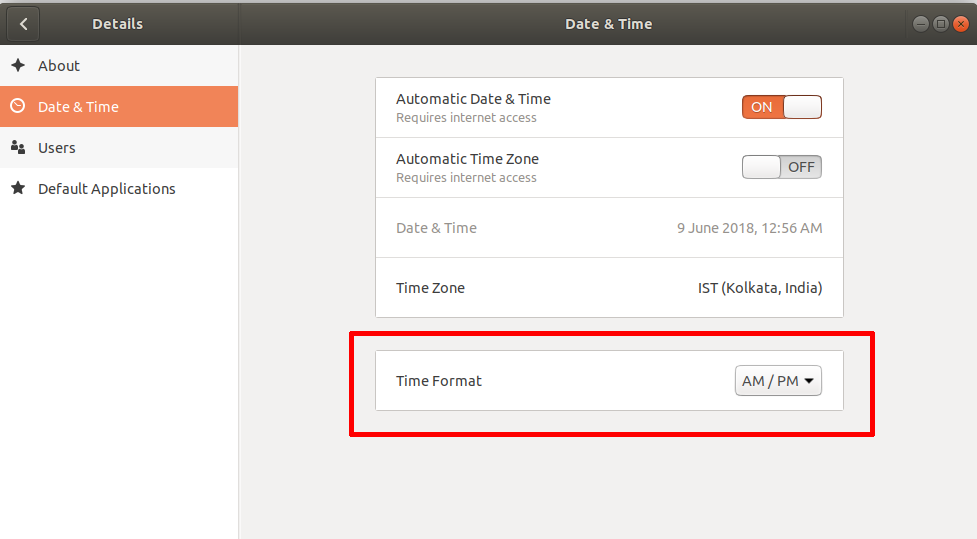
    By default Ubuntu 18.04 show time in 24 hour format. I prefer 12 hour format with AM/PM.

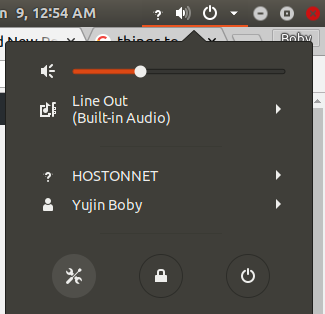
    Click on Power button, select Settings.

    Go to Details > Date & Time

    Gnome Shell Extensions

    You can customise how GNOME work by installing extensions. This is just like google chrome/firefox extensions. Installing is easy.

    First run

    sudo apt install gnome-shell-extensions chrome-gnome-shell
    

    Now open your web browser, visit

    https://extensions.gnome.org

    This will ask you to install a browser plugin, so you can install Gnome Extensions easily from the browser itself.

    For Firefox, install plugin

    https://addons.mozilla.org/en-US/firefox/addon/gnome-shell-integration/

    Create an account in Gnome.org, so you can manage your extensions.

    Here is some of the Gnome Extensions i installed.

    Unite

    Unite make your Gnome Top bar like Unity. Date get moved to right side. Also application close buttons merge with top bar like in Ubunty. This save from top space. This is highly recommended if you are a Unity user switching to Gnome.

    You can install it from

    https://extensions.gnome.org/extension/1287/unite/

    Sound Input & Output Device Chooser

    This Gnome Extension allow you to easily switch sound devices.

    You can get it from

    https://extensions.gnome.org/extension/906/sound-output-device-chooser/

    Remove Totem

    Ubuntu come with Torem video player. I perfer VLC. Remove Totem and install VLC with

    sudo apt remove --purge totem
    sudo apt install -y vlc