Category: Ubuntu

  • Install Tor on Ubuntu

    Tor is a highly anonymous proxy network. Tor is used by sites in dark web as it is almost impossible to find who owns a web site when it is hidden using tor.

    https://www.torproject.org

    To install tor on Ubuntu/Debian, run

    apt install -y tor
    

    This will start a sock5 proxy server on your PC on port 9050.

    tor proxy

    To check if proxy is working, run

    root@ok-vm:~# curl --socks5 127.0.0.1:9050 http://checkip.amazonaws.com
    185.220.101.44
    root@ok-vm:~# 
    

    You can also use “torify”, that work like proxychains.

    root@ok-vm:~# torify curl http://checkip.amazonaws.com
    185.220.101.46
    root@ok-vm:~# 
    

    You can configure your browser to use sock5 proxy server running on 127.0.0.1 on port 9050.

    If you are using applications that do not support proxy, then you can use torify or proxychains, for example.

    torify google-chrome
    
  • Install MATE Desktop in Ubuntu

    Add PPA repo with command

    apt-add-repository ppa:ubuntu-mate-dev/xenial-mate
    

    To install MATE run

    apt-get update
    apt-get install mate 
    

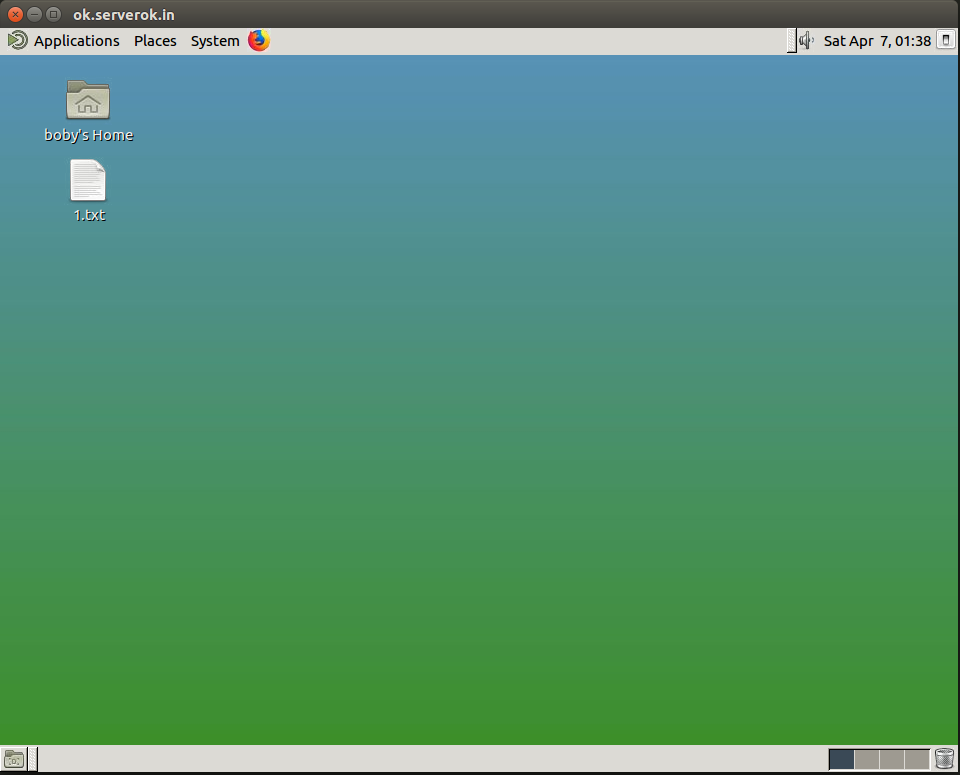
    This install was done on remote VPS with x2go server. Once install is over, i am able to connect to remote desktop using x2go client.

    x2go

  • Install PHP 7.2 on Ubuntu

    To install PHP 7.2, first add repository with command

    add-apt-repository ppa:ondrej/php
    

    Now run apt update

    apt update
    

    Install PHP 7.2 with command

    apt install php7.2
    

    To install additional modules, run

    apt install php7.2-bcmath php7.2-bz2 php7.2-cgi php7.2-cli php7.2-common php7.2-curl php7.2-dba php7.2-dev php7.2-enchant php7.2-fpm php7.2-gd php7.2-gmp php7.2-imap php7.2-intl php7.2-json php7.2-mbstring php7.2-mysql php7.2-opcache php7.2-pgsql php7.2-pspell php7.2-readline php7.2-soap php7.2-sqlite3 php7.2-sybase php7.2-tidy php7.2-xml php7.2-xmlrpc php7.2-zip php7.2-xsl
    

    php

  • Ubuntu point all .test domains to 127.0.0.1

    Until recently .dev was popular TLD used by developers for local web development. Recently google acquired the rights to use .DEV domain name extension and forced SSL for this LTD in google chrome.

    Web developers are looking for alternate home for their local development web sites. Some suggested .localhost as development LTD, but it is too large. Another option is .test, this is a reserved LTD, so you won’t be forced to leave and is short. So many opted for .test as local development domain extension.

    DNSMasq allow you to point *.test domains to 127.0.01, so you don’t have to edit /etc/hosts and add each domain you need for local development.

    To do this, create file

    vi /etc/NetworkManager/dnsmasq.d/test
    

    Add following

    address=/.test/127.0.0.1
    

    Restart network-manager.

    service network-manager restart
    

    We restarted network-manager as dnsmasq is started by Network Manager.

    root@hon-pc-01:~# pstree -sp $(pidof dnsmasq)
    systemd(1)───NetworkManager(11557)───dnsmasq(11594)
    root@hon-pc-01:~#

    dnsmasq

  • Installing OpenSSH from Source on Ubuntu 16.04

    PCI Compliance report from COMMODO complain about OpenSSH version available in Ubuntu 16.04.

    SSH-2.0-OpenSSH_7.2p2 Ubuntu-4ubuntu2.4

    This version have all security updates back ported. Installing OpenSSH from source is bad idea as you have to manually upgrade to latest version when new version is released.

    Since PCI Compliance require new version of OpenSSH, i installed from source. It is better to LIMIT SSH access to your own IP using firewall or hosts.allow/deny rules.

    Install requirements

    apt update && apt install -y build-essential libssl-dev zlib1g-dev
    

    Go to

    https://www.openssh.com/portable.html

    Download latest version of OpenSSH source code from one of the mirrors.

    Download and install with

    cd /usr/local/src
    wget https://cloudflare.cdn.openbsd.org/pub/OpenBSD/OpenSSH/portable/openssh-7.6p1.tar.gz
    tar -zxvf openssh-7.6p1.tar.gz
    cd /usr/local/src/openssh-7.6p1
    make clean && make distclean
    ./configure --prefix=/usr
    make
    make install
    
  • Install x2go Server in Ubuntu 16.04

    To install x2Go server in Ubuntu, run

    add-apt-repository ppa:x2go/stable
    apt-get update
    apt-get -y install x2goserver x2goserver-xsession
    

    if you don’t have xfce, install it with

    apt -y install xfce4
    

    See x2go, add-apt-repository

  • Invalid command Header

    On a web site running Apache, i got following error in log file

    [Fri Jan 19 06:43:41.146643 2018] [core:alert] [pid 3536:tid 139697024132864] [client 112.133.229.111:50559] /home/site.com/public_html/.htaccess: Invalid command 'Header', perhaps misspelled or defined by a module not included in the server configuration, referer: https://site.com/

    This was Ubuntu server with Apache.

    Problem is due to Apache Headers module not enabled. Fixed by running

    a2enmod headers

    Restart Apache

    systemctl restart apache2

    See Apache

  • Install PHP 5.6 on Debian

    Debian 9 come with PHP 7. To install PHP 5.6, run

    apt install apt-transport-https lsb-release ca-certificates -y
    wget -O /etc/apt/trusted.gpg.d/php.gpg https://packages.sury.org/php/apt.gpg
    sh -c 'echo "deb https://packages.sury.org/php/ $(lsb_release -sc) main" > /etc/apt/sources.list.d/php.list'
    apt-get update
    

    Install PHP 5.6 with

    apt install -y php5.6 php5.6-mysql php5.6-gd php5.6-mbstring php5.6-mcrypt php5.6-zip php5.6-curl php5.6-xml
    

    Enable SimpleXML module

    phpenmod -v 5.6 simplexml
    

    Install php-fpm if required

    apt install -y php5.6-fpm
    

    See php

  • OVH VPS Configure failover IP in Ubuntu

    On Ubuntu

    Default config look like

    root@zecurecode:~# cat /etc/network/interfaces
    # This file describes the network interfaces available on your system
    # and how to activate them. For more information, see interfaces(5).
    
    # The loopback network interface
    auto lo
    iface lo inet loopback
    
    # Source interfaces
    # Please check /etc/network/interfaces.d before changing this file
    # as interfaces may have been defined in /etc/network/interfaces.d
    # See LP: #1262951
    source /etc/network/interfaces.d/*.cfg
    
    root@zecurecode:~#
    

    /etc/network/interfaces.d/50-cloud-init.cfg is used to auto configure network interface with dhcp.

    root@zecurecode:~# cat /etc/network/interfaces.d/50-cloud-init.cfg 
    # This file is generated from information provided by
    # the datasource.  Changes to it will not persist across an instance.
    # To disable cloud-init's network configuration capabilities, write a file
    # /etc/cloud/cloud.cfg.d/99-disable-network-config.cfg with the following:
    # network: {config: disabled}
    auto lo
    iface lo inet loopback
    
    auto ens3
    iface ens3 inet dhcp
    root@zecurecode:~# 
    

    First find the gateway used by the VPS.

    root@zecurecode:~# route -n
    Kernel IP routing table
    Destination     Gateway         Genmask         Flags Metric Ref    Use Iface
    0.0.0.0         51.254.32.1     0.0.0.0         UG    0      0        0 ens3
    51.254.32.1     0.0.0.0         255.255.255.255 UH    0      0        0 ens3
    root@zecurecode:~# 
    

    We found the gateway IP 51.254.32.1

    The VPS had main IP of the server is 51.254.35.58 and secondary IPS 94.23.153.137, 178.32.52.159, 178.32.49.157

    Here is the modified /etc/network/interfaces

    root@zecurecode:~# cat /etc/network/interfaces
    # This file describes the network interfaces available on your system
    # and how to activate them. For more information, see interfaces(5).
    
    # The loopback network interface
    auto lo
    iface lo inet loopback
    
    # Source interfaces
    # Please check /etc/network/interfaces.d before changing this file
    # as interfaces may have been defined in /etc/network/interfaces.d
    # See LP: #1262951
    #source /etc/network/interfaces.d/*.cfg
    
    auto ens3
    iface ens3 inet static
        address 51.254.35.58
        netmask 255.255.255.255
        broadcast 51.254.35.58
        post-up route add 51.254.32.1 dev ens3
        post-up route add default gw 51.254.32.1
        post-down route del default gw 51.254.32.1
        post-down route del 51.254.32.1 dev ens3
    
    auto ens3:1
    iface ens3:1 inet static
        address 94.23.153.137
        netmask 255.255.255.255
        broadcast 94.23.153.137
    
    auto ens3:2
    iface ens3:2 inet static
        address 178.32.52.159
        netmask 255.255.255.255
        broadcast 178.32.52.159
    
    auto ens3:3
    iface ens3:3 inet static
        address 178.32.49.157
        netmask 255.255.255.255
        broadcast 178.32.49.157
    
    
    root@zecurecode:~# 
    

    Here is a PHP script to create OVH failover IP config for Ubuntu/Debian.

    https://gist.github.com/serverok/991f7ccd1be36cbc579e8d55caf39715

  • ufw

    ufw is firewall in Ubuntu.

    To enable

    systemctl enable ufw
    

    To list available apps, run

    ufw app list
    

    To see the status, run

    ufw status
    

    To see firewall rules in a numbered format

    ufw status numbered
    

    Stop ufw

    ufw disable
    

    Start ufw

    ufw enable
    

    Open Ports

    Here are some commands to open ports.

    ufw allow ssh
    ufw allow http
    ufw allow https
    ufw allow 3333/tcp
    

    Following command open tcp ports 8000 to 9000.

    ufw allow 8000:9000/tcp
    

    Disable all other ports by default for incoming and allow all outbound traffic

    ufw default deny incoming
    ufw default allow outgoing
    

    Whitelist an IP

    To allow an IP to access all services

    ufw allow from IP_ADDR_HERE
    

    To allow to specific PORT

    ufw allow from IP_ADDR_HERE proto tcp to any port PORT_HERE
    ufw allow from IP_ADDR_HERE proto udp to any port PORT_HERE
    

    Enable Logging

    To enable logging, run

    ufw logging on
    

    By default ufw logs to /var/log/kern.log.

    To log to differnt file, edit

    vi /etc/rsyslog.d/20-ufw.conf
    

    Uncomment the line

    :msg,contains,"[UFW " /var/log/ufw.log
    

    rstart rsyslog

    systemctl restart rsyslog
    

    Allow cloudflare IP in ufw

    for cfip in `curl -sw '\n' https://www.cloudflare.com/ips-v{4,6}`; do ufw allow proto tcp from $cfip comment 'Cloudflare IP'; done
    

    See firewall

  • apt error after MariaDB to MySQL change

    I have install MariaDB on a Ubuntu 16.04 server. Then installed Virtualmin, that require MySQL, so it removed MariaDB and installed MySQL, this caused apt stop working.

    When i run “apt update”, it failed with

    root@ok-vm:~# apt upgrade
    Reading package lists... Done
    Building dependency tree       
    Reading state information... Done
    You might want to run 'apt-get -f install' to correct these.
    The following packages have unmet dependencies:
     mysql-server : Depends: mysql-server-5.7 but it is not installed
    E: Unmet dependencies. Try using -f.
    root@ok-vm:~#
    

    Next i run ‘apt-get -f install’ as it said in above error message.

    root@ok-vm:~# apt-get -f install
    Reading package lists... Done
    Building dependency tree       
    Reading state information... Done
    Correcting dependencies... Done
    The following additional packages will be installed:
      mysql-server-5.7
    Suggested packages:
      mailx tinyca
    The following NEW packages will be installed:
      mysql-server-5.7
    0 upgraded, 1 newly installed, 0 to remove and 0 not upgraded.
    167 not fully installed or removed.
    Need to get 0 B/2,708 kB of archives.
    After this operation, 48.3 MB of additional disk space will be used.
    Do you want to continue? [Y/n] Y
    Preconfiguring packages ...
    (Reading database ... 120876 files and directories currently installed.)
    Preparing to unpack .../mysql-server-5.7_5.7.20-0ubuntu0.16.04.1_amd64.deb ...
    Aborting downgrade from (at least) 10.0 to 5.7.
    If are sure you want to downgrade to 5.7, remove the file
    /var/lib/mysql/debian-*.flag and try installing again.
    dpkg: error processing archive /var/cache/apt/archives/mysql-server-5.7_5.7.20-0ubuntu0.16.04.1_amd64.deb (--unpack):
     subprocess new pre-installation script returned error exit status 1
    Errors were encountered while processing:
     /var/cache/apt/archives/mysql-server-5.7_5.7.20-0ubuntu0.16.04.1_amd64.deb
    E: Sub-process /usr/bin/dpkg returned an error code (1)
    root@ok-vm:~#
    

    That too failed. The error message is

    Preparing to unpack …/mysql-server-5.7_5.7.20-0ubuntu0.16.04.1_amd64.deb …
    Aborting downgrade from (at least) 10.0 to 5.7.

    This is because MySQL detected MairaDB data files in /var/lib/mysql folder, it can’t use same data files as MariaDB is newer version.

    To fix the problem, i renamed the folder

    mv /var/lib/mysql /var/lib/mysql-old
    

    Now running “apt-get -f install” fixed the problem with apt.

    apt-get -f install