Tag: CentOS

  • Install OpenLiteSpeed on CentOS

    Install OpenLiteSpeed on CentOS

    To install OpenLiteSpeed web server on CentOS, install repository for your CentOS version

    For CentOS 6

    rpm -Uvh http://rpms.litespeedtech.com/centos/litespeed-repo-1.1-1.el6.noarch.rpm
    

    For CentOS 7

    rpm -Uvh http://rpms.litespeedtech.com/centos/litespeed-repo-1.1-1.el7.noarch.rpm
    

    For CentOS 8

    rpm -Uvh http://rpms.litespeedtech.com/centos/litespeed-repo-1.1-1.el8.noarch.rpm
    

    To install OpenLiteSpeed, run

    yum install openlitespeed
    

    Before you can install PHP, you need epel repository enabled with

    yum install epel-release
    

    Install PHP with

    yum install lsphp73 lsphp73-common lsphp73-mysql lsphp73-gd lsphp73-process lsphp73-mbstring lsphp73-xml lsphp73-mcrypt lsphp73-pdo lsphp73-imap lsphp73-soap lsphp73-bcmath lsphp73-json lsphp73-mysqlnd
    

    Set symlink

    ln -sf /usr/local/lsws/lsphp73/bin/lsphp /usr/local/lsws/fcgi-bin/lsphp5
    

    Start OpenLiteSpeed with

    /usr/local/lsws/bin/lswsctrl start
    

    To stop OpenLiteSpeed, run

    /usr/local/lsws/bin/lswsctrl stop
    

    By default, OpenLiteSpeed will run on port 8088

    http://YOUR_SERVER_IP_HERE:8088
    

    You can login to Admin Interface at

    http://YOUR_SERVER_IP_HERE:7080
    User = admin
    PW = 123456
    

    By default, you see an example application. The configuration file for this is at

    /usr/local/lsws/conf/vhosts/Example/vhconf.conf
    

    Default DocumentRoot is /usr/local/lsws/Example/html. To change, edit file

    vi /usr/local/lsws/conf/vhosts/Example/vhconf.conf
    

    Find

    docRoot $VH_ROOT/html/
    

    Replace $VH_ROOT/html/ with whatever path you need. You need to restart OpenLiteSpeed to make the change go live

    /usr/local/lsws/bin/lswsctrl restart
    
  • CentOS 7 VestaCP Upgrade PHP to 7.x

    On CentOS 7 VestaCP install PHP 5.6 by default. This is very old version of PHP. To upgrade PHP to latest version 7.x, you can install remi repo.

    Install EPEL repo

    yum install -y epel-release
    

    Install yum-utils

    yum install -y yum-utils
    

    Install remi repo

    rpm -ivh http://rpms.remirepo.net/enterprise/remi-release-7.rpm
    

    Select PHP version you need

    yum-config-manager --enable remi-php73
    

    Here i selected PHP 7.3. You can select differnt PHP versions with commands like.

    yum-config-manager --enable remi-php56
    yum-config-manager --enable remi-php71
    yum-config-manager --enable remi-php72
    yum-config-manager --enable remi-php73
    yum-config-manager --enable remi-php74
    

    Make sure you only enable one PHP version. If you enabled a PHP version from remi repo, disable it with

    yum-config-manager --disable remi-php56
    yum-config-manager --disable remi-php70
    yum-config-manager --disable remi-php71
    yum-config-manager --disable remi-php72
    yum-config-manager --disable remi-php73
    yum-config-manager --disable remi-php74
    

    Once you have desired version enabled, run yum upgrade

    yum upgrade
    

    Or only for PHP, run

    yum upgrade php*
    
  • CentOS 7 Grub 2

    CentOS 7 Grub 2

    To regenerate grub config on CentOS 7, run

    grub2-mkconfig -o /boot/grub2/grub.cfg
    

    If you use UEFI, run

    grub2-mkconfig -o /boot/efi/EFI/centos/grub.cfg
    

    OVH CentOS 7 server grub rescue prompt

    Back to grub

  • Disable PHP disable_functions on Cpanel Server

    Disable PHP disable_functions on Cpanel Server

    On a Cpanel Server using CentOS 7 + php-fpm, site phpinfo() shows few functions are set to disabled in disable_functions.

    PHP disable_functions

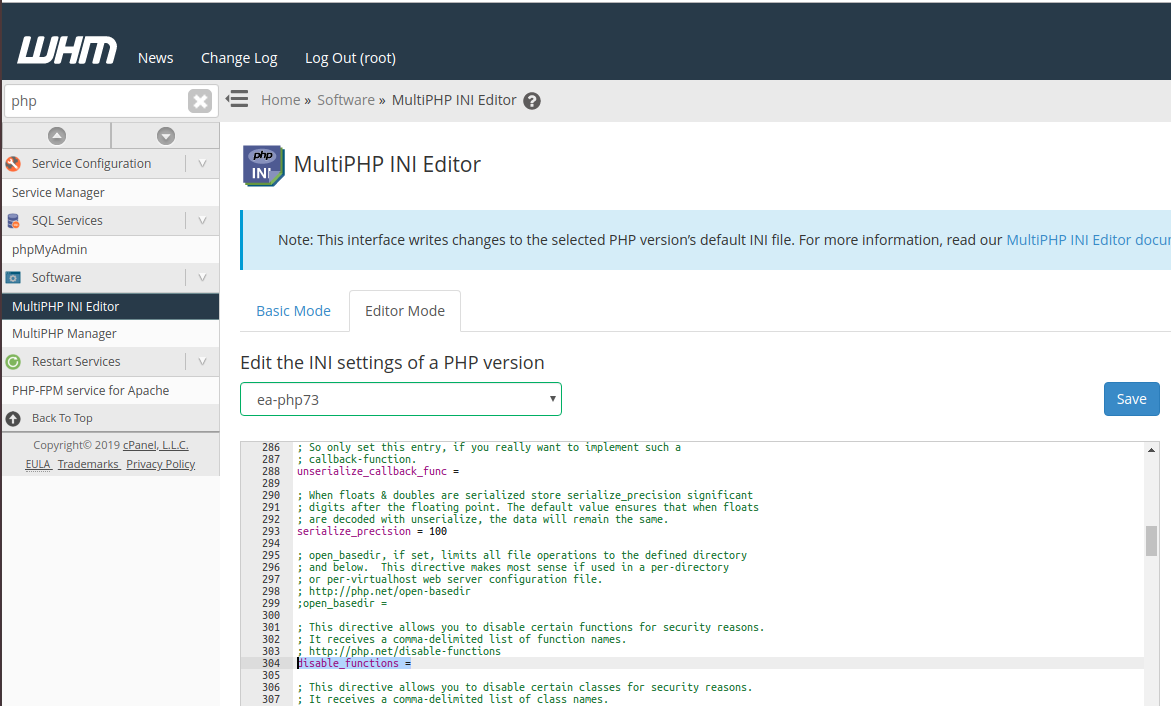
    I checked server wide PHP configuration in WHM for the PHP version the site is using. There is no disable_functions specified.

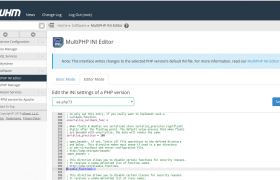
    WHM > Software > MultiPHP INI Editor > Editor Mode > PHP 7.3
    

    WHM php.ini editor

    This is because in Cpanel server running in PHP-FPM, you need to edit php-fpm pool config file at

    vi /opt/cpanel/ea-php73/root/etc/php-fpm.d/DOMAIN_NAME.conf
    

    Replace ea-php73 with whatever PHP version you selected for this web site.

    Remove the line

    php_admin_value[disable_functions] = exec,passthru,shell_exec,system
    

    Restart php-fpm with

    /scripts/restartsrv_apache_php_fpm
    

    See Cpanel Server

  • dnf – Package manager for CentOS/RHEL 8

    dnf is package manager for RHEL/CentOS 8. This is improved version of yum.

    To search for a package, use

    dnf search PACKAGE_NAME
    

    To install a package, use

    dnf install PACKAGE_NAME
    
  • CentOS 8

    CentOS 8 is a short-lived Linux distribution based on Red Hat Enterprise Linux (RHEL). Due to a change in policy, CentOS 8 had an early end of life on December 31, 2021.

    If you are using CentOS 8, you can easily migrate to other RHEL based distributions like Alma Linux, RockyLinux or Oracle Linux.

    CentOS will now provide CentOS 8 Stream, which is a rolling release Linux distribution. CentOS 8 Stream will position itself in the middle of Fedora and RHEL. It won’t be a copy of RHEL, instead, it will be used as a testing ground for RHEL. Newer versions of the software get released on CentOS 8 Stream, once it becomes stable, it will be included in RHEL.

  • Run Apache from command line

    To start Apache from command line with out using a systemd service file or init script, run

    /usr/sbin/httpd -DFOREGROUND
    

    To stop Apache, press CTRL+C.

    You can keep it running by running it inside screen or tmux.

    See Apache

  • Apache Increase FD limit

    Apache Increase FD limit

    On CentOS 7 sevrer running apache, when try to install plugin in WordPress admin area, i get error

    Installazione fallita: Il download non è andato a buon fine. cURL error 35: Process open FD table is full
    

    This is due to Apache File Descriptor Limits.

    To see current Limits, use following PHP script

    FD Soft Limit: " . exec('ulimit -Sn');
    echo "
    FD Hard Limit: " . exec('ulimit -Hn');

    To see system wide limits, use following commands

    sysctl fs.file-nr
    sysctl fs.file-max
    

    Normally this will be high value. You need to increse limit for user running Apache. On CentOS 7, the username is “apache”. To increase limit for this user, edit

    vi /etc/security/limits.conf
    

    Add following lines

    apache soft nofile 10240
    apache hard nofile 900000
    

    To verify, we need to login as user Apache, and verify limits, for this, lets enable SSH or bash terminal for user apache. By default no SSH login allowed for this user.

    chsh --shell /bin/bash apache
    

    Now change to user, verify the limits

    su - apache
    ulimit -Hn
    ulimit -Sn
    

    Exit back to root, disable shell for user apache with command.

    chsh --shell /sbin/nologin apache
    

    We need to edit service file for Apache. Default service file look like following.

    [root@centos-s-1vcpu-1gb-blr1-01 ~]# cat /usr/lib/systemd/system/httpd.service
    [Unit]
    Description=The Apache HTTP Server
    After=network.target remote-fs.target nss-lookup.target
    Documentation=man:httpd(8)
    Documentation=man:apachectl(8)
    
    [Service]
    Type=notify
    EnvironmentFile=/etc/sysconfig/httpd
    ExecStart=/usr/sbin/httpd $OPTIONS -DFOREGROUND
    ExecReload=/usr/sbin/httpd $OPTIONS -k graceful
    ExecStop=/bin/kill -WINCH ${MAINPID}
    # We want systemd to give httpd some time to finish gracefully, but still want
    # it to kill httpd after TimeoutStopSec if something went wrong during the
    # graceful stop. Normally, Systemd sends SIGTERM signal right after the
    # ExecStop, which would kill httpd. We are sending useless SIGCONT here to give
    # httpd time to finish.
    KillSignal=SIGCONT
    PrivateTmp=true
    
    [Install]
    WantedBy=multi-user.target
    [root@centos-s-1vcpu-1gb-blr1-01 ~]# 
    

    Find

    [Service]
    

    Add below

    LimitNOFILE=65535
    LimitNPROC=65535
    

    Method 2

    create file

    mkdir -p /etc/systemd/system/httpd.service.d/
    vi /etc/systemd/system/httpd.service.d/limits.conf
    

    Add

    [Service]
    LimitNOFILE=65535
    LimitNPROC=65535
    

    Reload service file with

    systemctl daemon-reload
    

    Restart Apache

    systemctl restart httpd
    

    See Apache

  • Download RPM package from yum repository

    To download RPM file from yum repo, you need to install yum-utils package.

    yum install -y yum-utils
    

    Now you can use command

    yumdownloader --resolve --destdir=/path/ PACKAGE_NAME
    

    Example

    yumdownloader --resolve --destdir=/root/yum/ nginx
    

    This will download and store all rpm files in /var/yum folder. –resolve will resolve dependency and download them. This will be helpful if you need to install a package on a system with no direct internet connection.

    See yum

  • Zimbra Mail Server CentOS firewall settings

    On CentOS 7 server with firewalld running, used following command to open ports used by Zimbra Mail Server.

    firewall-cmd --zone=public --permanent --add-service=http
    firewall-cmd --zone=public --permanent --add-service=https
    firewall-cmd --zone=public --permanent --add-service=ssh
    firewall-cmd --zone=public --permanent --add-port=110/tcp
    firewall-cmd --zone=public --permanent --add-port=11211/tcp
    firewall-cmd --zone=public --permanent --add-port=143/tcp
    firewall-cmd --zone=public --permanent --add-port=25/tcp
    firewall-cmd --zone=public --permanent --add-port=443/tcp
    firewall-cmd --zone=public --permanent --add-port=465/tcp
    firewall-cmd --zone=public --permanent --add-port=5222/tcp
    firewall-cmd --zone=public --permanent --add-port=5269/tcp
    firewall-cmd --zone=public --permanent --add-port=587/tcp
    firewall-cmd --zone=public --permanent --add-port=7025/tcp
    firewall-cmd --zone=public --permanent --add-port=7071/tcp
    firewall-cmd --zone=public --permanent --add-port=7072/tcp
    firewall-cmd --zone=public --permanent --add-port=7073/tcp
    firewall-cmd --zone=public --permanent --add-port=7110/tcp
    firewall-cmd --zone=public --permanent --add-port=7143/tcp
    firewall-cmd --zone=public --permanent --add-port=7993/tcp
    firewall-cmd --zone=public --permanent --add-port=7995/tcp
    firewall-cmd --zone=public --permanent --add-port=8443/tcp
    firewall-cmd --zone=public --permanent --add-port=993/tcp
    firewall-cmd --zone=public --permanent --add-port=995/tcp
    firewall-cmd --reload
    

    See Zimbra, firewall-cmd

  • CentOS add IP Address

    To add IP address on a Linux server, first find name of your network interface. This can be done with command

    ip link
    

    In most case, it can be enp3s0 or eth0, if you have more than one network card, this may be differnt, in such case, you need to identify which network interface you need to configure the the IP address .

    Now create file

    vi /etc/sysconfig/network-scripts/ifcfg-enp3s0:1
    

    Here i used enp3s0 as network inferface name, replace it with whatever network interface name you use.

    Add following content

    DEVICE="enp3s0:1"
    IPADDR=IP_ADDR_HERE
    NETMASK=255.255.255.255
    

    IP_ADDR_HERE = replace with the IP address you need to add.

    enp3s0 = replace with actual network interface name.

    Restart network service with command

    systemctl restart network
    

    If you need to add another IP, create file with name

    INTERFACE_NAME:2
    

    for example “enp3s0:2”, you need to use same alias name in DEVICE entry (first line) in the file.

    Adding IP Range in CentOS 6

  • Install CentOS Web Panel (CWP)

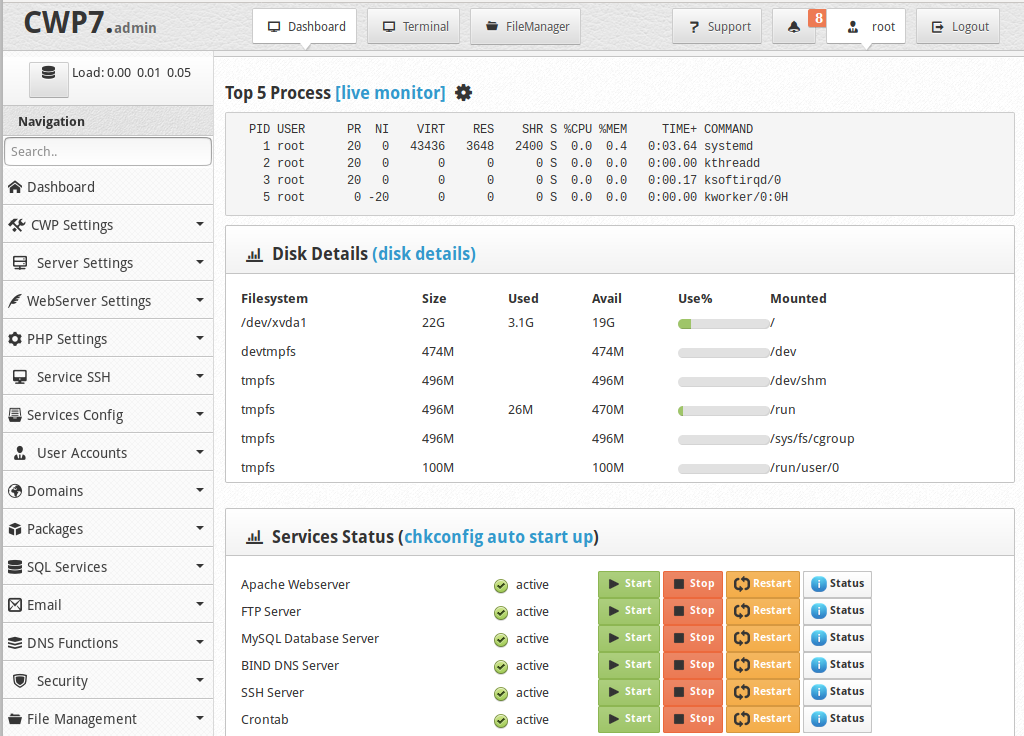
    CentOS Web Panel (CWP) is a free hosting control panel for CentOS servers.

    CentOS Web Panel

    To install CentOS Web Panel, run

    yum -y install wget
    cd /usr/local/src
    wget http://centos-webpanel.com/cwp-latest
    sh cwp-latest

    CWP use same Ports as popular Cpanel control panel.

    Admin Panel

    CWP Admin Panel available on following URL.

    You can login with system user “root” and its password.

    http://server-ip:2030
    http://server-ip:2086
    https://server-ip:2031
    https://server-ip:2087

    User Panel

    http://server-ip:2082/
    https://server-ip:2083/

    Webmail

    http://server-ip:2095
    https://server-ip:2096

    On CWP server, you can find MySQL login details in following config files.

    /root/.my.cnf
    /usr/local/cwpsrv/htdocs/resources/admin/include/db_conn.php
    /usr/local/cwpsrv/htdocs/resources/admin/include/postfix.php

    Document Root

    Web site files are stored in folder /home/USER/public_html

    Stop/Start Services

    systemctl start cwpsrv
    systemctl start cwp-phpfpm
    systemctl start httpd

    php-fpm used by cwp control panel

    systemctl stop cwpsrv-phpfpm
    systemctl start cwpsrv-phpfpm
    socket = /usr/local/cwp/php71/var/sockets/cwpsrv.sock

    Service files are stored in /usr/lib/systemd/system/

    Web Server

    CWP support multiple web servers. For Apache, it is installed in folder

    /usr/local/apache

    Apache config file is /usr/local/apache/conf.d/vhosts.conf

    CPW have its own apache package with name “cwp-httpd”, don’t use default httpd package provided by CentOS.

    CWP server log can be found at

    /var/log/cwp/webservers.log

    See Hosting Control Panel