Tag: Ubuntu

  • Configure OVH Failover IP in Ubuntu 20.04/22.04

    To configure IP in Ubuntu Server 20.04 guest, create a file

    vi /etc/netplan/50-netwrk.yaml

    add the following content

    network:
        version: 2
        ethernets:
            eth0:
                addresses:
                    - YOUR_FO_IP_HERE/32
                nameservers:
                    addresses:
                        - 1.1.1.1
                    search: []
                optional: true
                routes:
                    - to: 0.0.0.0/0
                      via: YOUR_GW_IP_HERE
                      on-link: true

    example

    root@easyengine:~# cat /etc/netplan/50-cloud-init.yaml
    network:
        version: 2
        ethernets:
            eth0:
                addresses:
                    - 164.132.150.95/32
                nameservers:
                    addresses:
                        - 1.1.1.1
                    search: []
                optional: true
                routes:
                    - to: 0.0.0.0/0
                      via: 51.255.79.254
                      on-link: true
    root@easyengine:~# 

    “on-link: true” is what makes it work. The “on-link: true” option is used to specify that a specific route should be considered “on-link.” This means that the route is directly reachable on the local network segment, and packets destined for that route should be sent directly to the network interface associated with that network segment, rather than being routed through a gateway.

    Test network config using

    netplan try

    If everything works fine, you can apply the changes with

    netplan apply

    See OVH, netplan

  • Ubuntu Remap keys in the keyboard

    Left Shift key on my keyboard started acting up. It some times work, some times it won’t. I never use the caps lock key on my kayboard, this is just above the shift key. So i decided to use this key as left shift key.

    To re-assign key, you need to edit file /usr/share/X11/xkb/symbols/pc

    Lets take a copy of the file before we edit it

    cp /usr/share/X11/xkb/symbols/pc ~/pc-backup
    

    Edit

    sudo gedit /usr/share/X11/xkb/symbols/pc
    

    Find the line

         key  {	[ Caps_Lock		]	};
    

    This is on line 22

    Replace with

         key  {	[ Shift_L		]	};
    

    Now you need to restart X-Windows by pressing ALT+F2, then type r. You can also just reboot your computer for the new keymap to work. After restart, i can use Caps lock key as my Left Shift key.

    If you want to disable left shift key, you can comment the line

        key  {	[ Shift_L		]	};
    

    by adding // at beginning of the line.

    See Ubuntu

  • Red Hat Killing CentOS Linux, Fight for CentOS clone

    Red Hat Killing CentOS Linux, Fight for CentOS clone

    RedHat, parent company of CentOS Linux announce it will stop supporting CentOS 8, the latest version of CentOS. CentOS is build from the source code RHEL, making a free version of stable and well-tested enterprise ready RHEL Linux. CentOS 7 will keep getting security updates until it reaches End Of Life June 30th, 2024. For Red Hat, maintaining CentOS wont help with their business. Now they don’t need to maintain CentOS, this will force many users to pay for Red Hat Enterprise Linux (RHEL).

    RedHat Killing CentOS Linux

    The new version of CentOS known as CentOS Stream is a rolling release. It will be used as a staging version of RHEL. Red Hat expect CentOS Stream to be stable and allow community participation as users will be able to contribute to CentOS Steam. With CentOS, community contribution was limited because it was a copy of RHEL.

    CentOS is populary used in web hosting servers as cpanel only supposed RHEL based Linux. With death of CentOS 8, cpanel have announced they will accelerate investment in development efforts to support additional operating systems. cPanel will suport Ubuntu LTS and expect to deliver a production-ready version in late 2021. After Ubuntu LTS, they will look into supporting Debian. Ubuntu is very popular with Cloud Servers as it come with latest software compared to CentOS. With many developers already using Ubuntu on their Desktop, supporting Ubuntu is wise decision by cpanel.

    With CentOS 8 unexpected demise, many users will be looking for alternative OS. This opens up market for next CentOS clone.

    Rocky Linux

    CentOS co-founder, Gregory Kurtzer announced he will be releasing his own Red Hat Enterprise Linux (RHEL) replacement Rocky Linux. No ETA on release date yet.

    https://rockylinux.org

    You can join discussion on their reddit.com/r/RockyLinux/

    Project Lenix

    Igor Seletskiy, CloudLinux CEO and founder said they will make their own RHEL patch to patch compatible Open Source Linux – Project Lenix.

    CloudLinux is a CentOS based commerical Linux, that is popular amoung web hosting providers as it allow resource limit per user and user isolation with CageFS. They also have support for kernel update with out reboot.

    CloudLinux will be investing more than a million dollar into Project Lenix. CentOS 8 users will be able to convert into Project Lenix or CloudLinux easily with out reboot. In the announcement Igor Seletskiy said “Red Hat’s announcement has left users looking for an alternative with all that CentOS provides and without the disruption of having to move to alternative distributions. We promise to dedicate the resources required to Project Lenix that will ensure impartiality and a not-for-profit community initiative. CloudLinux already has the assets, infrastructure, and experience to carry out the mission, and we promise to be open about the process of developing Project Lenix”.

    See CentOS

  • Ubuntu Server 20.04 set static IP with netplan

    First check if you have file

    /etc/cloud/cloud.cfg.d/subiquity-disable-cloudinit-networking.cfg

    If the file exists, make sure, you have the following content in it.

    root@ubuntu:~# cat /etc/cloud/cloud.cfg.d/subiquity-disable-cloudinit-networking.cfg
    network: {config: disabled}
    root@ubuntu:~# 

    Edit

    vi /etc/netplan/00-installer-config.yaml

    Replace all content with

    network:
        version: 2
        ethernets:
            eth0:
                addresses: [192.168.1.100/24]
                routes:
                    - to: default
                      via: 192.168.1.1
                nameservers:
                    addresses: [1.1.1.1, 8.8.8.8]

    In the above cause 192.168.1.100 is your static IP address. 192.168.1.1 is the gateway. eth0 is the network interface name.

    Older versions of netpan used gateway4 instead of routes.

                gateway4: 192.168.1.1

    Now try the changes with

    netplan try

    If all is good, you can make changes permanent with

    netplan apply

    See IP

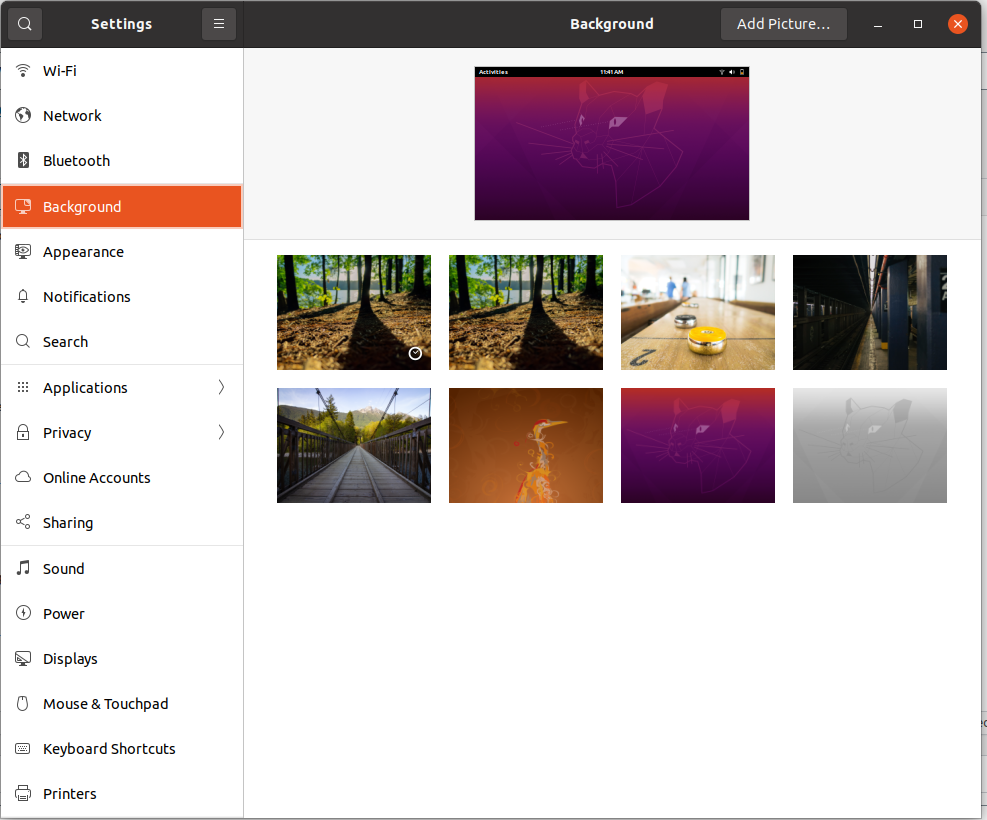
  • Ubuntu 20.04/22.04 settings won’t open

    On Ubuntu 20.04/22.04 settings won’t open. This may be caused by some software install/update.

    ubuntu settings

    I tried to run

    gnome-control-center

    From the terminal, I get the error

    boby@sok-01:~$ gnome-control-center
    
    Command 'gnome-control-center' not found, but can be installed with:
    
    sudo apt install gnome-control-center
    
    boby@sok-01:~$ 

    To fix the error, I installed gnome-control-center package as the error suggests.

    sudo apt install gnome-control-center

    See Ubuntu

  • csf error path to iptables is either not set or incorrect

    Whem install csf firewall on Ubuntu 20.04, i get following error

    root@ok:~# csf
    *Error* The path to iptables is either not set or incorrect for IPTABLES [/usr/sbin/ip6tables] in /etc/csf/csf.conf at /usr/local/csf/lib/ConfigServer/URLGet.pm line 26.
    Compilation failed in require at /usr/sbin/csf line 21.
    BEGIN failed--compilation aborted at /usr/sbin/csf line 21.
    root@ok:~#
    

    This is because path for iptables is changed in Ubuntu 20.04. To fix the error edit csf.conf

    vi /etc/csf/csf.conf
    

    Find

    IPTABLES = "/sbin/iptables"
    IPTABLES_SAVE = "/sbin/iptables-save"
    IPTABLES_RESTORE = "/sbin/iptables-restore"
    IP6TABLES = "/sbin/ip6tables"
    IP6TABLES_SAVE = "/sbin/ip6tables-save"
    IP6TABLES_RESTORE = "/sbin/ip6tables-restore"
    

    Replace with

    IPTABLES = "/usr/sbin/iptables"
    IPTABLES_SAVE = "/usr/sbin/iptables-save"
    IPTABLES_RESTORE = "/usr/sbin/iptables-restore"
    IP6TABLES = "/usr/sbin/ip6tables"
    IP6TABLES_SAVE = "/usr/sbin/ip6tables-save"
    IP6TABLES_RESTORE = "/usr/sbin/ip6tables-restore"
    

    Now restart csf with csf -r, it will work.

    csf -r
    systemctl restart lfd
    

    See csf

  • GNOME Shell Extension

    GNOME Shell Extensions allow you to add/modify features in Gnome Desktop. Gnome Desktop is used by Ubuntu.

    Shell Extensions are stored in folder

    /home/USER/.local/share/gnome-shell/extensions
    

    On Ubuntu 20.04, i installed NoAnnoyance extension. This prevent Annoying Windows Ready notification.

    https://extensions.gnome.org/extension/1236/noannoyance/

    To install an extension, go to the web page of the extension, you will be asked to install a browser extension. Once browser etxtension installed, you need to install

    sudo apt install chrome-gnome-shell
    

    This is same for both Google Chrome and Firefox. Now you can go to any extension page, select “ON/OFF” button on the page to install an extension.

    Extensions i use on Ubuntu 20.04

    Ubuntu don’t have a quick way to switch between sound devices. For example switching between headphone and speaker. I used Sound Input & Output Device Chooser for very long. On 2021-03-30, it stopped working. I started using a differnt extension Audio output selector, this have less features, but do the work properly.

    List all Gnome Extensions

    To list all gnome extensions, run “gnome-extensions list”.

    boby@sok-01:~$ gnome-extensions list
    desktop-icons@csoriano
    [email protected]
    [email protected]
    [email protected]
    [email protected]
    boby@sok-01:~$ 
    

    To enable/disable an extension, use

    gnome-extensions enable EXTENSION_NAME
    gnome-extensions disable EXTENSION_NAME
    

    Example

    gnome-extensions disable [email protected]
    
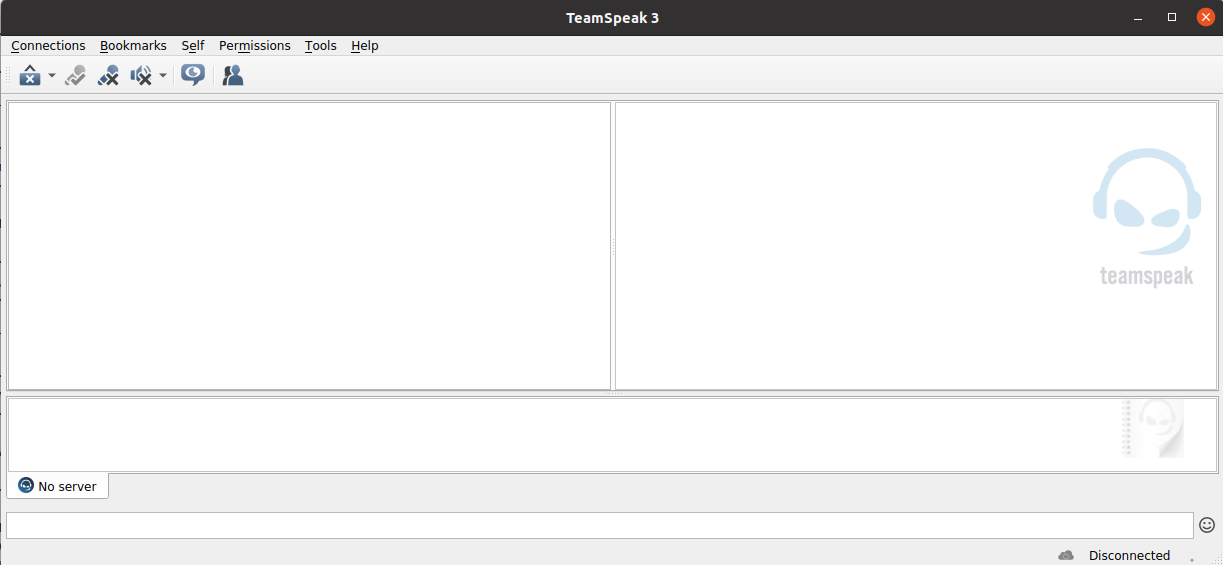
  • Install TeamSpeak Client on Ubuntu

    Install TeamSpeak Client on Ubuntu

    To install TeamSpeak client on Ubuntu, download latest version from

    https://www.teamspeak.com/en/downloads/

    Download page list both 32 and 64 bit versions. Most computers these days use 64 bit OS. So download 64 bit version unless you are using older computer with 32 bit OS.

    TeamSpeak Client Ubuntu

    On Ubuntu, you can find if you are using 32 or 64 bit version with command arch

    boby@sok-01:~$ arch
    x86_64
    boby@sok-01:~$ 
    

    Download latest version of TeamSpeak, as for this writing, latest verison is

    wget https://files.teamspeak-services.com/releases/client/3.5.5/TeamSpeak3-Client-linux_amd64-3.5.5.run
    

    Make it executable

    chmod 755 TeamSpeak3-Client-linux_amd64-3.5.5.run
    

    To extract it, run

    ./TeamSpeak3-Client-linux_amd64-3.5.5.run
    

    This will cretae a folder with TeamSpeak files. Move it to /opt directory or any other folder you prefer.

    mv TeamSpeak3-Client-linux_amd64 /opt/
    

    Now you can start TeamSpeak from command line with command

    /opt/TeamSpeak3-Client-linux_amd64/ts3client_runscript.sh
    

    To create a shortcut file, create a desktop file

    vi ~/.local/share/applications/teamspeak.desktop
    

    Add following content

    [Desktop Entry]
    Name=TeamSpeak 3
    Comment=TeamSpeak 3 VoIP Communicator
    Exec=/opt/TeamSpeak3-Client-linux_amd64/ts3client_runscript.sh
    Terminal=false
    Type=Application
    Categories=Network;Application;
    Icon=/opt/TeamSpeak3-Client-linux_amd64/styles/default/logo-128x128.png
    

    Now you will be able to find TeamSpeak 3 in Ubuntu Start menu/Dash.

    See Ubuntu

  • bash: man: command not found

    When running man command on a debian server, i get error

    root@lab:~# man sftp
    -bash: man: command not found
    root@lab:~#
    

    This is because man-db package not installed on the server. To fix, install man-db package with

    apt install man-db
    

    See Errors

  • Enable FTP for EasyEngine Website

    To Enable FTP for EasyEngine web sites, we need to install pure-ftpd. On Ubuntu/Debian, run

    apt install -y pure-ftpd
    

    Enable virtial FTP users

    ln -s /etc/pure-ftpd/conf/PureDB /etc/pure-ftpd/auth/PureDB
    touch /etc/pure-ftpd/pureftpd.pdb
    

    In EasyEngine, we sites files are owned by www-data user, this user have a UID of 33. By default pure-ftpd won’t allow this. To enable users with UD 33 to login, run

    echo 1 > /etc/pure-ftpd/conf/MinUID
    

    Now lets create FTP user for a web site running in EasyEngine.

    pure-pw useradd  FTP_USER_HERE -u www-data -g www-data -d /opt/easyengine/sites/DOMAIN_NAME_HERE/app/
    

    In above command replace

    FTP_USER_HERE = FTP user for the web site, this can be any name, no space

    DOMAIN_NAME_HERE = the domain name of the web site that is hosted in EasyEngine, that you need FTP access.

    When you run above command, you will be asked to select password for the FTP user, this can be used to login to FTP server.

    Before you can login to FTP server with newly created virtual FTP user, you need to run

    pure-pw mkdb
    systemctl restart pure-ftpd
    

    Change FTP Password

    If you want to change FTP user for a user, you can run

    pure-pw passwd FTP_USER_HERE
    pure-pw mkdb
    systemctl restart pure-ftpd
    

    Passive FTP Configuration

    Many cloud hosting providers like AWS, Google Cloud, Oracle Cloud, AliCloud servers use NAT networking. That is your VM have private IP and your public IP is routed to your VM. In such case, you need to enable Passive FTP, for this run

    echo "30000 50000" > /etc/pure-ftpd/conf/PassivePortRange
    echo "YOUR_PUBLIC_IP" > /etc/pure-ftpd/conf/ForcePassiveIP
    

    YOUR_PUBLIC_IP = replace this with your public IP address.

    Restart pure-ftpd

    systemctl restart pure-ftpd
    

    Firewall configuration

    For Passive FTP, you need to open following ports in your firewall

    tcp 21
    tcp 30000:50000
    

    On Oracle Cloud server, i edited file

    vi /etc/iptables/rules.v4
    

    Find

    -A INPUT -p tcp -m state --state NEW -m tcp --dport 22 -j ACCEPT
    

    Replace with

    -A INPUT -p tcp -m state --state NEW -m tcp --dport 21 -j ACCEPT
    -A INPUT -p tcp -m state --state NEW -m tcp --dport 22 -j ACCEPT
    -A INPUT -p tcp -m state --state NEW -m tcp --dport 30000:50000 -j ACCEPT
    

    Now restore firewall rules with

    iptables-restore < /etc/iptables/rules.v4
    

    Now FTP will work.

    See EasyEngine

  • Enable Remote Desktop in Ubuntu from the command line

    Method 1: Using x11vnc

    Connect to remote computer with SSH

    ssh user@REMOTE_PC_IP
    

    Install x11vnc

    sudo apt install x11vnc
    

    start x11vnc as the user that is logged in to GUI.

    x11vnc -display :0
    

    Now you should be able to connect to the desktop using any vnc client software using

    REMOTE_PC_IP:0
    

    Method 2: Using vino

    Connect to remote computer with SSH

    ssh -Y user@REMOTE_PC_IP
    

    Run

    sudo apt-get install vino -y
    vino-preferences
    

    You need X11 forward enabled to get this working, so you can run GUI application of remote PC on your PC.

    Configure settings as required.

    Now run

    export DISPLAY=:0.0
    xhost +
    /usr/lib/vino/vino-server
    

    This will start vino-server, if you want to run in background, run with & at end.

    /usr/lib/vino/vino-server &
    

    To verify vino running, run

    netstat -nl | grep 5900 
    

    Now you have VNC enabled on remote PC.

    Start your favorite VNC client and connect to remote PC.

    If you don’t have vino-preferences, you can use

    export DISPLAY=0.0
    gsettings set org.gnome.Vino notify-on-connect false
    gsettings set org.gnome.Vino prompt-enabled false
    gsettings get org.gnome.desktop.notifications.application:/org/gnome/desktop/notifications/application/vino-server/ enable
    gsettings set org.gnome.desktop.notifications.application:/org/gnome/desktop/notifications/application/vino-server/ enable false
    gsettings set org.gnome.desktop.notifications show-in-lock-screen false
    gsettings set org.gnome.desktop.notifications show-banners false
    gsettings set org.gnome.Vino require-encryption false
    gsettings set org.gnome.Vino view-only false
    

    To set password for VNC, run

    dbus-launch gsettings set org.gnome.Vino authentication-methods "['vnc']"
    dbus-launch gsettings set org.gnome.Vino vnc-password $(echo -n "YOUR_VNC_PW_HERE"|base64)
    

    Allow connection from a network interface

    eths=$(nmcli -t -f uuid,type c s --active | grep 802 | awk -F  ":" '{ print "'\''" $1 "'\''" }' | paste -s -d, -)
    gsettings set org.gnome.settings-daemon.plugins.sharing.service:/org/gnome/settings-daemon/plugins/sharing/vino-server/ enabled-connections "[ $eths ]"
    dbus-launch gsettings set org.gnome.settings-daemon.plugins.sharing.service:/org/gnome/settings-daemon/plugins/sharing/vino-server/ enabled-connections "[ $eths ]"
    gsettings get org.gnome.settings-daemon.plugins.sharing.service:/org/gnome/settings-daemon/plugins/sharing/vino-server/ enabled-connections
    

    start vino server

    /usr/lib/vino/vino-server --display=:0.0
    

    To view the settings

    gsettings list-recursively org.gnome.Vino
    gsettings list-recursively org.gnome.desktop.notifications
    dconf dump /org/gnome/