Category: Linux

  • Webuzo

    Install webuzo

    wget -N http://files.webuzo.com/install.sh
    chmod 0755 install.sh
    ./install.sh

    After installing you can login into the Webuzo control panel at

    https://server-ip:2005/

    Webuzo Config files

    /usr/local/apps/nginx/etc/conf.d/webuzoVH.conf - Nginx
    /var/webuzo/my.conf - MySQL root password
    /var/webuzo/certs - SSL certificates used by the control panel, mail server, FTP
    /var/webuzo/logs - update/import logs

    Back to Hosting Control Panels

  • CageFS command not working for user

    I have flvtool2 installed on the server. Path to binary file location was added in file /etc/cagefs/conf.d/vshare.cfg

    [root@server22 ~]# cat /etc/cagefs/conf.d/vshare.cfg 
    [vshare]
    comment=vShare Youtube Clone Requirements
    paths=/usr/bin/ffmpeg, /usr/bin/mencoder, /usr/bin/mplayer, /usr/bin/flvtool2, /usr/bin/lame, /usr/bin/yamdi, /usr/bin/qt-faststart, /usr/bin/MP4Box, /usr/bin/mediainfo, /usr/bin/neroAacEnc
    [root@server22 ~]# 
    

    The binary program works properly when running as root, but it fail when switching to a user that use CageFS.

    [root@server22 ~]# /usr/bin/flvtool2 -V
    FLVTool2 1.0.6
    [root@server22 ~]# su - socialwe
    Last login: Thu May 28 06:33:33 UTC 2020 on pts/0
    [socialwe@server22 ~]$ /usr/bin/flvtool2 -V
    :1:in `require': cannot load such file -- rubygems.rb (LoadError)
    from :1:in `'
    [socialwe@server22 ~]$
    

    The problem is fixed by editing file /etc/cagefs/cagefs.mp

    vi /etc/cagefs/cagefs.mp
    

    Add following lines

    !/usr/lib64/ruby/
    !/usr/share/rubygems/
    !/usr/share/ruby/
    !/usr/local/share/ruby/
    

    Now remount cagefs with

    cagefsctl --remount-all
    

    See cagefs

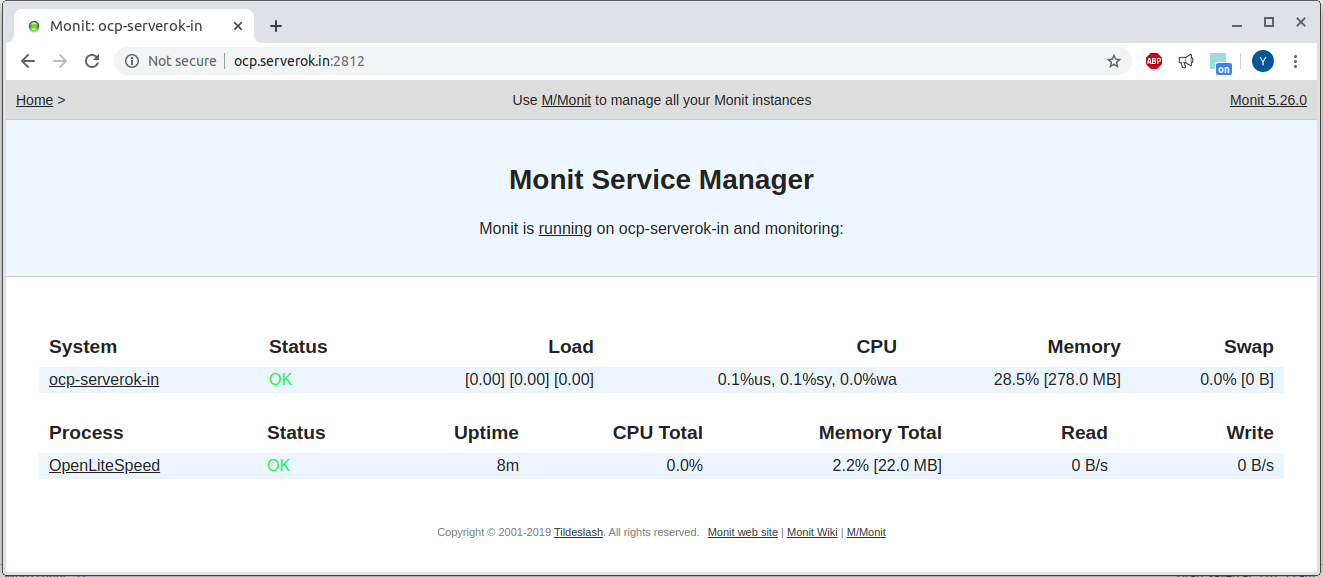
  • Monitor OpenLiteSpeed with monit

    OpenLiteSpeed Monit

    To monitor OpenLiteSpeed with monit on Ubuntu Server, create file

    vi /etc/monit/conf-enabled/openlitespeed
    

    Add following content

    check process OpenLiteSpeed with pidfile /tmp/lshttpd/lshttpd.pid
        start program = "/usr/bin/systemctl start lshttpd"
        stop program = "/usr/bin/systemctl stop lshttpd"
    

    Reload monit with

    monit reload
    

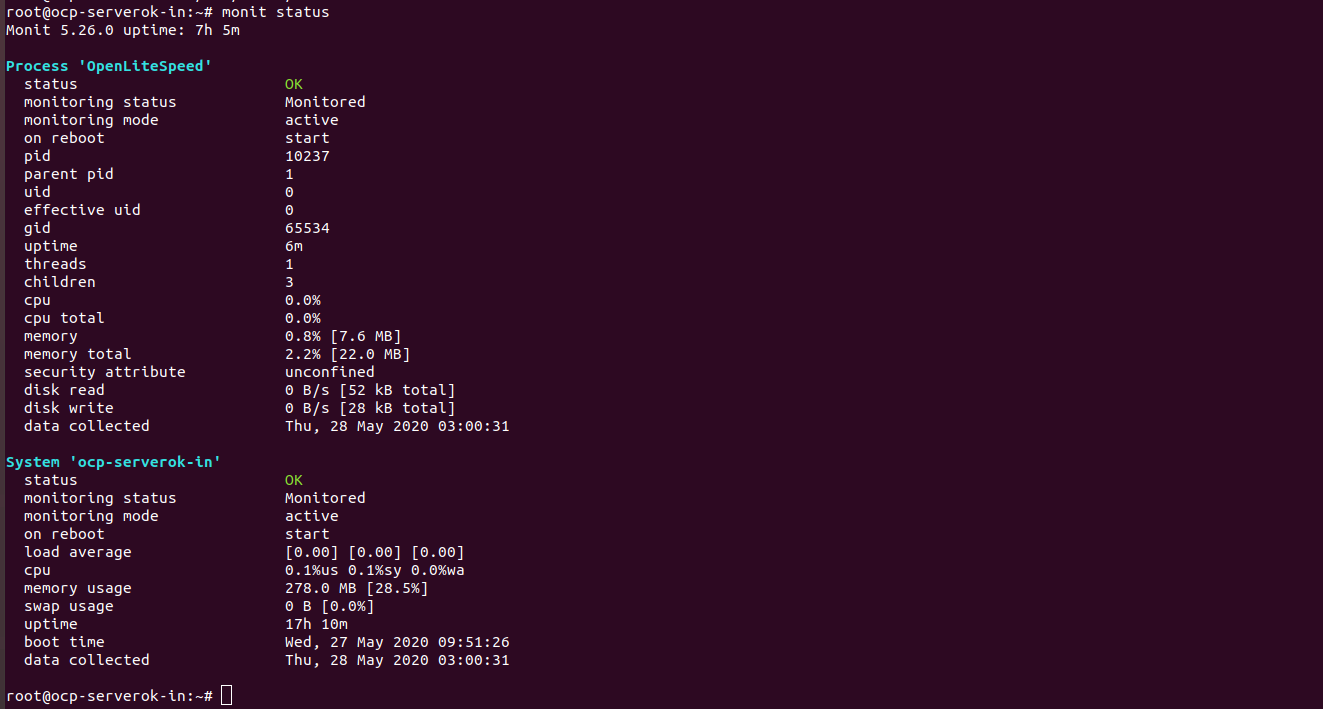
    Now monit will monitor OpenLiteSpeed, restart if required. You can check status with

    monit status
    

    monit status openlitespeed

    If you want to monitor if web server is responding to request, you can use

    check process OpenLiteSpeed with pidfile /tmp/lshttpd/lshttpd.pid
        start program = "/usr/bin/systemctl start lshttpd"
        stop program = "/usr/bin/systemctl stop lshttpd"
        if failed host localhost port 80 protocol http then restart
    
  • Ubuntu Screen Recorder

    Ubuntu come with screen recorder, this can be activated with shortcut

    CTRL + ALT + SHIFT + R
    

    By default, it will record for 30 seconds. Video get saved in your home directory (/home/USERNAME) in webm format.

    If you want to increase time, you can run following command

    gsettings set org.gnome.settings-daemon.plugins.media-keys max-screencast-length  TIME_IN_SECONDS_HERE
    

    It is better to set this to 0, this way record never auto stop. You need to manually stop recording with CTRL + ALT + SHIFT + R key combination.

    gsettings set org.gnome.settings-daemon.plugins.media-keys max-screencast-length 0
    

    Default value on Ubuntu 20.04 is “uint32 30”

    gsettings

    boby@sok-01:~$ gsettings get org.gnome.settings-daemon.plugins.media-keys max-screencast-length
    uint32 30
    boby@sok-01:~$ gsettings set org.gnome.settings-daemon.plugins.media-keys max-screencast-length 0
    boby@sok-01:~$ gsettings get org.gnome.settings-daemon.plugins.media-keys max-screencast-length
    uint32 0
    boby@sok-01:~$ 
    

    See Ubuntu

  • inotifywait

    inotifywait monitor changes in Linux file system. It can be used to track file changes.

    Here is inotifywait command used by bitninja to detect uploaded files.

    /bin/inotifywait --daemon --recursive --outfile /var/log/bitninja/inotify/inotify.log --fromfile /var/lib/bitninja/monitor.txt --exclude (^/var/cache/buagent/md0.cache.data$|\.MYD$|\.MYI$|\.MAD$|\.MAI$|\.yara$|^/tmp/lshttpd/*\.sock*|^/tmp/lshttpd/\.rtreport\.*|^/var/tmp/clamav-.*|^/tmp/clamav-.*|^/var/lib/bitninja|^/var/log/bitninja|^/var/cache/awstats|^/usr/local/maldetect/quarantine|\.sock$|\.log$|^.*_log$|^.*_log\.processed$|^.*_ssl_log\.webstat$|^/home/accesslog|^/home/virtfs|^/home/cagefs-skeleton/|^/usr/share/cagefs-skeleton/|^/home/.*?/mail/|^/home/cpeasyapache/src/) --timefmt %F %T --format %w%f %e %T --monitor --event create,move,modify
    
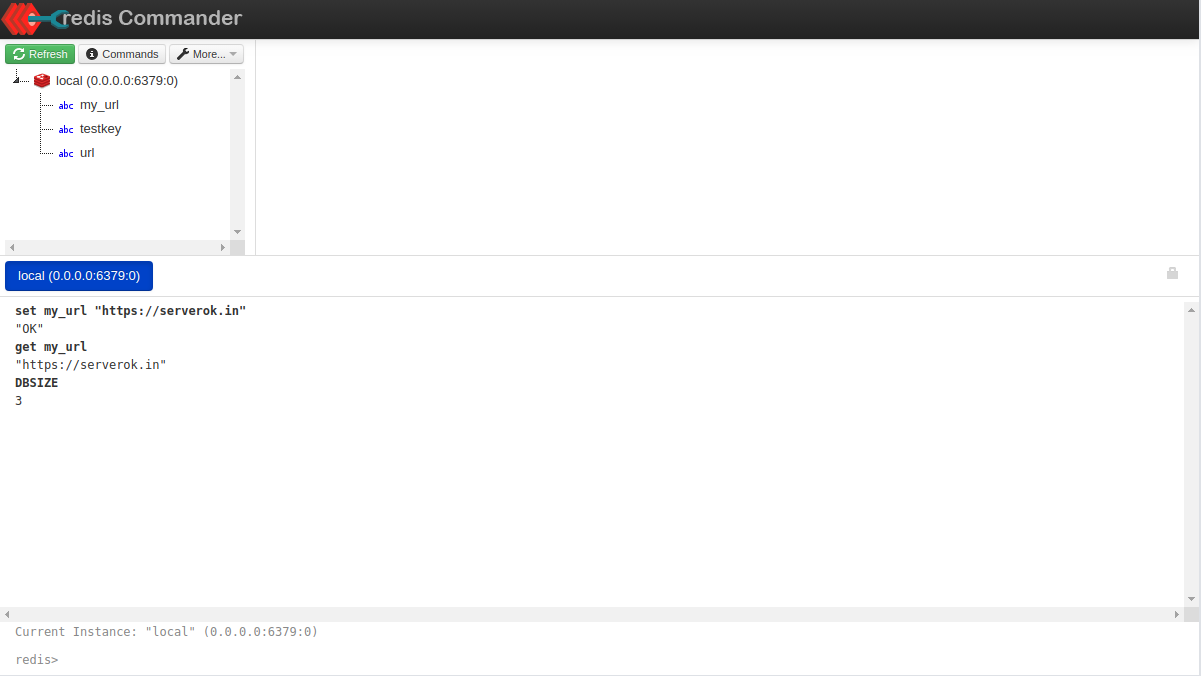
  • redis commander

    redis-commander is a GUI for redis. To install, run

    npm install -g redis-commander
    redis-commander
    

    redis commander

  • Disable ModSecurity for a specific URL

    On a web site that is protected with ModSecurity, when admin edit HTML pages in admin area, ModSecurity falsely detect it as XSS attack.

    ModSecurity

    What we can do is disable specific rules that create this false positive. But in this case, it is bceause HTML is submitted. This application normally done need HTML submitted on any other part of the site. So it is better to disable ModSecurity for the specific URL that causes this error.

    To do this, add the following code to the Apache VirtualHost entry for this website.

    <If "%{REQUEST_URI} =~ m#/admin_area/manage_pages.php#">
        SecRuleEngine Off
    </If>
    
    <If "%{REQUEST_URI} =~ m#/admin_area/edit_announcement.php#">
        SecRuleEngine Off
    </If>

    This will disable ModSecurity for URLs /admin_area/manage_pages.php and /admin_area/edit_announcement.php

    Back to ModSecurity

  • yum list all available packages in a repo

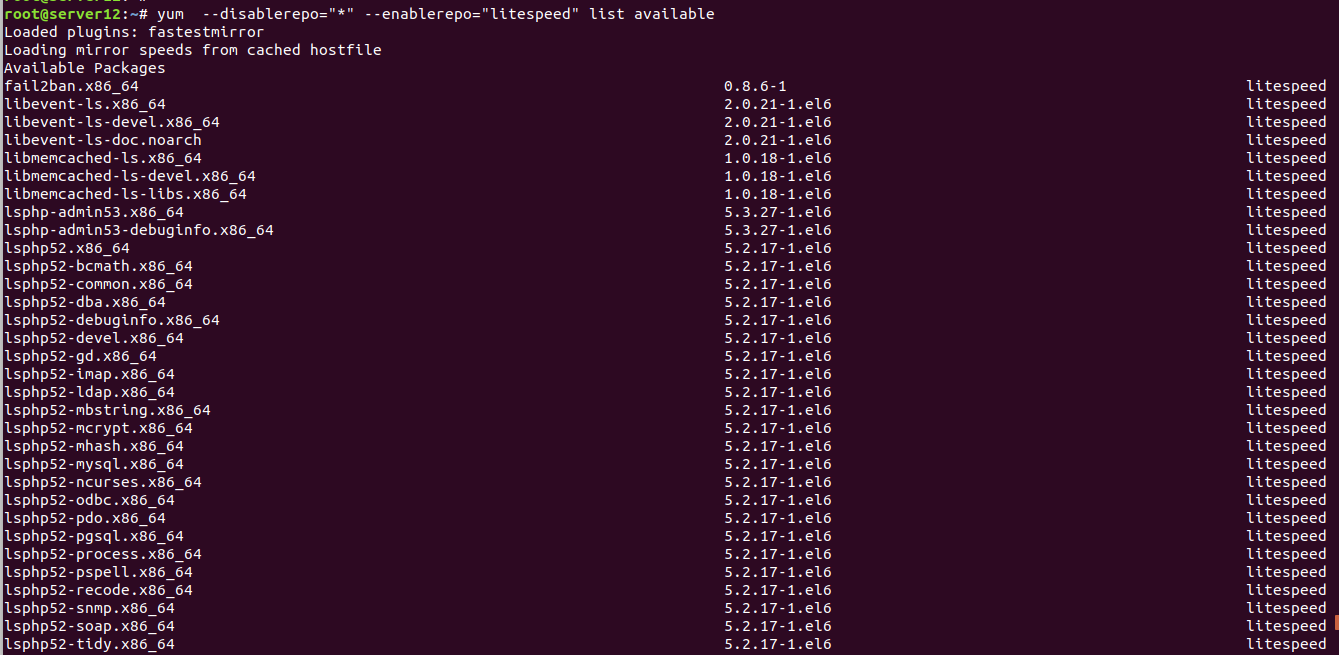
    To list all packages available on a specific repo, run

    yum  --disablerepo="*" --enablerepo="REPO_NAME_HERE" list available
    
    
    You can get list of all available repos with command
    
    
    yum repolist
    

    Example:

    yum list available

    yum  --disablerepo="*" --enablerepo="litespeed" list available
    

    This command list all packages available in repo "litespeed"

  • Install ModSecurity on Debian

    To install ModSecurity on Debian/Ubuntu Apache web server, run

    apt-get install libapache2-mod-security2
    

    Restart Apache web server

    service apache2 restart
    

    Verify mod_security installed with

    apachectl -M | grep security
    

    To activate ModSecurity rules, run

    cp /etc/modsecurity/modsecurity.conf-recommended /etc/modsecurity/modsecurity.conf
    

    Edit

    vi /etc/modsecurity/modsecurity.conf
    

    set

    SecRuleEngine = on
    

    Get latest rules

    mv /usr/share/modsecurity-crs /usr/share/modsecurity-crs.bk
    git clone https://github.com/SpiderLabs/owasp-modsecurity-crs.git /usr/share/modsecurity-crs
    

    Emable the config file

    cp /usr/share/modsecurity-crs/crs-setup.conf.example /usr/share/modsecurity-crs/crs-setup.conf
    

    Edit file

    vi  /etc/apache2/mods-enabled/security2.conf
    

    Add

    IncludeOptional /usr/share/modsecurity-crs/*.conf
    IncludeOptional "/usr/share/modsecurity-crs/rules/*.conf
    

    Restart Apache

    service apache2 restart
    
  • OpenLiteSpeed restart PHP

    On OpenLiteSpeed, if you edit php.ini or installed a PHP module, restart OpenLiteSpeed won’t show the changes. You will need to restart PHP process.

    You can do this by killing all PHP process with

    killall -9 lsphp
    

    Or you can create a file

    touch /usr/local/lsws/admin/tmp/.lsphp_restart.txt
    

    If you need PHP restarted just for a web site, run

    touch /home/USER1/.lsphp_restart.txt
    
  • Migrate IMAP emails using imapsync

    To copy emails from one mailbox to another using imapsync, use

    imapsync --host1 IP_SRC_SERVER -user1 YOU@YOURDOMAIN --password1 'PASSWORD'  --host2 IP_NEW_SERVER --user2 YOU@YOURDOMAIN --password2 'PASSWORD'
    

    Example

    imapsync --host1 gator4170.hostgator.com -user1 [email protected] --password1 'CE2U7gnTq0CUk6'  --host2 server20.hostonnet.com --user2 [email protected] --password2 'CE2U7gnTq0CUk6'
    

    In this example, source and destination email and passwords are the same.

    Install Using Docker

    imapsync available as a docker container at https://hub.docker.com/r/gilleslamiral/imapsync/

    Pull the image

    docker pull gilleslamiral/imapsync
    

    To use it, run

    docker run gilleslamiral/imapsync imapsync 
    

    Install ImapSync on Ubuntu/Debian

    Install dependency

    apt-get install -y libauthen-ntlm-perl libclass-load-perl libcrypt-ssleay-perl libdata-uniqid-perl libdigest-hmac-perl libdist-checkconflicts-perl libencode-imaputf7-perl libfile-copy-recursive-perl libfile-tail-perl libio-compress-perl libio-socket-inet6-perl libio-socket-ssl-perl libio-tee-perl libmail-imapclient-perl libmodule-scandeps-perl libnet-dbus-perl libnet-ssleay-perl libpar-packer-perl libreadonly-perl libregexp-common-perl libsys-meminfo-perl libterm-readkey-perl libtest-fatal-perl libtest-mock-guard-perl libtest-mockobject-perl libtest-pod-perl libtest-requires-perl libtest-simple-perl libunicode-string-perl liburi-perl libtest-nowarnings-perl libtest-deep-perl libtest-warn-perl make cpanminus
    

    Install imapsync

    git clone https://github.com/imapsync/imapsync.git
    cd imapsync
    ./imapsync
    

    For more info, see

    https://imapsync.lamiral.info/INSTALL.d/INSTALL.Ubuntu.txt

    See imap