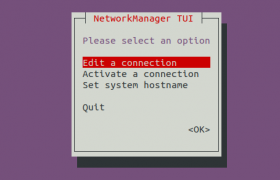
nmtui allow you to configure network interface if you are using network manager.
On Debian/Ubuntu, it is part of network-manager package
apt install network-manager

nmtui allow you to configure network interface if you are using network manager.
On Debian/Ubuntu, it is part of network-manager package
apt install network-manager
Ubuntu 18.04 was released with Linux kernel 4.15
root@DUS-147022:~# hostnamectl
   Static hostname: DUS-147022.op-net.com
         Icon name: computer-desktop
           Chassis: desktop
        Machine ID: 1fcb383ac03e4299a3b994dca4c51a10
           Boot ID: 66d616e9b11145c38387d71f9c48a4bd
  Operating System: Ubuntu 18.04.3 LTS
            Kernel: Linux 4.15.0-58-generic
      Architecture: x86-64
root@DUS-147022:~#
On 8 Aug 2019, Cannonical released Ubuntu 18.04.3 LTS with Linux Kernel 5.0.
If you are using older Ubuntu 18.04 point release, you won’t get newer kernel when you do software upgrade.
To get newer Linux kernal installed, you need to install Hardware enablement (HWE) stack, this provide newer kernel that provide support for latest hardware.
To install Hardware enablement (HWE) stack, run
apt install linux-generic-hwe-18.04
if this is Desktop computer, you may need to run
apt install linux-generic-hwe-18.04 xserver-xorg-hwe-18.04
after installing, reboot
reboot
after reboot, you will see latest Linux Kernel.
boby@sok-01:~$ hostnamectl
   Static hostname: sok-01
         Icon name: computer-desktop
           Chassis: desktop
        Machine ID: 70486772aac1410c9a8031851ab60a0d
           Boot ID: 6c946c08f95d4c6b883e6790ab83e728
  Operating System: Ubuntu 18.04.3 LTS
            Kernel: Linux 5.0.0-25-generic
      Architecture: x86-64
boby@sok-01:~$
On a server, ping localhost did not work
root@cloud1:~# ping localhost
ping: unknown host localhost
root@cloud1:~#
/etc/hosts files was proper, had entry for localhost.
root@cloud1:~# cat /etc/hosts | grep localhost
127.0.0.1 localhost
::1 ip6-localhost ip6-loopback
root@cloud1:~#
problem was due to /etc/nsswitch.conf file missing in the server. To fix create file
vi /etc/nsswitch.conf
Add
# /etc/nsswitch.conf
#
# Example configuration of GNU Name Service Switch functionality.
# If you have the `glibc-doc-reference' and `info' packages installed, try:
# `info libc "Name Service Switch"' for information about this file.

passwd:         compat systemd
group:          compat systemd
shadow:         compat
gshadow:        files

hosts:          files mdns4_minimal [NOTFOUND=return] dns myhostname
networks:       files

protocols:      db files
services:       db files
ethers:         db files
rpc:            db files

netgroup:       nis
Set permission for the file
chmod 644 /etc/nsswitch.conf
yum-config-manager allows you to manage yum repositories.
To add a repo, run
yum-config-manager --add-repo https://download.docker.com/linux/centos/docker-ce.repo
Disable a repository
yum-config-manager --disable rpmfusion-free-updates
See yum
https://guacamole.apache.org
Google Chome Remote Desktop
https://rustdesk.com – Free Open source teamviewer alternative.
See vnc
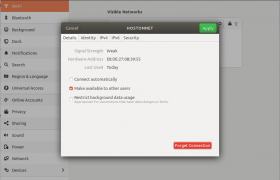
When a normal user edit Wi-Fi connection on Wi-Fi Settings, they will be asked to enter administrator user pasword.
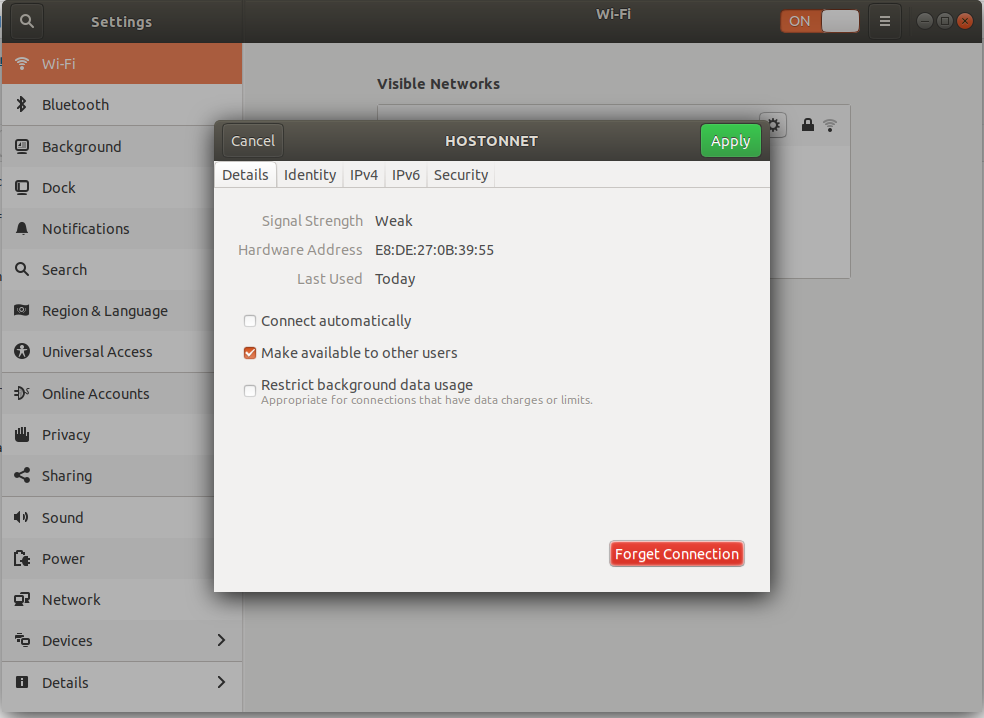
To allow a normal user to modify network connection, you can edit the connection configuration file in folder
/etc/NetworkManager/system-connections
This file look like
root@sok-01:/etc/NetworkManager/system-connections# cat SOK
[connection]
id=SOK
uuid=982596a7-44c8-4e52-a696-6acf4daeec12
type=wifi
permissions=

[wifi]
mac-address=E8:DE:27:0B:39:55
mac-address-blacklist=
mode=infrastructure
ssid=SOK

[wifi-security]
auth-alg=open
key-mgmt=wpa-psk
psk=Sup3rD0nkey

[ipv4]
dns-search=
method=auto

[ipv6]
addr-gen-mode=stable-privacy
dns-search=
method=auto
root@sok-01:/etc/NetworkManager/system-connections#
Find
permissions=
Replace with
permissions=user:USER_NAME_HEARE:;
USER_NAME_HEARE = replace this with actual username, that need to edit the network configuration.
To change shell for a user, run
chsh --shell PATH_TO_SHELL USERNAME
Example
chsh --shell /bin/bash okadmin
I will add a user, if no shell specified, it use sh as shell.
root@lab:~# useradd okadmin
root@lab:~# su - okadmin
No directory, logging in with HOME=/
$ echo $SHELL
/bin/sh
$ exit
root@lab:~# chsh --shell /bin/bash okadmin
root@lab:~# su - okadmin
No directory, logging in with HOME=/
okadmin@lab:/$ echo $SHELL
/bin/bash
okadmin@lab:/$ logout
root@lab:~#
You can find what shell you are using now with command
echo $SHELL
To add IP address on a Linux server, first find name of your network interface. This can be done with command
ip link
In most case, it can be enp3s0 or eth0, if you have more than one network card, this may be differnt, in such case, you need to identify which network interface you need to configure the the IP address .
Now create file
vi /etc/sysconfig/network-scripts/ifcfg-enp3s0:1
Here i used enp3s0 as network inferface name, replace it with whatever network interface name you use.
Add following content
DEVICE="enp3s0:1"
IPADDR=IP_ADDR_HERE
NETMASK=255.255.255.255
IP_ADDR_HERE = replace with the IP address you need to add.
enp3s0 = replace with actual network interface name.
Restart network service with command
systemctl restart network
If you need to add another IP, create file with name
INTERFACE_NAME:2
for example “enp3s0:2”, you need to use same alias name in DEVICE entry (first line) in the file.
gonit is a replacent for monitoring software monit. monit was removed from Debian 10 due to security issues and the devloper will not provide a patch for the security vlunerabilty in time for Debian 10 release.
You can download gonit from
https://github.com/bitnami/gonit
root@ip-172-26-14-184:~# gonit status

Uptime                         22h5m41s
Last Check                     2019-08-05 08:23:57.612314368 +0000 UTC m=+79440.116643915
Next Check                     2019-08-05 08:25:57.612314368 +0000 UTC m=+79560.116643915
Pid                            3162
Pid File                       /var/run/gonit.pid
Control File                   /etc/gonit/gonitrc
Socket File                    /var/run/gonit.sock
Log File                       /var/log/gonit.log
Process 'apache'
  status                                        Running
  pid                                              2020
  uptime                                       22h5m41s
  monitoring status                           monitored

Process 'mysql'
  status                                        Running
  pid                                              1911
  uptime                                       22h5m41s
  monitoring status                           monitored

Process 'php-fpm'
  status                                        Running
  pid                                              2014
  uptime                                       22h5m41s
  monitoring status                           monitored


root@ip-172-26-14-184:~#
To identify if you are using 32 bit or 64 bit Linux OS, run command arch.
boby@sok-01:~$ arch
x86_64
boby@sok-01:~$
You can also use uname command
boby@sok-01:~$ uname -i
x86_64
boby@sok-01:~$
Another way is to use hostnamectl command and look for “Architecture”.
boby@sok-01:~$ hostnamectl
   Static hostname: sok-01
         Icon name: computer-desktop
           Chassis: desktop
        Machine ID: 70486772aac1410c9a8031851ab60a0d
           Boot ID: 46ff31881cca4e7090edb35f2af89a4a
  Operating System: Ubuntu 18.04.2 LTS
            Kernel: Linux 4.15.0-55-generic
      Architecture: x86-64
boby@sok-01:~$
sudo alsa force-reload
vi /etc/modprobe.d/alsa-base.conf
boby@fwhlin:~$ cat /proc/asound/cards
 0 [Intel          ]: HDA-Intel - HDA Intel
                      HDA Intel at 0xfb9f8000 irq 75
 1 [HDMI           ]: HDA-Intel - HDA ATI HDMI
                      HDA ATI HDMI at 0xfbcfc000 irq 76
boby@fwhlin:~$
boby@boby-pc ~ $ cat /proc/asound/card0/codec* | grep Codec
Codec: Realtek ALC892
boby@boby-pc ~ $
boby@boby-pc ~ $ cat /proc/asound/card0/pcm0c/info
card: 0
device: 0
subdevice: 0
stream: CAPTURE
id: ALC892 Analog
name: ALC892 Analog
subname: subdevice #0
class: 0
subclass: 0
subdevices_count: 1
subdevices_avail: 1
boby@boby-pc ~ $