Tag: linux

  • Make hosts file editable with out sudo

    hosts file allow you to override DNS. This will allow you to point a domain to difernt IP address on your computer. It is helpful for testing sites during site migrations.

    If you edit hosts file a lot, it is better to make it owned by you or make it editable by everyone.

    sudo chmod 777 /etc/hosts
    

    Now onwards, you can edit the file with out sudo requirment.

    Another option is make it owned by current user.

    sudo chown USER_HERE:GROUP_HERE /etc/hosts
    

    See /etc/hosts

  • Creating Software RAID 5

    Creating Software RAID 5

    RAID 5 Requires 3 or more physical disks. It provides the redundancy of RAID 1 combined with the speed and size benefits of RAID 0. RAID 5 uses striping, like RAID 0, but also stores parity blocks distributed across each member disk. In the event of a failed disk, these parity blocks are used to reconstruct the data on a replacement disk. RAID 5 can withstand the loss of one member disk.

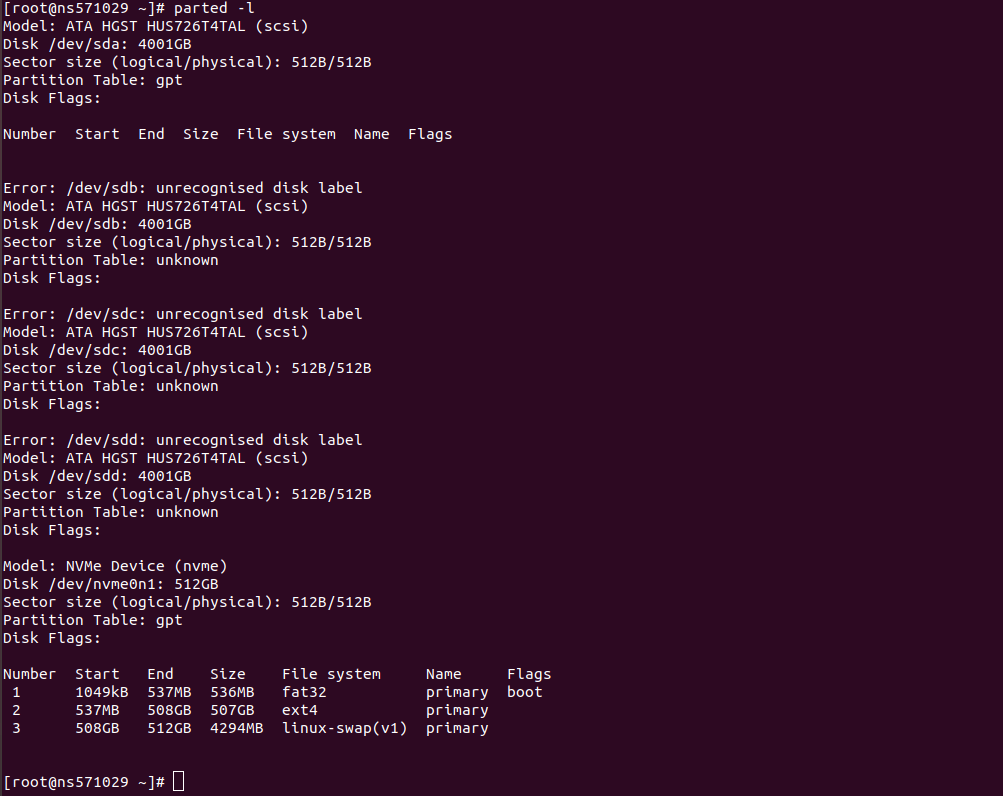
    I have a server with 4 * 4 TB Disks. Here is parted -l result on the server.

    On this server /dev/sda, /dev/sdb, /dev/sdc and /dev/sdd are 4 TB disks and are not in use. Lets format these disk to be used as RAID 5.

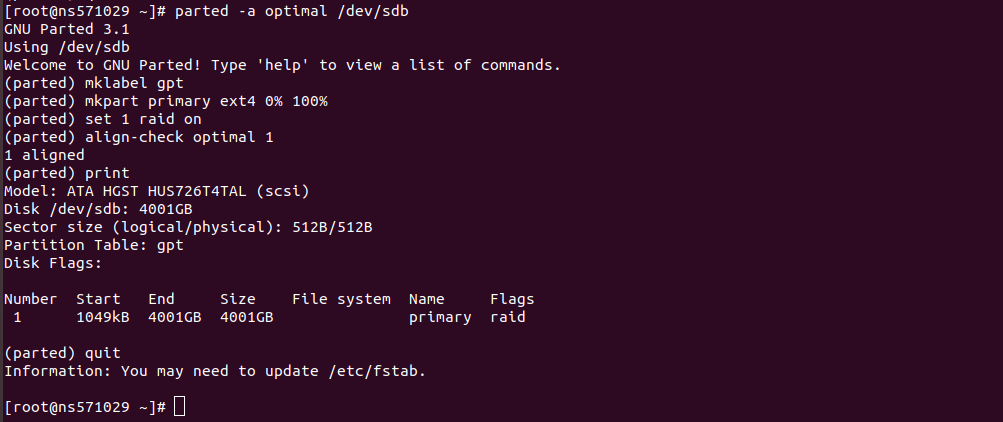
    Following commands need to be executed for each of the disks.

    parted -a optimal /dev/sda
    mklabel gpt
    mkpart primary ext4 0% 100%
    set 1 raid on
    align-check optimal 1
    print
    quit
    

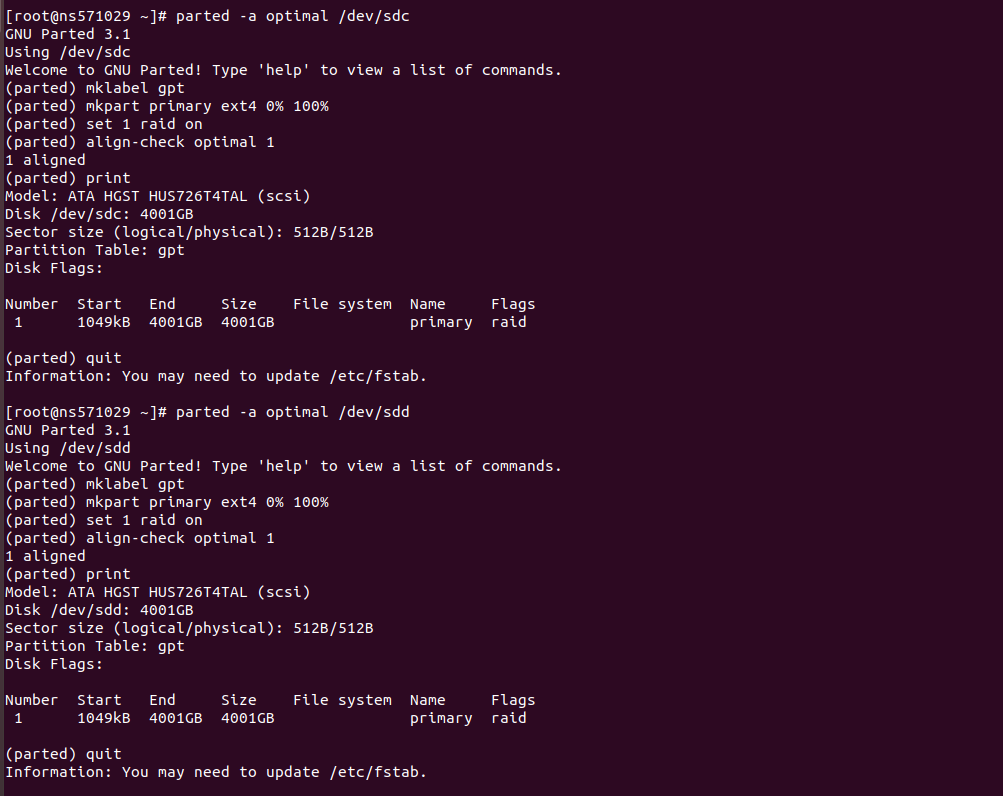
    This will partition the disks, set file system as raid.

    Repeat the steps for /dev/sdb, /dev/sdc and /dev/sdd.

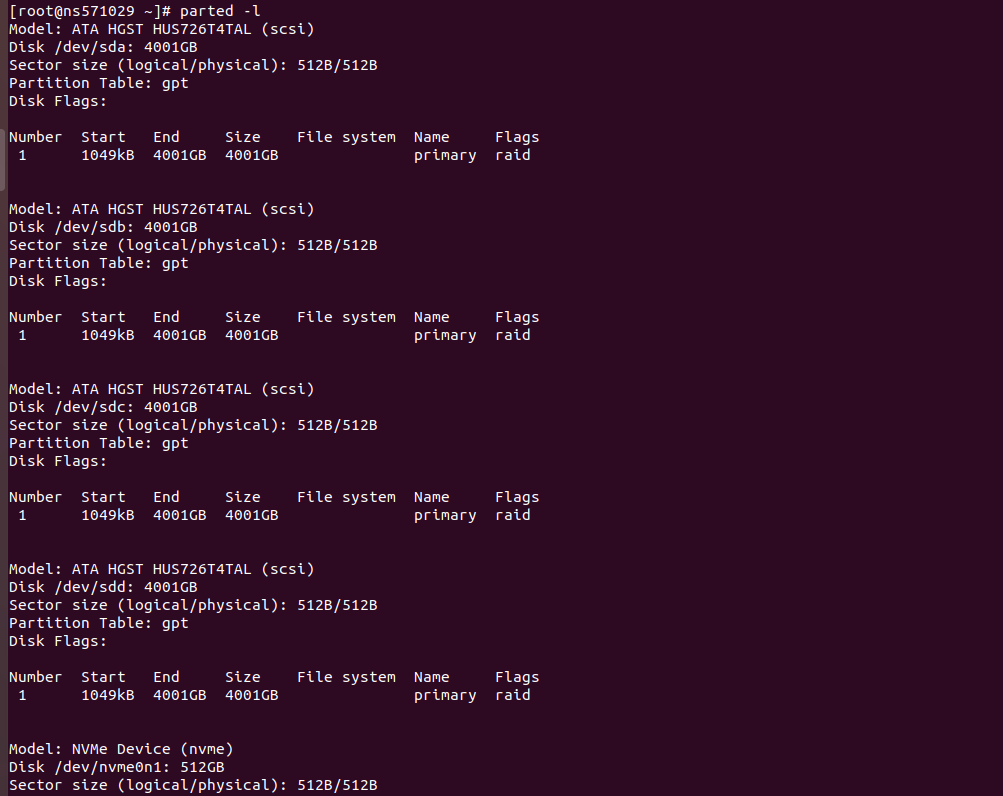
    Now you have all disks formatted, ready to be used in raid array.

    Create RAID 5 array with command

    mdadm --create --verbose --level=5 --chunk=64 --raid-devices=4 --layout=left-symmetric /dev/md0 /dev/sda1 /dev/sdb1 /dev/sdc1 /dev/sdd1
    

    Once raid created, you can see status with command

    cat /proc/mdstat
    

    Before we can use raid array, we need to create a file system on the raid with command

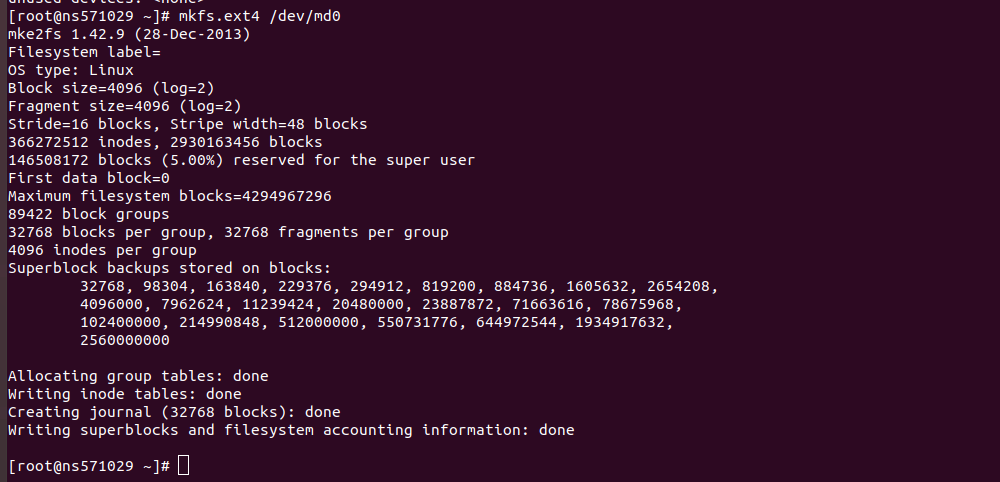
    mkfs.ext4 /dev/md0
    

    formatting raid 5 array

    Create mdadm.conf file with following command

    mkdir /etc/mdadm/
    cat /etc/mdadm/mdadm.conf
    mdadm --detail --scan >> /etc/mdadm/mdadm.conf
    cat /etc/mdadm/mdadm.conf
    

    Mount Raid 5 Array

    I want to mount the new raid 5 array as /home. For this i edited /etc/fstab, added

    /dev/md0        /home           ext4    errors=remount-ro 0       1
    

    After rebooting, i have 11 TB RAID 5 drive mounted as /home

  • How to increase /tmp partition size

    On a Linux server /tmp partition was only 1 GB, it get full at times.

    Server had following in its /etc/fstab file

    [root@imeicheck-2020 ~]# cat /etc/fstab 
    UUID=c0f46bb1-c0bc-4199-95d6-551d03c12a0a /                       xfs     defaults        1 1
    /var/.tempdisk /tmp ext4 loop,rw,noexec,nosuid,nodev,nofail 0 0
    /tmp /var/tmp none bind 0 0
    [root@imeicheck-2020 ~]#
    

    Currenly file /var/.tempdisk is mounted as /tmp.

    So i created a new file with 4 GB size

    dd if=/dev/zero of=/var/sok_tmp bs=1M count=4096
    

    Format it as ext4 file system

    mkfs -t ext4 /var/sok_tmp
    

    Before i swith /tmp to newly created disk, i need to copy content of current /tmp to it. For this i mount the new disk as /tmp2

    mkdir /tmp2
    mount -o loop /var/sok_tmp /tmp2
    rsync -avzP /tmp/ /tmp2/
    

    Now you have all files of /tmp in /tmp2, edit /etc/fstab

    vi /etc/fstab
    

    Find entry for current /tmp partition

    /var/.tempdisk /tmp ext4 loop,rw,noexec,nosuid,nodev,nofail 0 0
    

    Replace it with new file you created

    /var/sok_tmp /tmp ext4 loop,rw,noexec,nosuid,nodev,nofail 0 0
    

    Reboot the server. You will have 4 GB /tmp partition now.

  • Lock User Account in Linux

    To lock a Linux User account, run

    usermod -L USER_NAME_HERE
    

    You can verify the account is locked with command

    passwd --status USER_NAME_HERE
    

    Example

    Lock Linux User Account usermod

    See usermod

  • Find limit search depth

    I wanted to find some files inside the subdirectory of the current folder. To do this, find have maxdepth option.

    find ./ -maxdepth 2 -name '*.gz'

    This command will limit search depth to the current directory and all first-level sub folders.

    See find

  • Set vim as default cronjob editor

    Method 1

    vi /etc/bashrc
    

    Find

    export EDITOR="pico"
    export VISUAL="pico"
    

    Replace with

    export EDITOR="vi"
    export VISUAL="vi"
    

    Method 2

    edit .bash_profile

    vi /root/.bash_profile
    

    Add

    export VISUAL=vi
    

    Once added, .bash_profile will look like

    root@server54 [~]# cat .bash_profile
    # .bash_profile
    
    # Get the aliases and functions
    if [ -f ~/.bashrc ]; then
            . ~/.bashrc
    fi
    
    # User specific environment and startup programs
    
    PATH=$PATH:$HOME/bin
    
    export VISUAL=vi
    export PATH
    unset USERNAME
    uptime
    root@server54 [~]#
    

    Method 3

    If you need it done one time only, run following commands on command prompt.

    VISUAL=vi; export VISUAL
    
  • xdotool

    xdotool lets you programmatically simulate keyboard input and mouse activity, move and resize windows, etc.

    To search for an application with title name, run

    xdotool search --name TEXT_TO_SERCH_HERE
    

    This will return ID of the windows. You can use xwininfo command to view information about the application window.

    Example

    boby@hon-pc-01:~ $ xdotool search --name RuneScape
    77594631
    boby@hon-pc-01:~ $ xwininfo -id 77594631
    
    xwininfo: Window id: 0x4a00007 "RuneScape"
    
      Absolute upper-left X:  65
      Absolute upper-left Y:  24
      Relative upper-left X:  0
      Relative upper-left Y:  0
      Width: 1855
      Height: 1056
      Depth: 24
      Visual: 0x21
      Visual Class: TrueColor
      Border width: 0
      Class: InputOutput
      Colormap: 0x20 (installed)
      Bit Gravity State: NorthWestGravity
      Window Gravity State: NorthWestGravity
      Backing Store State: NotUseful
      Save Under State: no
      Map State: IsViewable
      Override Redirect State: no
      Corners:  +65+24  -0+24  -0-0  +65-0
      -geometry 1855x1056-0-0
    
    boby@hon-pc-01:~ $ 
    
  • brctl

    brctl show

    [root@server70 etc]# brctl show
    bridge name     bridge id               STP enabled     interfaces
    br0             8000.002590d08d66       no              eth0
                                                            vnet0
    virbr0          8000.525400f12faf       yes             virbr0-nic
    [root@server70 etc]# ifconfig
    br0       Link encap:Ethernet  HWaddr 00:25:90:D0:8D:66
              inet addr:192.99.18.195  Bcast:192.99.18.255  Mask:255.255.255.0
              inet6 addr: fe80::225:90ff:fed0:8d66/64 Scope:Link
              UP BROADCAST RUNNING MULTICAST  MTU:1500  Metric:1
              RX packets:8108397 errors:0 dropped:0 overruns:0 frame:0
              TX packets:7823258 errors:0 dropped:0 overruns:0 carrier:0
              collisions:0 txqueuelen:0
              RX bytes:1951542690 (1.8 GiB)  TX bytes:15136345174 (14.0 GiB)
    
    br0:1     Link encap:Ethernet  HWaddr 00:25:90:D0:8D:66
              inet addr:198.27.105.228  Bcast:198.27.105.228  Mask:255.255.255.255
              UP BROADCAST RUNNING MULTICAST  MTU:1500  Metric:1
    
    eth0      Link encap:Ethernet  HWaddr 00:25:90:D0:8D:66
              inet6 addr: fe80::225:90ff:fed0:8d66/64 Scope:Link
              UP BROADCAST RUNNING MULTICAST  MTU:1500  Metric:1
              RX packets:69612987 errors:6 dropped:0 overruns:0 frame:6
              TX packets:114006505 errors:0 dropped:0 overruns:0 carrier:0
              collisions:0 txqueuelen:1000
              RX bytes:7042298846 (6.5 GiB)  TX bytes:151793078797 (141.3 GiB)
              Interrupt:48 Memory:fe9e0000-fea00000
    
    lo        Link encap:Local Loopback
              inet addr:127.0.0.1  Mask:255.0.0.0
              inet6 addr: ::1/128 Scope:Host
              UP LOOPBACK RUNNING  MTU:16436  Metric:1
              RX packets:407995 errors:0 dropped:0 overruns:0 frame:0
              TX packets:407995 errors:0 dropped:0 overruns:0 carrier:0
              collisions:0 txqueuelen:0
              RX bytes:1284505268 (1.1 GiB)  TX bytes:1284505268 (1.1 GiB)
    
    virbr0    Link encap:Ethernet  HWaddr 52:54:00:F1:2F:AF
              inet addr:192.168.122.1  Bcast:192.168.122.255  Mask:255.255.255.0
              UP BROADCAST RUNNING MULTICAST  MTU:1500  Metric:1
              RX packets:0 errors:0 dropped:0 overruns:0 frame:0
              TX packets:0 errors:0 dropped:0 overruns:0 carrier:0
              collisions:0 txqueuelen:0
              RX bytes:0 (0.0 b)  TX bytes:0 (0.0 b)
    
    vnet0     Link encap:Ethernet  HWaddr FE:54:00:F6:41:4B
              inet6 addr: fe80::fc54:ff:fef6:414b/64 Scope:Link
              UP BROADCAST RUNNING MULTICAST  MTU:1500  Metric:1
              RX packets:44 errors:0 dropped:0 overruns:0 frame:0
              TX packets:24993 errors:0 dropped:0 overruns:0 carrier:0
              collisions:0 txqueuelen:500
              RX bytes:3499 (3.4 KiB)  TX bytes:2333834 (2.2 MiB)
    
    [root@server70 etc]#
    

    brctl showmacs br0

    [root@server70 etc]#  brctl showmacs br0
    port no mac addr                is local?       ageing timer
      1     00:05:73:a0:00:00       no                11.10
      1     00:07:b4:00:00:02       no                 2.72
      1     00:07:b4:00:01:01       no                 4.73
      1     00:07:b4:00:01:02       no                 6.65
      1     00:25:90:7b:a3:8e       no                31.80
      1     00:25:90:7c:72:34       no                53.08
      1     00:25:90:d0:8d:66       yes                0.00
      1     00:2a:6a:3d:50:81       no               119.90
      1     00:2a:6a:3d:df:bc       no                 2.33
      1     c8:f9:f9:58:3f:c0       no                 0.00
      1     d8:24:bd:91:c7:00       no                 0.00
      2     fe:54:00:f6:41:4b       yes                0.00
    [root@server70 etc]#
    

    brctl showstp br0

    [root@server70 etc]# brctl showstp br0
    br0
     bridge id              8000.002590d08d66
     designated root        8000.002590d08d66
     root port                 0                    path cost                  0
     max age                  19.99                 bridge max age            19.99
     hello time                1.99                 bridge hello time          1.99
     forward delay            14.99                 bridge forward delay      14.99
     ageing time             299.95
     hello timer               0.42                 tcn timer                  0.00
     topology change timer     0.00                 gc timer                   8.42
     hash elasticity           4                    hash max                 512
     mc last member count      2                    mc init query count        2
     mc router                 1                    mc snooping                1
     mc last member timer      0.99                 mc membership timer      259.96
     mc querier timer        254.96                 mc query interval        124.98
     mc response interval      9.99                 mc init query interval    31.24
     flags
    
    
    eth0 (0)
     port id                0000                    state                forwarding
     designated root        8000.002590d08d66       path cost                  4
     designated bridge      8000.002590d08d66       message age timer          0.00
     designated port        8001                    forward delay timer        0.00
     designated cost           0                    hold timer                 0.00
     mc router                 1
     flags
    
    vnet0 (0)
     port id                0000                    state                forwarding
     designated root        8000.002590d08d66       path cost                100
     designated bridge      8000.002590d08d66       message age timer          0.00
     designated port        8002                    forward delay timer        0.00
     designated cost           0                    hold timer                 0.00
     mc router                 1
     flags
    
    [root@server70 etc]#
    
  • Block Country in CSF firewall

    CSF firewall can block all traffic from a country or list of countries using the GeoIP database.

    To block a country, edit the file

    /etc/csf/csf.conf
    

    Find

    CC_DENY=""
    

    Replace with

    CC_DENY="2_LETTER_COUNTRY_CODE"
    

    Here is an example to block all traffic from China

    CC_DENY="CN"
    

    If you want to block another country, you can add it like

    CC_DENY="CN,RU"
    

    Now restart CSF firewall with

    csf -r
    

    See CSF firewall

  • Can’t locate version.pm in @INC

    I got error “Can’t locate version.pm in @INC” running awk.

    [root@vmi431969 /]# ack mp3pdjSu5B0
    Can't locate version.pm in @INC (@INC contains: /usr/local/lib64/perl5 /usr/local/share/perl5 /usr/lib64/perl5/vendor_perl /usr/share/perl5/vendor_perl /usr/lib64/perl5 /usr/share/perl5 .) at /usr/local/bin/ack line 18.
    BEGIN failed--compilation aborted at /usr/local/bin/ack line 18.
    [root@vmi431969 /]# 
    

    On CentOS, this error is fixed by running

    yum install perl-version.x86_64 -y
    

    See Errors

  • Plesk Mail not working amavis error

    Plesk Mail not working amavis error

    When sending email from a Plesk server, i get error

    Aug 11 19:49:28 vmi274961 postfix/smtp[29276]: E413C3320265: to=, relay=none, delay=0.47, delays=0.47/0/0/0, dsn=4.4.1, status=deferred (connect to 127.0.0.1[127.0.0.1]:10024: Connection refused)
    

    This is beccause amavis service is not running. It is supposed to be run in port 10024

    amavisd error

    When i try to start amavis service, i get error

    Aug 17 09:31:04 server.ishiply.com systemd[1]: Starting LSB: Starts amavisd-new mailfilter...
    Aug 17 09:31:05 server.ishiply.com amavis[7771]: Starting amavisd: Problem in Amavis SQL base code: Can't locate DBI.pm in @INC (you may need to install the DBI module) (@INC contains: /etc/perl /usr/local/lib/x86_64-linux-gnu/perl/5.22.1 /usr/local/share/perl/5.22.1 /usr/lib/x86_64-linux-gnu/perl5/5.22 /usr/share/perl5 /usr/lib/x86_64-linux-gnu/perl/5.22 /usr/share/perl/5.22 /usr/local/lib/site_perl /usr/lib/x86_64-linux-gnu/perl-base) at (eval 100) line 19.
    Aug 17 09:31:05 server.ishiply.com amavis[7771]: BEGIN failed--compilation aborted at (eval 100) line 19.
    Aug 17 09:31:05 server.ishiply.com amavis[7771]: (failed).
    

    This is becuase Perl DBI module was missing. On Ubuntu server, i found the package that provide this DBI.pm with command “apt-cache search DBI.pm”. To fix the error, install package libdbd-mysql-perl.

    apt install -y libdbd-mysql-perl
    

    After installing this, i try start amavis again. I got differnt error

    root@server:~# systemctl status amavis.service
    ● amavis.service - LSB: Starts amavisd-new mailfilter
       Loaded: loaded (/etc/init.d/amavis; bad; vendor preset: enabled)
       Active: failed (Result: exit-code) since Mon 2020-08-17 09:59:37 SAST; 5s ago
         Docs: man:systemd-sysv-generator(8)
      Process: 10597 ExecStart=/etc/init.d/amavis start (code=exited, status=1/FAILURE)
    
    Aug 17 09:59:36 server.ishiply.com systemd[1]: Starting LSB: Starts amavisd-new mailfilter...
    Aug 17 09:59:37 server.ishiply.com amavis[10603]: starting. /usr/sbin/amavisd-new at server.ishiply.com amavisd-new-2.10.1 (20141025), Unicode aware, LC_ALL="C", LANG="en_US.UTF-8"
    Aug 17 09:59:37 server.ishiply.com amavis[10597]: Starting amavisd: ERROR: MISSING REQUIRED ADDITIONAL MODULES:
    Aug 17 09:59:37 server.ishiply.com amavis[10597]:   DBD::mysql
    Aug 17 09:59:37 server.ishiply.com amavis[10597]:   DBD::mysql
    Aug 17 09:59:37 server.ishiply.com amavis[10597]: (failed).
    Aug 17 09:59:37 server.ishiply.com systemd[1]: amavis.service: Control process exited, code=exited status=1
    Aug 17 09:59:37 server.ishiply.com systemd[1]: Failed to start LSB: Starts amavisd-new mailfilter.
    Aug 17 09:59:37 server.ishiply.com systemd[1]: amavis.service: Unit entered failed state.
    Aug 17 09:59:37 server.ishiply.com systemd[1]: amavis.service: Failed with result 'exit-code'.
    root@server:~# 
    

    To find package that provide DBD::mysql, i used command

    apt-cache search DBD::mysql
    

    To fix, install the package

    apt install -y libdbd-mysql-perl
    

    I am able to start amavis service with command

    systemctl start amavis.service
    

    In Plesk > Extensions > Plesk Email Security now shows Amavis, Postfix and Dovecot running properly.
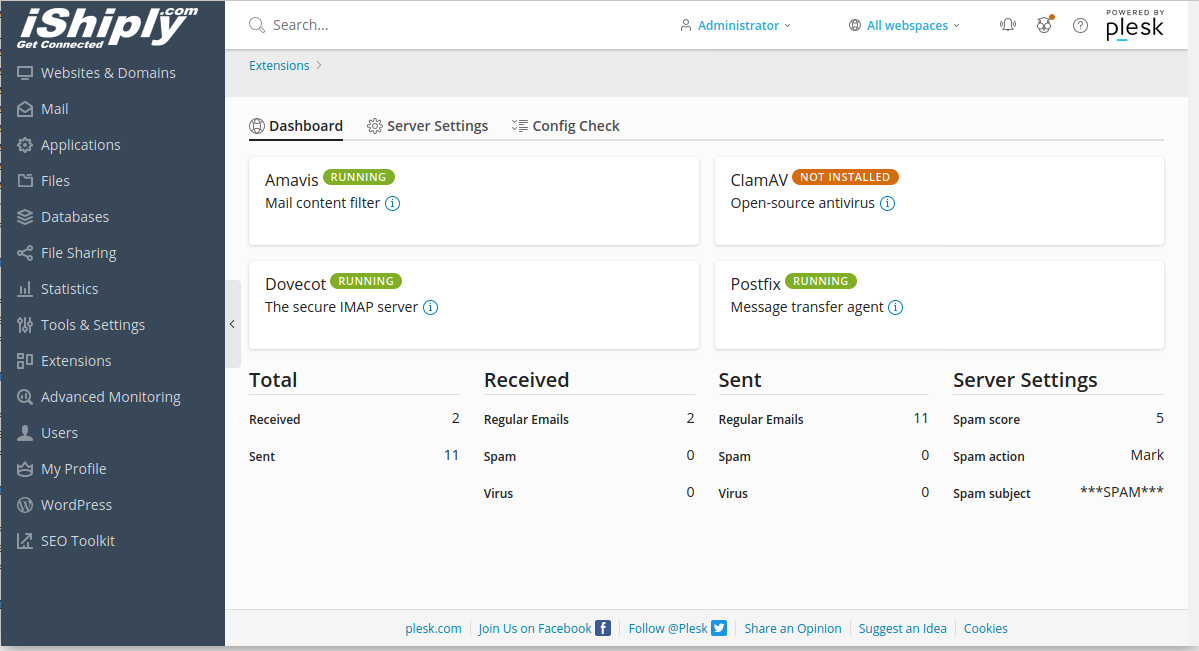
    Plesk Mail Security Extension

  • Install elasticsearch on CentOS 7

    To install elasticsearch, first install java

    yum -y install java-1.8.0-openjdk
    

    Import key

    rpm --import https://artifacts.elastic.co/GPG-KEY-elasticsearch
    

    Create file

    vi /etc/yum.repos.d/elasticsearch.repo
    

    Paste following

    [elasticsearch]
    name=Elasticsearch repository for 7.x packages
    baseurl=https://artifacts.elastic.co/packages/7.x/yum
    gpgcheck=1
    gpgkey=https://artifacts.elastic.co/GPG-KEY-elasticsearch
    enabled=0
    autorefresh=1
    type=rpm-md
    

    Install elasticsearch

    yum install --enablerepo=elasticsearch elasticsearch
    

    Set elastic search to start on boot

    systemctl enable elasticsearch
    

    To start/stop/status

    systemctl stop elasticsearch.service
    systemctl start elasticsearch.service
    systemctl status elasticsearch.service
    

    To see logs

    tail -f /var/log/elasticsearch/elasticsearch.log
    

    ElasticSearch runs on port 9200

    [root@server ~]# netstat -lntp | grep java
    tcp6       0      0 127.0.0.1:9200          :::*                    LISTEN      1289/java           
    tcp6       0      0 ::1:9200                :::*                    LISTEN      1289/java           
    tcp6       0      0 127.0.0.1:9300          :::*                    LISTEN      1289/java           
    tcp6       0      0 ::1:9300                :::*                    LISTEN      1289/java           
    [root@server ~]# 
    

    If you get error starting elasticsearch, check Elasticsearch failed to start on CentOS 7

    If you have a previous installation, make sure you delete left over files before you install differnt version of elasticsearch. I removed following files/folders when i had to downgrade elasticsearch.

    /etc/sysconfig/elasticsearch.rpmsave
    /var/lib/elasticsearch
    /var/log/elasticsearch
    

    See elasticsearch