Tag: linux

  • Install Apache, MySQL, PHP (LAMP) Stack on CentOS 8

    First disable SELinux by editing file

    vi /etc/selinux/config
    

    Find

    SELINUX=enforcing
    

    Replace with

    SELINUX=disabled
    

    Now restart the server.

    reboot
    

    Verify SELinux is disabled by running “sestatus” command. It should show disabled.

    CentOS 8 sestatus

    Install basic tools

    Lets start by installing some basic tools like whois, curl, git etc..

    dnf -y install wget curl telnet bind-utils net-tools git
    

    Configure Firewall

    On CentOS 8 by default only port 22 (SSH) is open to public. To run a web server, you need to open ports 80 and 443.

    Run following command to open ports in firewall

    firewall-cmd --zone=public --permanent --add-service=http
    firewall-cmd --zone=public --permanent --add-service=https
    firewall-cmd --zone=public --permanent --add-service=ssh
    firewall-cmd --zone=public --permanent --add-port=25/tcp
    firewall-cmd --reload
    

    Install Apache

    To install Apache, run

    dnf -y install httpd
    

    Enable Apache to start on boot by running

    systemctl start httpd
    

    Verify Apache is running with command

    netstat -lntp | grep 80
    

    If Apache is running, you will see something like

    CentOS 8 apache netstat

    If all works good, you should be able to access your web server by opening your server IP in a web browser.

    CentOS 8 Apache Default page

    Install PHP

    CentOS 8 comes with PHP 7.2

    To install PHP, run

    dnf -y install php php-cli php-xml php-json php-intl php-odbc php-pdo php-soap php-mysqlnd php-process php-bcmath php-gd php-mbstring
    

    Install php-fpm

    dnf -y install php-fpm
    

    Enable php-fpm start on boot

    systemctl enable php-fpm
    

    Start php-fpm with

    systemctl start php-fpm
    

    php-fpm pool config files are located in folder /etc/php-fpm.d. php-fpm listens on socket at /run/php-fpm/www.sock

    php-fpm package comes with Apache config file, it get placed on /etc/httpd/conf.d/php.conf. Restart apache to get php-fpm activated.

    systemctl restart httpd
    

    Now create a file

    vi /var/www/html/1.php
    

    with content


    You should be able to access phpinfo page on URL

    http://YOUR-SERVER-IP/1.php
    

    php.ini file located in /etc/php.ini, you need to restart php-fpm service if you edit this file.

    Install MySQL

    We will install MariaDB, it is an open source drop in replacement for MySQL, created by creator of MySQL. To install MariaDB, run

    dnf install mariadb-server
    

    Enable MariaDB to start on boot

    systemctl enable mariadb
    

    Start MariaDB

    systemctl start mariadb
    

    CentOS 8 come with MariaDB 10.3. By default there is no root PW set, So you can connect to MySQL with command "mysql".

    CentOS 8 MariaDB

    To create a database, use

    create database DB_NAME_HERE;
    

    To create a user, run

    grant all on DB_NAME_HERE.* to 'USER_NAME'@'localhost' identified by 'PASSWORD_HERE';
    

    Now you have Apache, PHP, MySQL ready to use. Upload your web application to /var/www/html folder using SFTP.

    See CentOS 8

  • Disable PHP disable_functions on Cpanel Server

    Disable PHP disable_functions on Cpanel Server

    On a Cpanel Server using CentOS 7 + php-fpm, site phpinfo() shows few functions are set to disabled in disable_functions.

    PHP disable_functions

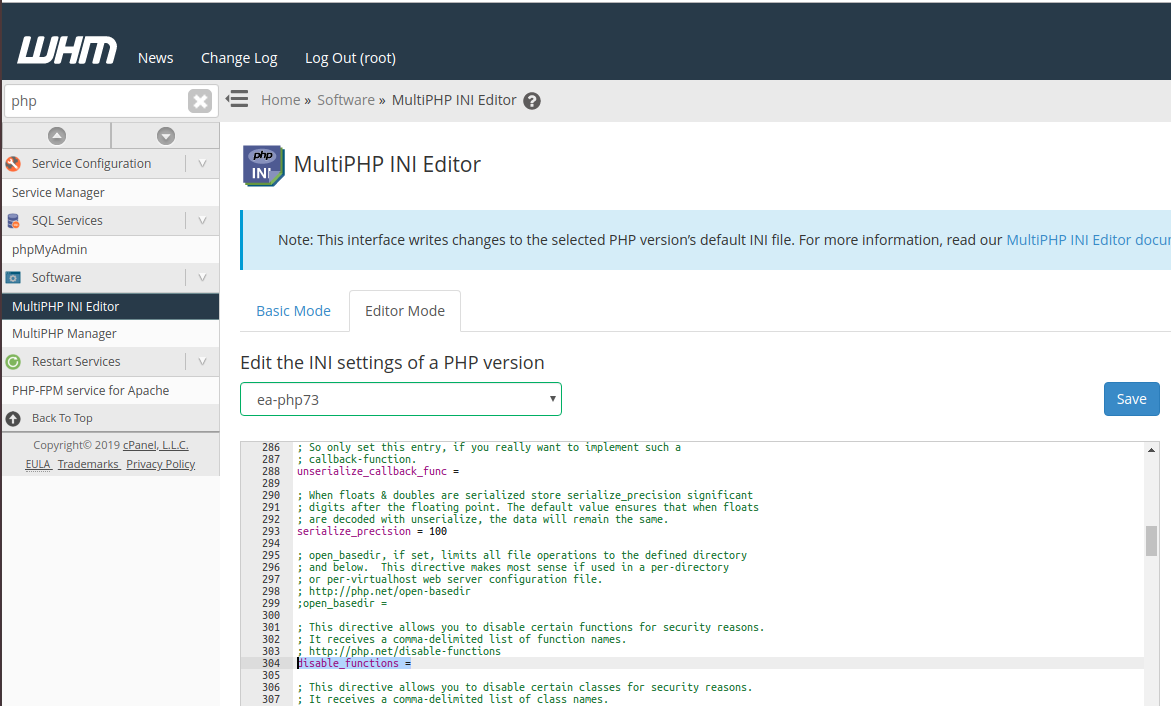
    I checked server wide PHP configuration in WHM for the PHP version the site is using. There is no disable_functions specified.

    WHM > Software > MultiPHP INI Editor > Editor Mode > PHP 7.3
    

    WHM php.ini editor

    This is because in Cpanel server running in PHP-FPM, you need to edit php-fpm pool config file at

    vi /opt/cpanel/ea-php73/root/etc/php-fpm.d/DOMAIN_NAME.conf
    

    Replace ea-php73 with whatever PHP version you selected for this web site.

    Remove the line

    php_admin_value[disable_functions] = exec,passthru,shell_exec,system
    

    Restart php-fpm with

    /scripts/restartsrv_apache_php_fpm
    

    See Cpanel Server

  • Install KernelCare

    KernelCare allow you to update Linux Kernel with out rebooting your server. You can find more info at

    https://www.kernelcare.com

    To install KernelCare, run

    curl -s -L https://kernelcare.com/installer | bash
    

    To activate the KernelCare license, run

    kcarectl --register LICENSE_KEY_HERE
    

    To update the kernel manually

    kcarectl --update
    

    Check if new update available

    kcarectl --check
    

    Check license details

    kcarectl --license-info
    

    Related Posts

    cloudlinux

    KernelCare Unknown Kernel

  • Restore MongoDB collection

    mongoimport allow you to restore mongodb backups.

    mongoimport --db DB_NAME --collection COLLECTION_NAME --file COLLECTION_BACKUP.json
    

    Example

    mongoimport --db direct_db --collection image_settings --file image_settings.json
    

    See MongoDB

  • Nginx Location Directive

    Nginx Location Directive is used to route request to correct files.

    Match

    Exact match is used to match an exact URL.

    server {
        listen 80 default_server;
        root /var/www/html;
        index index.html;
        server_name _;
    
        location /ok/ {
            root /home/;
        }
    }
    

    When location is used with no modifiers, then beginning of the URL is matched. In this case, any url http://domain/ok/FILE_NAME will be served from /home/ok/FILE_NAME

    Exact Match (=)

    Exact match is used to match an exact URL.

    server {
        listen 80 default_server;
        root /var/www/html;
        index index.html;
        server_name _;
    
        location = /ok/index.html {
            root /home/;
        }
    }
    

    In this example http://domain/ok/index.html get served from /home/ok/index.html. Only this specific file will be matched.

    Cause Insensitive Regular Expression Match (~*)

    server {
        listen 80 default_server;
        root /var/www/html;
        index index.html;
        server_name _;
    
        location /ok/ {
            root /home/;
        }
    }
    

    Above code routes URL http://domain/ok/ to /home/ok/index.html. But won’t match http://domain/OK/.

    If you need both /ok and /OK work, you need to use

        location ~* /ok/ {
            root /home/;
        }
    

    With this config, http://domain/OK/FILE will be served from /home/OK/FILE.

    See Nginx

  • Install NextCloud Desktop client on Ubuntu

    Install NextCloud Desktop client on Ubuntu

    To install NextCloud desktop client on Ubuntu, add PPA

    sudo add-apt-repository ppa:nextcloud-devs/client
    sudo apt-get update
    

    Now run

    sudo apt install nextcloud-client
    

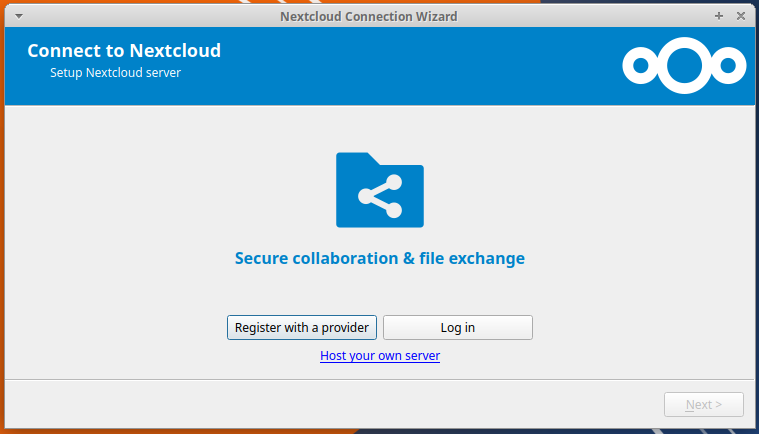
    After install, start nextcloud client, you will be able to login with nextcloud server URL, user and password.

    NextCloud ubuntu client

  • dnf – Package manager for CentOS/RHEL 8

    dnf is package manager for RHEL/CentOS 8. This is improved version of yum.

    To search for a package, use

    dnf search PACKAGE_NAME
    

    To install a package, use

    dnf install PACKAGE_NAME
    
  • CentOS 8

    CentOS 8 is a short-lived Linux distribution based on Red Hat Enterprise Linux (RHEL). Due to a change in policy, CentOS 8 had an early end of life on December 31, 2021.

    If you are using CentOS 8, you can easily migrate to other RHEL based distributions like Alma Linux, RockyLinux or Oracle Linux.

    CentOS will now provide CentOS 8 Stream, which is a rolling release Linux distribution. CentOS 8 Stream will position itself in the middle of Fedora and RHEL. It won’t be a copy of RHEL, instead, it will be used as a testing ground for RHEL. Newer versions of the software get released on CentOS 8 Stream, once it becomes stable, it will be included in RHEL.

  • Apache run web site as user with mod_ruid2

    mod ruid2 allow you to run web site as differnt user from the one web server is running. This is helpfull when you have multiple web sites on same Apache web server.

    To install mod_ruid2 on Ubuntu/Debian server, run

    apt install libapache2-mod-ruid2
    

    Edit VirtualHost entry for the web site, add

    RMode config
    RUidGid USERNAME_HERE GROUP_HERE
    

    Restart Apache

    systemctl restart apache2
    

    Now website will run as user specified in line

    RUidGid USERNAME_HERE GROUP_HERE
    

    Example

    root@create:~# cat /etc/apache2/sites-enabled/serverok.in.conf 
    
        ServerName serverok.in
        ServerAdmin [email protected]
        DocumentRoot /home/serverok.in/html
        CustomLog ${APACHE_LOG_DIR}/serverok.in.log combined
        ErrorLog ${APACHE_LOG_DIR}/serverok.in-error.log
        
            RMode config
            RUidGid serverok serverok
            Options All
            AllowOverride All
            Require all granted
            Order allow,deny
            allow from all
        
    
    root@create:~# 
    

    See Apache

  • ulimit

    ulimit command allow you to view or set user limits.

    boby@sok-01:~$ ulimit -a
    core file size          (blocks, -c) 0
    data seg size           (kbytes, -d) unlimited
    scheduling priority             (-e) 0
    file size               (blocks, -f) unlimited
    pending signals                 (-i) 31482
    max locked memory       (kbytes, -l) 16384
    max memory size         (kbytes, -m) unlimited
    open files                      (-n) 1024
    pipe size            (512 bytes, -p) 8
    POSIX message queues     (bytes, -q) 819200
    real-time priority              (-r) 0
    stack size              (kbytes, -s) 8192
    cpu time               (seconds, -t) unlimited
    max user processes              (-u) 31482
    virtual memory          (kbytes, -v) unlimited
    file locks                      (-x) unlimited
    boby@sok-01:~$ 
    

    To increase limits for a user, edit file

    vi /etc/security/limits.conf
    

    Add

    USER_NAME_HERE        hard nofile 20480
    USER_NAME_HERE        soft nofile 10240
    
  • Apache Increase FD limit

    Apache Increase FD limit

    On CentOS 7 sevrer running apache, when try to install plugin in WordPress admin area, i get error

    Installazione fallita: Il download non è andato a buon fine. cURL error 35: Process open FD table is full
    

    This is due to Apache File Descriptor Limits.

    To see current Limits, use following PHP script

    FD Soft Limit: " . exec('ulimit -Sn');
    echo "
    FD Hard Limit: " . exec('ulimit -Hn');

    To see system wide limits, use following commands

    sysctl fs.file-nr
    sysctl fs.file-max
    

    Normally this will be high value. You need to increse limit for user running Apache. On CentOS 7, the username is “apache”. To increase limit for this user, edit

    vi /etc/security/limits.conf
    

    Add following lines

    apache soft nofile 10240
    apache hard nofile 900000
    

    To verify, we need to login as user Apache, and verify limits, for this, lets enable SSH or bash terminal for user apache. By default no SSH login allowed for this user.

    chsh --shell /bin/bash apache
    

    Now change to user, verify the limits

    su - apache
    ulimit -Hn
    ulimit -Sn
    

    Exit back to root, disable shell for user apache with command.

    chsh --shell /sbin/nologin apache
    

    We need to edit service file for Apache. Default service file look like following.

    [root@centos-s-1vcpu-1gb-blr1-01 ~]# cat /usr/lib/systemd/system/httpd.service
    [Unit]
    Description=The Apache HTTP Server
    After=network.target remote-fs.target nss-lookup.target
    Documentation=man:httpd(8)
    Documentation=man:apachectl(8)
    
    [Service]
    Type=notify
    EnvironmentFile=/etc/sysconfig/httpd
    ExecStart=/usr/sbin/httpd $OPTIONS -DFOREGROUND
    ExecReload=/usr/sbin/httpd $OPTIONS -k graceful
    ExecStop=/bin/kill -WINCH ${MAINPID}
    # We want systemd to give httpd some time to finish gracefully, but still want
    # it to kill httpd after TimeoutStopSec if something went wrong during the
    # graceful stop. Normally, Systemd sends SIGTERM signal right after the
    # ExecStop, which would kill httpd. We are sending useless SIGCONT here to give
    # httpd time to finish.
    KillSignal=SIGCONT
    PrivateTmp=true
    
    [Install]
    WantedBy=multi-user.target
    [root@centos-s-1vcpu-1gb-blr1-01 ~]# 
    

    Find

    [Service]
    

    Add below

    LimitNOFILE=65535
    LimitNPROC=65535
    

    Method 2

    create file

    mkdir -p /etc/systemd/system/httpd.service.d/
    vi /etc/systemd/system/httpd.service.d/limits.conf
    

    Add

    [Service]
    LimitNOFILE=65535
    LimitNPROC=65535
    

    Reload service file with

    systemctl daemon-reload
    

    Restart Apache

    systemctl restart httpd
    

    See Apache

  • ImageMagick

    To install ImageMagick on CentOS, run

    yum install ImageMagick
    

    To install on Ubuntu/Debian, run

    apt install -y imagemagick
    

    How to check if ImageMagick is installed?