Tag: linux

  • Port forward using iptables

    To forward all requests from port 80 to port 8080, run

    iptables -t nat -A PREROUTING -p tcp --dport 80 -j REDIRECT --to-port 8080

    Here is another command that specify network interface and forward traffic on port 80 to port 5000

    iptables -t nat -A PREROUTING -i eth0 -p tcp --dport 80 -j REDIRECT --to-port 5000

    Back to iptables

  • ASTPP

    ASTPP is a Open Source VoIP Billing Solution for Freeswitch. It supports prepaid and postpaid billing with call rating and credit control.

    https://www.astppbilling.org

    To install ASTPP on CentOS 7, run

    wget --no-check-certificate https://raw.githubusercontent.com/iNextrix/ASTPP/v4.0.1/install.sh -O install.sh
    chmod +x install.sh
    ./install.sh
    

    Related Posts

    ASTPP change URL
    ASTPP install SSL

    voip

  • Caddy

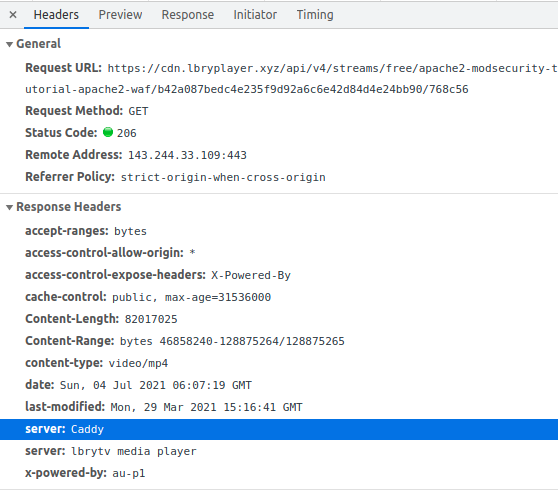
    Caddy is used to serving videos on https://odysee.com, it is a block-chain based video service with no censoring.

    Install Caddy Web Server
    Install Caddy Webserver on CentOS 7
    How to Use Caddy as a Reverse Proxy

    Caddy Web Server

    Web Server

  • Install Caddy Web Server

    Caddy is a light weight web server written in golang. Caddy auto generate SSL for your web site using LetsEncrypt and support HTTP/2.

    To instal Caddy, download latest Caddy release from github

    https://github.com/caddyserver/caddy/releases/

    At the time of this post, 1.3 is latest stable release, to install it, run

    cd /usr/local/src
    wget https://github.com/caddyserver/caddy/releases/download/v2.4.6/caddy_2.4.6_linux_amd64.tar.gz
    tar xvf caddy_2.4.6_linux_amd64.tar.gz
    cp /usr/local/src/caddy /usr/local/bin
    chown root:root /usr/local/bin/caddy
    chmod 755 /usr/local/bin/caddy
    

    Make caddy listen to privilage ports 80 and 443

    setcap 'cap_net_bind_service=+ep' /usr/local/bin/caddy
    

    If you don’t have a system user for caddy to run as, create one

    groupadd -g 33 www-data
    useradd -g www-data --no-user-group  --home-dir /var/www --no-create-home --shell /usr/sbin/nologin --system --uid 33 www-data
    

    Create config folder for caddy

    mkdir /etc/caddy
    chown -R root:root /etc/caddy
    mkdir /etc/ssl/caddy
    chown -R root:www-data /etc/ssl/caddy
    chmod 0770 /etc/ssl/caddy
    

    Create Caddy config file

    vi /etc/caddy/Caddyfile
    

    Add

    lab.serverok.in {
        root /var/www/html
    }
    

    Replace lab.serverok.in with whatever domain you need to host.

    Create service file for caddy

    vi /etc/systemd/system/caddy.service
    

    Add following

    [Unit]
    Description=Caddy
    Documentation=https://caddyserver.com/docs/
    After=network.target network-online.target
    Requires=network-online.target
    
    [Service]
    Type=notify
    User=caddy
    Group=caddy
    ExecStart=/usr/bin/caddy run --environ --config /etc/caddy/Caddyfile
    ExecReload=/usr/bin/caddy reload --config /etc/caddy/Caddyfile
    TimeoutStopSec=5s
    LimitNOFILE=1048576
    LimitNPROC=512
    PrivateTmp=true
    ProtectSystem=full
    AmbientCapabilities=CAP_NET_BIND_SERVICE
    
    [Install]
    WantedBy=multi-user.target
    

    Set permission

    chown root:root /etc/systemd/system/caddy.service
    chmod 644 /etc/systemd/system/caddy.service
    systemctl daemon-reload
    

    Start caddy with

    systemctl start caddy
    

    Enable caddy start on boot

    systemctl enable caddy
    
  • curl set user agent

    When using curl linux command line tool, to set user agent, run

    curl --user-agent "USER_AGENT_HERE" URL_HERE
    

    You can also use

    curl -A "USER_AGENT_HERE" URL_HERE
    

    By changing user agent, you can view a site as google bot, check Fetch as Google with curl

    Back to curl

  • phpMyAdmin allow connecting to multiple servers

    phpMyAdmin configuration file is config.inc.php located in phpMyAdmin install folder.

    To enable connecting to arbitary Server, add

    $cfg['AllowArbitraryServer'] = true;
    

    This will allow you to enter server IP or hostname to connect to.

    To add connecting to differnt predefined servers, you can add following to end of config.inc.php

    $i++;
    $cfg['Servers'][$i]['host'] = 'database-1.abxfzy3gt.us-east-2.rds.amazonaws.com';
    $cfg['Servers'][$i]['port'] = '3306';
    $cfg['Servers'][$i]['user'] = 'root';
    $cfg['Servers'][$i]['password'] = 'yoursecretpassword';
    $cfg['Servers'][$i]['extension'] = 'mysqli';
    $cfg['Servers'][$i]['auth_type'] = 'config';
    

    Repeat this for any number of MySQL servers you need to connect.

    Related Posts

    MySQL root can’t login to phpMyAdmin
    phpmyadmin

  • iostat

    iostat

    iostat – Report Central Processing Unit (CPU) statistics and input/output statistics for devices and partitions.

    The iostat command is used for monitoring system input/output device loading by observing the time the devices are active in relation to their average transfer rates. The iostat command generates reports that can be used to change system configuration to better balance the input/output load between physical disks.

    The first report generated by the iostat command provides statistics concerning the time since the system was booted. Each subsequent report covers the time since the previous report. All statistics are reported each time the iostat command is run. The report consists of a CPU header row followed by a row of CPU statistics. On multiprocessor systems, CPU statistics are calculated system-wide as averages among all processors. A device header row is displayed followed by a line of statistics for each device that is configured.

    The interval parameter specifies the amount of time in seconds between each report. The first report contains statistics for the time since system startup (boot). Each subsequent report contains statistics collected during the interval since the previous report. The count parameter can be specified in conjunction with the interval parameter. If the count parameter is specified, the value of count determines the number of reports generated at interval seconds apart. If the interval parameter is specified without the count parameter, the iostat command generates reports continuously.

    iostat is part of sysstat package. To install on Debian/Ubuntu, run

    apt install sysstat
    

    To enable sysstat to collect data, edit file

    vi /etc/default/sysstat
    

    Find

    ENABLED="false"
    

    Replace with

    ENABLED="true"
    

    To see current IO Usage, run

    iostat
    

    iostat

    To show information in one line, run

    iostat -xkd 2 5
    

    linux iostat

    The number 2 is to print stats every 2 seconds. 5 is to print the stats 5 times.

    Other iostat options

    iostat -x
    iostat -x 2 5
    

    Related Posts

    Server Load

  • Plesk Change Backup Location

    Plesk Change Backup Location

    By default, Plesk store backups in folder /var/lib/psa/dumps/. To move this to a differnt partition or directory, create a folder

    mkdir /backup
    chown psaadm:psaadm /backup
    chmod 750 /backup
    

    Edit file

    vi /etc/psa/psa.conf
    

    Find

    DUMP_D /var/lib/psa/dumps
    

    Replace with

    DUMP_D /backup
    

    Move old backup to new location

    rsync -avzP /var/lib/psa/dumps/ /backup/
    

    Remove old backup directory, here i rename it to dumps-old, you can delete it.

    cd /var/lib/psa
    mv dumps dumps-old
    ln -s /backup dumps
    

    Restart Plesk

    service sw-cp-server restart
    

    Related Posts

    Plesk
    Plesk MySQL Daily Backup Script

  • EasyApache 4 installing PHP 5

    EDIT 2022-06-20: Cpanel completely removed support for PHP 5.6, so this method no longer works on AlmaLinux 8. If you need PHP 5.6, the best solution is to use CloudLinux, which provides support for older PHP versions. CloudLinux is a popular Linux distro used by many shared hosting providers as it allows for better security and isolates each website to its own virtual file system. You can find more information on cloudlinux at

    https://www.cloudlinux.com/os-shared/

    Cpanel have removed PHP 7.0 and older version from newer cpanel installations. Existing servers with older version of PHP will continue working.

    https://blog.cpanel.com/removal-of-php-5-6-and-php-7-0-in-easyapache-profiles/

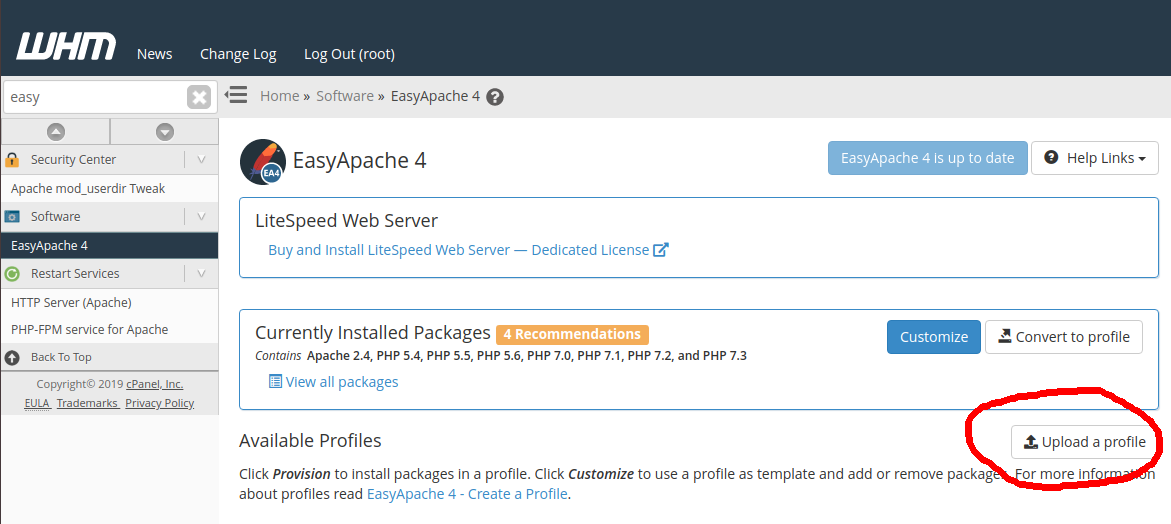
    If you have a new cpanel server, but required older PHP version for some of your site to work, you can download EasyApache 4 profile from another server and upload to your server and provision it to get older PHP version.

    I have EA4 profile with Older PHP version available at

    https://gist.githubusercontent.com/serverok/ba144b7f04f0602a369406d7d400c87d

    To install, run following commands as root

    cd /etc/cpanel/ea4/profiles/custom
    curl -s https://gist.githubusercontent.com/serverok/ba144b7f04f0602a369406d7d400c87d/raw -o serverok-all-php.json
    

    Or save content of gist https://gist.github.com/serverok/ba97370b3184b480e29cf22c89dc69c3 as serverok-all-php.json, then upload it at

    WHM > EasyApache 4 > Upload a profile
    

    cpanel server

    Now login to WHM > EasyApache 4, you will see

    EasyApache4 php 5.6

    Click on “Provision” to install older PHP versions.

    Related Posts

    EasyApache
    Reinstall EasyApache4
    CloudLinux EasyApache 4 Profile Missing
    Cpanel Server

  • KernelCare Unknown Kernel

    On Cpanel server with KernelCare installed, i keep getting email

    KernelCare

    This is because the kernel is not yet supported by kernalcare. Since this kernal is provided by CloudLinux, you don’t have to worry. CloudLinux support said they do add support for KernelCare after 3 to 4 days of releasing new kernel.

    To disable this warning, edit file

    vi /etc/sysconfig/kcare/kcare.conf
    

    Add

    IGNORE_UNKNOWN_KERNEL=True
    

    You can find more KernelCare options at

    https://docs.kernelcare.com/config-options/

    You can always check if KernelCare supports your current kernel here:

    http://patches.kernelcare.com/

    KernelCare update kernel using cronjob in /etc/cron.d/kcare-cron

    [root@ok cron.d]# cat kcare-cron 
    31 */4  * * * root /usr/bin/kcarectl -q --auto-update
    [root@ok cron.d]# 
    

    Related Posts

    Install KernelCare
    cloudlinux

  • Auto start XAMPP on Boot

    Allow phpMyAdmin remote access on xampp
    Restart Services in Xampp Linux

    To auto start XAMPP on boot on Ubuntu, create file

    vi /etc/systemd/system/xampp.service
    

    Add following content

    [Unit]
    Description=XAMPP auto start by ServerOk.in
    
    [Service]
    ExecStart=/opt/lampp/lampp start
    ExecStop=/opt/lampp/lampp stop
    Type=forking
    
    [Install]
    WantedBy=multi-user.target
    

    Enable xampp with

    systemctl enable xampp
    

    start xampp

    systemctl start xampp