Tag: cpanel

  • install fantastico on Cpanel Server

    For installing fantastico, run following command on ssh

    cd /usr/local/cpanel/whostmgr/docroot/cgi 
    wget -N http://files.betaservant.com/files/free/fantastico_whm_admin.tgz
    tar -xzpf fantastico_whm_admin.tgz 
    rm -rf fantastico_whm_admin.tgz
    

    Now Login to WHM

    WHM -> Plugins -> Fantastico De Luxe WHM Admin (scroll down the left menu).

    After installing Fantastico De Luxe WHM Admin will auto-update your existing installation. All files will moved or created to /var/netenberg.

    See Cpanel Server

  • Cpanel Server Setup

    Configure Service Manager

    * disable eximstats. It use mysql to store log, better disable it. WHM > Service Manger > Eximstats = DISABLE

    FTP Server Config (pureftpd)

    * FTP Server Configuration > TLS Encryption Support = Disabled
    * FTP Server Configuration > Allow Anonymous Logins = No
    * FTP Server Configuration > Allow Anonymous Uploads = No
    * FTP Server Configuration > Allow Logins with Root Password = No

    Security Center Configuration

    * WHM > Security Center > Apache mod_userdir Tweak = ENABLE
    * WHM > Security Center > Compiler Access = DISABLE
    * WHM > Security Center > PHP open_basedir Tweak = ENABLE
    * WHM > Security Center > Manage External Authentications > Configure = ALL OFF
    * WHM > Security Center > Shell Fork Bomb Protection = ENABLE
    * WHM > Security Center > SSH Password Authorization Tweak = DISABLED
    * WHM > Security Center > cPHulk Brute Force Protection = DISABLE (use CSF)

    Service Configuration

    * Service Configuration > cPanel log rotation configuration
    * home > service configuration > exim configuration manger > Scan outgoing messages for spam and reject based on spamassassin® internal spam_score setting [?] on

    Other Settings

    * change main shared ip – home »server configuration »basic cPanel & whm setup
    * add new ip address – home »ip functions »add a new ip address ( 192.168.4.128-255 format)
    * home »server configuration »Basic cPanel & whm Setup
    * home »server configuration »tweak settings

    * home »service configuration »exim configuration manger
    * home »service configuration »php configuration editor
    * home »system health »background process killer
    * main >> backup >> configure Backup
    * home »software »easyapache (apache update) Suphp enable on easyapache
    * plugins >> configserver security and firewall

    See Cpanel Server

  • Cpanel Statistics Software Configuration

    Cpanel Statistics Software Configuration

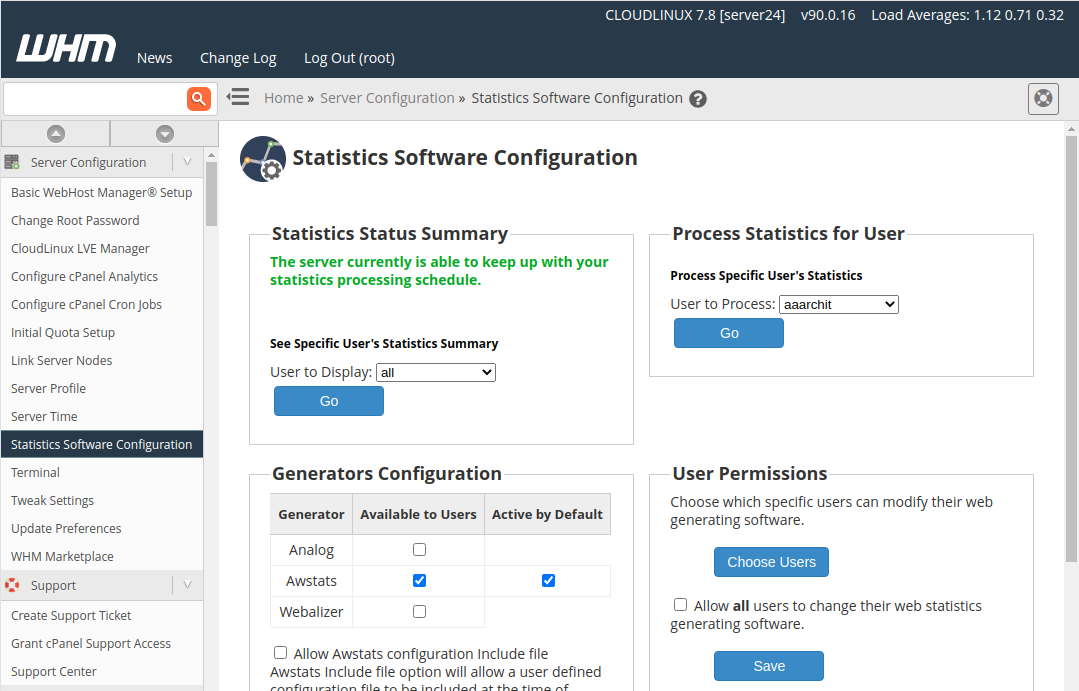
    Cpanel provide 3 different Statistics programs (Analog, AWStats and Webalizer). Enabling all 3 is not required as it use more CPU and do same task. AWStats is best out of the 3. Most users will be happy with just Awstats.

    With better stats like Google Analytics, even Awstats is not required.

    So i only enable Awstats, disable other 2.

    Cpanel Statistics Software Configuration

    See Cpanel Server Setup

  • Update Cpanel License Key

    To update cpanel server license, run

    /usr/local/cpanel/cpkeyclt

    Example

    [root@pbcp-22-01 ~]# /usr/local/cpanel/cpkeyclt
    Updating cPanel license...Done. Update succeeded.
    Building global cache for cpanel...Done
    [root@pbcp-22-01 ~]# 

    Back to Cpanel Server

  • How to Install ImunifyAV on Cpanel Server

    ImunifyAV is a Free version of a malware scanner for websites. To install ImunifyAV on Cpanel

    yum install imunify-antivirus imunify-antivirus-cpanel

    To start/stop, run

    systemctl start imunify-antivirus
    systemctl stop imunify-antivirus

    If that did not work, you can use the following command, which works on Cpanel, Plesk, and DirectAdmin server

    wget https://repo.imunify360.cloudlinux.com/defence360/imav-deploy.sh
    bash imav-deploy.sh

    Install Cpanel Plugin

    By default, ImunifyAV doesn’t show up in the Cpanel interface. To enable the Cpanel plugin, run

    /usr/share/av-userside-plugin.sh

    To uninstall the ImunifyAV Cpanel plugin, run

    /usr/share/av-userside-plugin.sh -r

    It is provided by package “imunify-antivirus”. You can find it with yum whatprovides “*/av-userside-plugin.sh”.

    Uninstall ImunifyAV

    To uninstall ImunifyAV free version, run

    yum remove imunify-antivirus imunify-antivirus-cpanel imunify-notifier imunify-common

    See ImunifyAV

  • CloudLinux PHP versions missing in PHP Selector

    CloudLinux PHP versions missing in PHP Selector

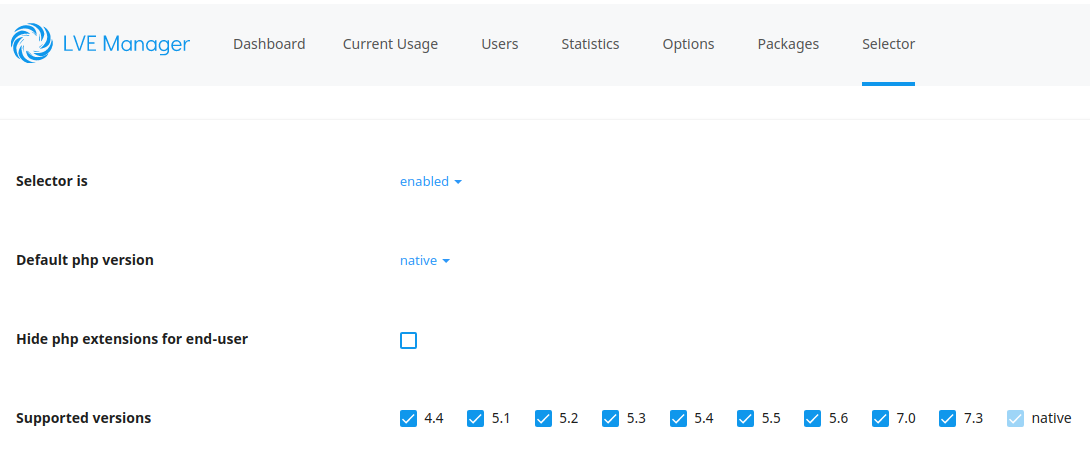
    On a Cpanel server running CloudLinux, PHP Selector did not show all PHP versions.

    cloudlinux php selector

    I reinstalled EasyApache profile “CloudLinux + All PHP Options + OpCache + mod_lsapi”.

    WHM EasyApache 4  PHP missing

    Even after installing EasyApache profile with all PHP versions, PHP 7.2 and PHP 7.4 was missing on this server.

    To fix, the problem, i run

    yum clean all
    yum install -y alt-php72* 
    yum install -y alt-php74*
    yum install -y alt-php73*
    
  • CloudLinux PHP Selector on Cpanel Server

    CloudLinux come with PHP Selector, this allow you to select differnt PHP versions. When you enable PHP selector, you should do the following.

    1) EasyApache 4 and bild profile "CloudLinux + All PHP Options + OpCache + mod_lsapi".
    2) MultiPHP Manager > System PHP Version set to any ea-php Version
    3) MultiPHP Manager > System PHP-FPM click "Turn Off" button.
    4) MultiPHP Manager > set INHERIT php version for domain.
    5) Users PHP selector > choose needed alt-php version and modules.
    6) WHM > Feature Manager > default => disable MultiPHP Manager and MultiPHP INI Editor.
    

    Related Posts

    Enable CloudLinux PHP lsapi
    CloudLinux

  • Cpanel Exim Bypass SMTP authentication for specific IP address.

    To bypass SMTP authentication for specific IP on Cpanel Exim mail server, edit file

    vi /etc/alwaysrelay
    

    Add IP or Hostname you need to allow sending email with out SMTP autentication and restart exim mail server.

    systemctl restart exim
    
  • EasyApache 4 installing PHP 5

    EDIT 2022-06-20: Cpanel completely removed support for PHP 5.6, so this method no longer works on AlmaLinux 8. If you need PHP 5.6, the best solution is to use CloudLinux, which provides support for older PHP versions. CloudLinux is a popular Linux distro used by many shared hosting providers as it allows for better security and isolates each website to its own virtual file system. You can find more information on cloudlinux at

    https://www.cloudlinux.com/os-shared/

    Cpanel have removed PHP 7.0 and older version from newer cpanel installations. Existing servers with older version of PHP will continue working.

    https://blog.cpanel.com/removal-of-php-5-6-and-php-7-0-in-easyapache-profiles/

    If you have a new cpanel server, but required older PHP version for some of your site to work, you can download EasyApache 4 profile from another server and upload to your server and provision it to get older PHP version.

    I have EA4 profile with Older PHP version available at

    https://gist.githubusercontent.com/serverok/ba144b7f04f0602a369406d7d400c87d

    To install, run following commands as root

    cd /etc/cpanel/ea4/profiles/custom
    curl -s https://gist.githubusercontent.com/serverok/ba144b7f04f0602a369406d7d400c87d/raw -o serverok-all-php.json
    

    Or save content of gist https://gist.github.com/serverok/ba97370b3184b480e29cf22c89dc69c3 as serverok-all-php.json, then upload it at

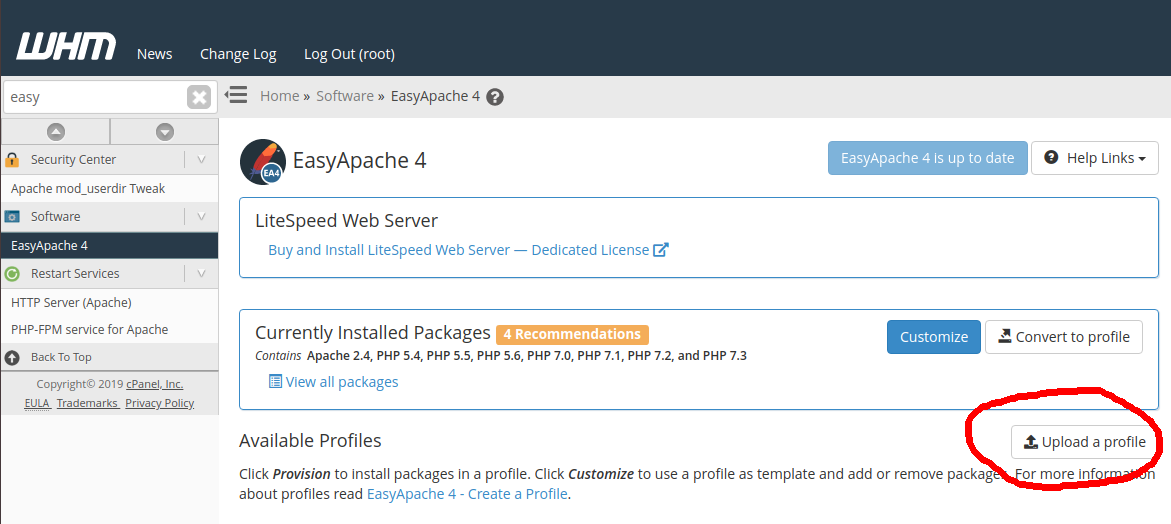
    WHM > EasyApache 4 > Upload a profile
    

    cpanel server

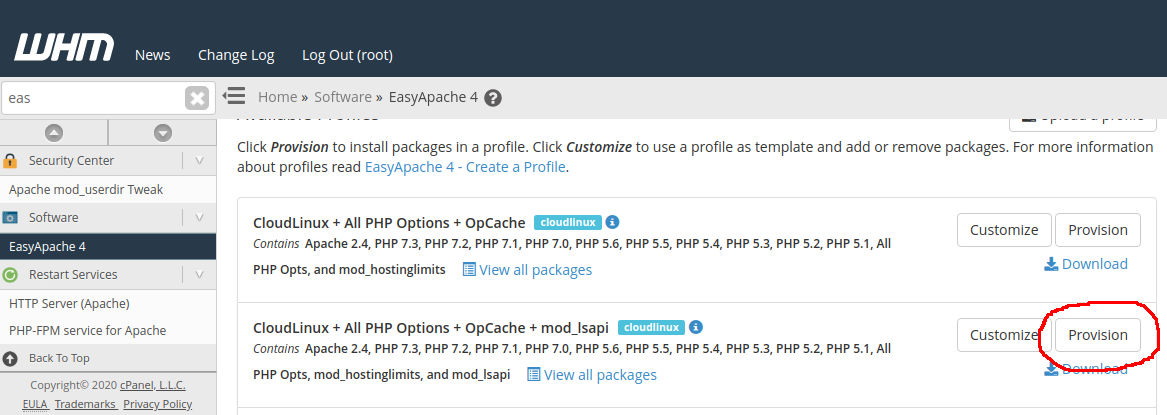
    Now login to WHM > EasyApache 4, you will see

    EasyApache4 php 5.6

    Click on “Provision” to install older PHP versions.

    Related Posts

    EasyApache
    Reinstall EasyApache4
    CloudLinux EasyApache 4 Profile Missing
    Cpanel Server

  • Disable PHP disable_functions on Cpanel Server

    Disable PHP disable_functions on Cpanel Server

    On a Cpanel Server using CentOS 7 + php-fpm, site phpinfo() shows few functions are set to disabled in disable_functions.

    PHP disable_functions

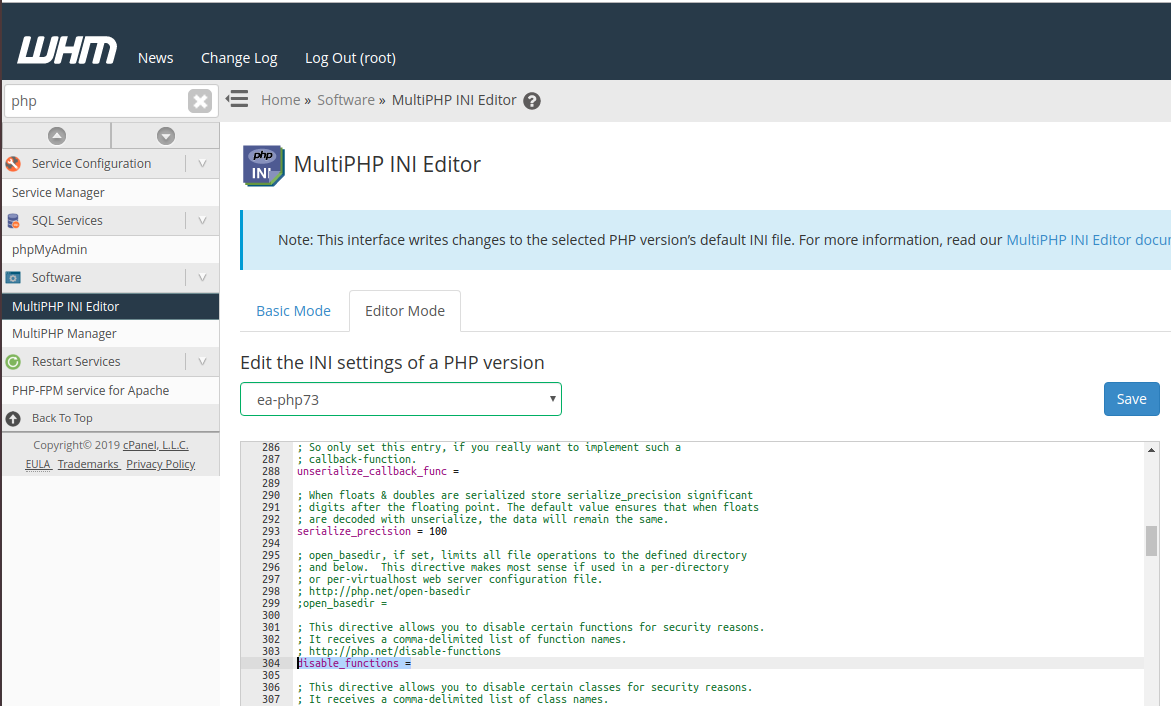
    I checked server wide PHP configuration in WHM for the PHP version the site is using. There is no disable_functions specified.

    WHM > Software > MultiPHP INI Editor > Editor Mode > PHP 7.3
    

    WHM php.ini editor

    This is because in Cpanel server running in PHP-FPM, you need to edit php-fpm pool config file at

    vi /opt/cpanel/ea-php73/root/etc/php-fpm.d/DOMAIN_NAME.conf
    

    Replace ea-php73 with whatever PHP version you selected for this web site.

    Remove the line

    php_admin_value[disable_functions] = exec,passthru,shell_exec,system
    

    Restart php-fpm with

    /scripts/restartsrv_apache_php_fpm
    

    See Cpanel Server

  • Cpanel find owner of a website

    On Cpanel server, to find username for a web site, run

    /scripts/whoowns DOMAIN_HERE
    

    Example

    Cpanel  find owner

  • Disable 2 Factor Authentication in Cpanel

    To disable 2 Factor Autentication for WHM in Cpanel Server, SSH into server as user root, run

    whmapi1 twofactorauth disable_policy
    

    Or run

    whmapi1 create_user_session user=root service=whostmgrd locale=en
    

    This will create a link for WHM login, using this link won’t require 2 Factor Authentication. After logging into WHM, you can disable 2 Factor Autentication.

    If you want 2 FA disabled for a cpanel user, run

    /usr/local/cpanel/bin/uapi --user=username TwoFactorAuth remove_user_configuration