Blog

  • How to change pure-ftpd port

    How to change pure-ftpd port

    pure-ftpd by default listens on port 21. We will change the FTP port from 21 to some other port. This instruction work for RHEL, CentOS, AlmaLinux, Oracle Linux, and RockeyLinux.

    To change FTP port to some other port, edit file

    vi /etc/pure-ftpd/pure-ftpd.conf
    

    Find

    # Bind                         127.0.0.1,21
    

    Add below

    Bind                        FTP_PORT_HERE
    

    Example

    [root@backendz ~]# cat /etc/pure-ftpd/pure-ftpd.conf  | grep -i bind
    # Bind                         127.0.0.1,21
    Bind                        2121 
    [root@backendz ~]# 
    

    This will change FTP port to 2121.

    Restart pure-ftpd with command.

    systemctl start pure-ftpd
    
  • How to view the contents of tar.gz file

    How to view the contents of tar.gz file

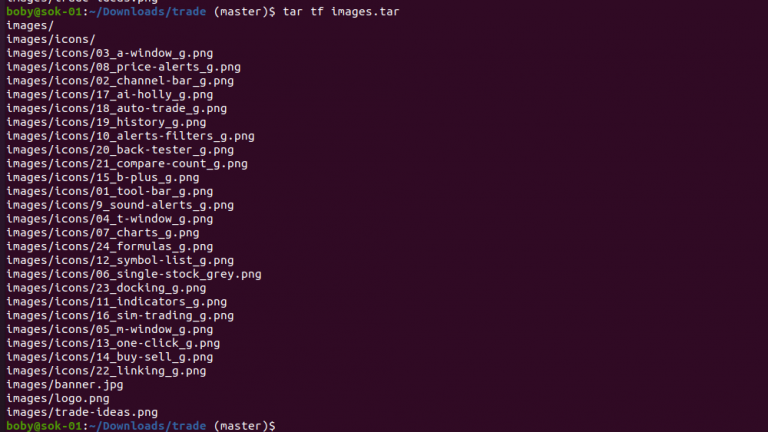
    To view the contents of tar.gz file, run

    tar tf FILE.tar.gz
    

    tar view files

    -f, --file=ARCHIVE         use archive file or device ARCHIVE
    -t, --list                 list the contents of an archive
    
  • How to install zabbix agent on Ubuntu

    How to install zabbix agent on Ubuntu

    To install the Zabbix agent on Ubuntu, run the command

    apt install zabbix-agent
    

    To autostart, Zabbix agent on boot, enable it with

    systemctl enable zabbix-agent
    

    To manage Zabbix, use commands

    systemctl stop zabbix-agent
    systemctl start zabbix-agent
    systemctl restart zabbix-agent
    

    To see Zabbix listening port

    netstat -lntp | grep zabbix
    

    Zabbix agent port

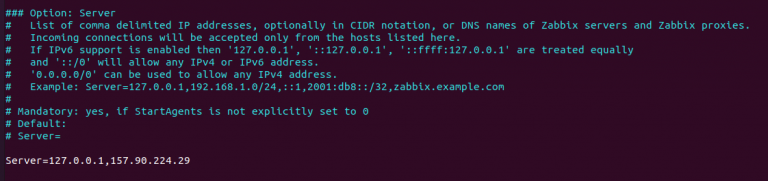
    Edit file

    vi /etc/zabbix/zabbix_agentd.conf 
    

    Find

    Server=127.0.0.1
    

    Replace with

    Server=127.0.0.1,IP_OF_ZABBIX_SERVER_HERE
    

    zabbix agent Server config

    Restart zabbix agent

    systemctl restart zabbix-agent
    

    After the Zabbix agent is installed, you need to add the sevrer in your Zabbix installation.

  • How to find java version

    To find the java version, run the command

    java --version
    

    Example

    boby@sok-01:~$ java --version
    openjdk 14.0.2 2020-07-14
    OpenJDK Runtime Environment (build 14.0.2+12-Ubuntu-120.04)
    OpenJDK 64-Bit Server VM (build 14.0.2+12-Ubuntu-120.04, mixed mode, sharing)
    boby@sok-01:~$ 
    
  • Set Time in Cpanel Server

    Set Time in Cpanel Server

    In Cpanel Server, you can set Time Zone in WHM once you logged in as user root. If you have WHM reseller access you won’t be able to set server time. You need to contact the server administrator with root access to set the time.

    Go to

    Home > Server Configuration > Server Time
    

    You can also use the search box on the top-left corner of WHM. Search for “time”.

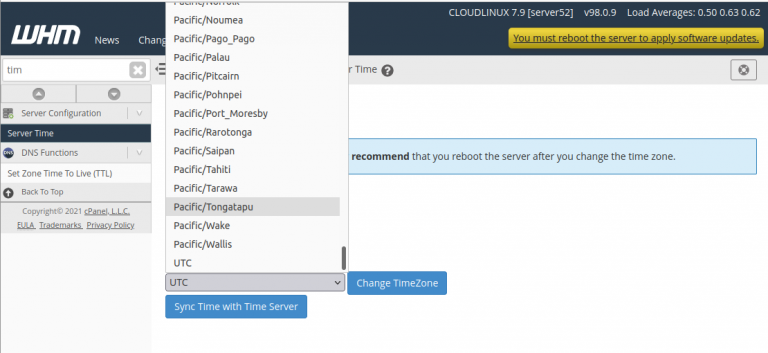
    On the Server Time page, you can change the server time zone.

    Cpanel WHM server time

    From the Dropdown menu, select the desired time zone you want.

    Click the button “Change TimeZone” to change the time zone.

    If you have customers from different countries, it is better to select time zone UTC (GMT + 0) as it is universal time Most PHP applications have the option to offset time from UTC and display the local time for users.

    Once the time zone is set, click on the button “Sync Time with Time Server”. This will update server time.

    Back to Cpanel Server Setup

  • SiberianCMS

    SiberianCMS

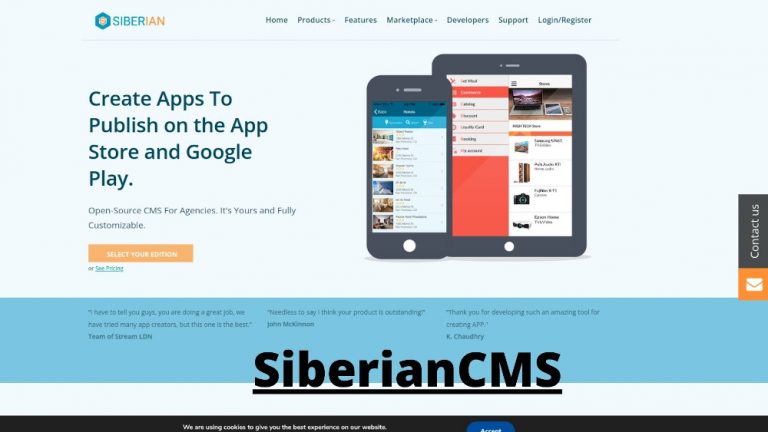
    SiberianCMS is an Open-Source web-based software to create mobile applications for Android and IOS using easy to use interface. No coding knowledge is required to create your own mobile applications for iOS and Android. It can also create Webapp, which is accessible using web browsers.

    siberiancms

    You can get it from

    https://www.siberiancms.com

    Source code for Siberian Single App Edition (SAE), free and open-source app builder available on Github. It is created in PHP using Zend Framework.

    https://github.com/Xtraball/Siberian/

  • How to Migrate CentOS 8 to AlmaLinux

    How to Migrate CentOS 8 to AlmaLinux

    CentOS 8 is reaching its End of Life in December 2021. If you are using CentOS 8, you may need to consider migrating to other operating systems.

    Other alternatives for CentOS 8 are AlmaLinux, Rocky Linux, and Oracle Linux. All of these are free and are based on RHEL 8.

    AlmaLinux is released a migration script

    https://github.com/AlmaLinux/almalinux-deploy

    This script allows you to convert CentOS 8 to AlmaLinux.

    WARNING: Make sure you take a full system backup before migrating.

    Before migrating, make sure your system is up to date.

    dnf update

    If you get error, Error: Failed to download metadata for repo ‘appstream’, run

    sed -i -e "s|mirrorlist=|#mirrorlist=|g" /etc/yum.repos.d/CentOS-*
    sed -i -e "s|#baseurl=http://mirror.centos.org|baseurl=http://vault.centos.org|g" /etc/yum.repos.d/CentOS-*
    dnf update

    Reboot the server

    reboot

    Once the server is back online, we can run the AlmaLinux migration script to start the migration.

    curl -O https://raw.githubusercontent.com/AlmaLinux/almalinux-deploy/master/almalinux-deploy.sh
    bash almalinux-deploy.sh

    After the migration is complete, run

    dnf distro-sync -y

    Now you need to reboot the server

    reboot
  • How To See Currently Running Processes in Cpanel/WHM Server

    How To See Currently Running Processes in Cpanel/WHM Server

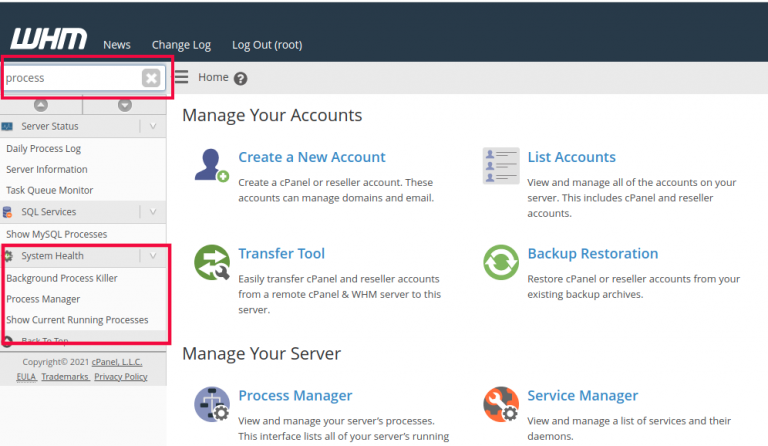
    To see the currently running process on Cpanel/WHM server, log in to WHM.

    Search for “process” on the left-top corner search box.

    CPanel WHM process

    Under System health, click on “Process Manager”

    WHM > System Health > Process Manager
    

    Cpanel Process Manager

    This page list all running process. On the left of each process, you have the option to kill a process and trace.

    The “trace” option allows you to see what the process is doing. It uses strace command to attach a process and show the result.

    kill option allows you to kill a process. There is an option to kill all processes owned by a specific user.

    On the left menu, there is another link “Show Current Running Processes”, this just shows a read-only process list. You won’t be able to interact with it.

    Another option is to search for “terminal” in WHM, click on Terminal Link. This will open the Terminal connection to the server, here you can run Linux commands. You can use the following Linux commands to see the running process.

    ps aux
    top
    

    Back to Cpanel Server

  • libnsl.so.1: cannot open shared object file: No such file or directory

    While installing LiteSpeed web server on a Cpanel server running on ALMALINUX 8.4, I get an error

    /usr/src/lsws/lsws-6.0.9/admin/fcgi-bin/admin_php5: error while loading shared libraries: libnsl.so.1: cannot open shared object file: No such file or directory

    To fix the error, install libnsl package

    yum install -y libnsl
    

    Back to LiteSpeed

  • Creating Private Nameservers at Enom.com

    Creating Private Nameservers at Enom.com

    Private Name servers or vanity name servers are name servers like ns1.your-domain.com and ns2.your-domain.com. If you have used shared hosting, you may have seen hosting providers have name servers with their domain name. If you own a domain name, it is possible to create custom name servers with your domain registrar.

    To register a name server, log in to your enom.com account at

    https://cp.enom.com/login.aspx

    Once logged in, Under the Domains menu, click Advanced Tools, and then click Register a Name Server.

    enom register name server

    On the next page, you need to enter the name server you need to register and the IP address for the name server.

    enom custom nameserver

    Once you enter nameserver and IP address, click on “Register Name server”.

    After the nameserver is created, you need to add an A record for the nameserver, this needs to be done with your DNS provider.

    Back to nameserver for instruction on how to register/change name servers at various other domain registrars.

  • Copy files from one Amazon S3 bucket to another

    Amazon S3 is a cheap object storage service from Amazon AWS. You can use aws-cli to copy files between S3 buckets. To install aws-cli, check post How to Install Amazon AWS awscli.

    To copy files from one Amazon S3 bucket to another, you can use the command

    aws s3 sync "s3://source-bucket-name/" "s3://destination-bucket-name/"
    

    If you only need to copy a folder in the bucket to another, use

    aws s3 sync "s3://source-bucket-name/folder_name/" "s3://destination-bucket-name/folder_name/"
    

    if you only need to copy a file, you can use

    aws s3 cp "s3://source-bucket-name/filename.extn" "s3://destination-bucket-name/"
    

    See Amazon S3